
Two Case Studies:
1. An aerospace manufacturer needs to inspect a PCB by measuring the locations of several thru-hole locations and documenting via a digital image all components in specific area. The measurements can be easily done on a vision system. However, the digital image documentation is proving to be difficult even with a stereomicroscope. When using a stereo zoom microscope in order to get the needed image quality, we have to zoom up the magnification (MAG) quite high to see the tiny details on the board. Once we zoom up, the field of view (FOV) area that we see gets so small we only see a tiny section of the board.
2. A medical device manufacturer has to inspect metal parts. The parts have several features that need to be measured for their true position. The specification also requires guaranteed assurance via documentation that the parts have a smooth taper shoulder bevel. The vision system will measure the features accurately and very quickly. However, using the available zoom stereo microscope, it is too difficult to document the image needed to show the smooth tapered bevels. The problem is to see the proper details under the scope (resolution), it is important to zoom the MAG up. When the MAG goes up, the depth of field (DOF) is so shallow that only a thin image section in “Z” is in focus at any one time.
The newest generation multi-sensor tools meet these challenges...and more.
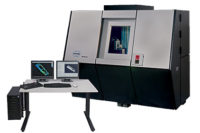
Some multi-sensor measuring systems, like the iNEXIV VMA-2520 from Nikon are incorporating new qualitative inspection tools that extend the vision and capabilities of previous systems. New 3D imaging and stitched field of view (FOV) panoramic tools are available to answer the need to extend the depth of field (EDF) and extend the field of view (EFV). These tools are built into the measuring software program so that the operator can easily measure or acquire a picture for inspection and documentation purposes.
Stitching Together Image Information
The X, Y & Z precision and motorization of the vision system makes this an excellent platform to extend past the limitations of conventional photography. The computer software, camera, large memory and motor controls counter-balances the competing physical limitations regarding magnification (MAG), field of view (FOV) and depth of field (DOF). To extend the FOV, the computer program tells the stage to go to a location such as the PCB and then acquires an image at the magnification and lighting needed for proper resolution. During programming the operator also tells the computer how far to step over in the “X” axis and how far in the “Y” axis. The new panoramic stitching software will then merge the matrix of images together to extend FOV and make one large high-resolution image. The vision system equipped with EDF software tools would also provide an answer to the bevel documentation problem in case #2, by supplying a 3D image documenting the angle and slope of the bevels. To extend the DOF of the image, the programmer tells the system to move to the proper position at a “Z” height equal to the top of the part feature. The computer is also prompted by the operator as to the where the bottom of the part feature is. Once the EDF program is initiated the vision system takes thin “Z” axis slices of image data very precisely from the top to the bottom of the feature. Because the EDF software moves with precision along the “Z” axis guides, the computer can combine the sliced images very accurately to create a realistic and proportional 3D image.The images you can get with these new technologies are not just ordinary pictures. The 3D EDF images show the part as it is in the real world. It will have relative and proportional height, depth and relief and can be rotated, stored and measured. The large stitched panoramic images with EFV will have greatly improved resolution over a large area making inspection documentation easy for critical parts inspection.
Because of the demands from consumers in an ever expanding technological world, inspectors of manufactured goods need to document more than ever before. The explosion of the digital camera revolution technology offers realistic images that are used for QC analysis, archiving and communications between customer and supplier. Taking pictures has always been an art, now it has become more of a science by being part of a systematic computer process.
Nikon Instruments Inc.
Industrial Microscopy and Metrology
1300 Walt Whitman Road
Melville, NY 11747
800-52-NIKON
www.nikonusa.com
www.nexiv.net


