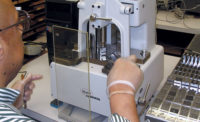
The difference between calibration and certification is very simple, but a lot of people don't understand it. Certification simply involves verifying the performance accuracy of a CMM at a given point in time. Then, if you find that the machine is not performing accurately enough for your application, recalibration is necessary. Recalibration involves making adjustments to the CMM and doing whatever is necessary to restore the machine to its original performance accuracy parameters.
Understanding these differences can have a significant impact on machine reliability, particularly since the two processes are not always clearly separated. For example, some laboratories provide certification services under the name of "calibration." As a result, you may be quoted an unusually low price for "calibration," when what you really are getting is certification, as no adjustments to the CMM or its software are made.
Before and after
One ISO 17025-accredited laboratory offers customers a choice of "before and after" data. This means that the laboratory first checks the machine and certifies its current operational state. The customer is shown this "before" data and then given the option to accept it or have the laboratory recalibrate the machine. If recalibration is requested, the CMM is then brought back to its original manufacturer specification. Then an "after" recertification is performed that shows the machine is operating within its original manufacturer specification.
ISO-certified parts manufacturers are required to have CMMs calibrated and certified annually, and sometimes more often, depending on internal standards. Above and beyond these requirements, what determines the need for calibration or certification?
If your CMM is capable of performing to a very low specification--for example, less than a tenth of your design tolerance on its worst day--there is still plenty of room for error. In these cases, certifying the machine may be all that's necessary.
On the other hand, if a CMM is just within tolerance, then it's probably time to recalibrate. You could go out of tolerance tomorrow or the following week. Although calibration is more expensive and requires more downtime than certification, out-of-tolerance parts, customer complaints and warranty claims could end up being far more costly.
Are we drifting?
Interim check procedures also are advised for those who are working to maintain extremely tight tolerances. By running interim checks on a CMM on a weekly, monthly or quarterly basis, for example, machine performance can be monitored and machine operators will be able to detect "drift" based on historical information. This will signal the need for calibration and limit the time and money spent on certification.
To perform laboratory calibra-tion services on their equipment, most automotive companies re-quire that service laboratories comply with ISO/IEC 17025, a requirement that many tier suppliers also are adopting. The purpose of ISO/IEC 17025 is to provide testing and calibration laboratories with a common traceable standard. ISO/IEC 17025, which replaces ISO Guide 25, is required by QS-9000 of all calibration laboratories that certify a piece of equipment meets standards established by the National Institute of Standardization.
ISO/IEC 17025 certification should be the top criteria parts manufacturers look for when seeking calibration services, since it offers independent assurance of the laboratory's inspection capabilities. The staff performing the calibration has been trained and there is evidence of that training. Further, the staff always completes the same certified procedures and techniques, and the software used for calibra-tion has been certified, verified and tested to produce accurate results.
Manufacturers can choose among CMM manufacturers, large third party organizations or smaller one- and two-person shops that provide calibration services. The type of organization chosen depends in part on what type of software the machine uses.
Some CMMs have protective port locks or proprietary error map software that is difficult to access. In these cases, CMM manufacturers are the safest choices for calibration, since they will be able to use their own error map techniques quickly and accurately without making physical adjustments to the running machine.
Third party risk
It also is possible for a third party laboratory to mechanically recalibrate a CMM without altering the software compensation map. However, this is a costly process that requires more downtime and carries the risk of altering the machine's reliability.
Overall, it is beneficial for manufacturers to know that unless they are using an ISO/IEC 17025 accredited laboratory, there are no guarantees that their CMM will be brought back to its original specification. For example, an unaccredited agent might use untraceable equipment, or run procedures or software routines that are incorrect.
The biggest concern is that you--the customer--may be producing a bad product and not even know it. That's where accreditation adds a lot of value. Using a calibrated standard to calibrate someone's machine and certify it removes the guesswork and ensures the most accurate parts inspection for CMM operators.
