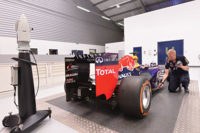
The Leica Laser tracker and T-probe helped Airbus with high-precision measurements. Source: Leica Geosystems
In the world of aerospace manufacturing, measurement inaccuracies have enormous negative consequences on timelines and bottom lines. Finding the weakest link and the correct answer is the job of every quality assurance professional in aviation. Implementing and integrating the best technology to achieve this endeavor is a top priority at Airbus (Toulouse, France), a manufacturer of airliners ranging in capacity from 100 to more than 500 seats.
Although Airbus' engineering and manufacturing work is centrally managed, it relies on integrated cross-
functional, trans-national teamwork between 16 different locations in Germany, France, Spain and Great Britain. Each location produces complete aircraft sections that are transported for final assembly to Toulouse, France, or Hamburg, Germany.
Bremen is the second largest Airbus site in Germany and one of five main design offices. The site focuses on widebody wing equipping and the manufacture of high lift components and sheet metal parts. Each year roughly 2.5 million metal parts for all Airbus models are produced in Bremen. The factory also produces all landing flaps for Airbus in the structural assembly process. They also prepare the wing assemblies for the A330 and A340 aircraft types. These tasks require extremely high levels of precision. To meet this demand, Airbus employs seven laser trackers from the Metrology Division of Leica Geosystems (St. Gallen, Switzerland).

The Airbus assembly floor in Bremen is the second largest Airbus site in Germany and one of five main design offices. Source: Leica Geosystems
"We received our first laser tracker in January 1999," Hoffmann says. "Because of the types of problems we were confronted with at the time in connection with production of the EF200 Eurofighter, we needed to acquire either a larger stationary measurement system or a more flexible system. We therefore carried out a comprehensive benchmarking exercise. The Leica tracker emerged clearly as the best measurement system for us on the grounds of both speed and cost efficiency. Today, we have three LTD500 Leica laser trackers and four of the state-of-the-art Leica tracker model, the LTD800, in use at Bremen."
The Leica Laser Tracker is a mobile coordinate measurement system. Because of the laser interferometer, high precision measurements can be carried out rapidly. For both single point and surface measurements, the laser tracking system can record data from a single set-up position with a measurement volume of up to 80 meters in diameter, with an accuracy level of ±10 points per minute at a measurement rate of up to 3,000 points per second.
The set-up procedure for the laser tracker can be adapted to the object size or to confined spatial conditions. The tracker can help master many metrology challenges. For instance, Airbus' new countersinking facilities are dismantled and examined using the tracker. The collimation of tracks and landing flaps during the preparation of wing assemblies for the long-range aircraft-the A330/A340-is performed using the mobile measurement system. The trackers also are deployed during setup and approval of the entire production system and machinery, during structural assembly at the final examination of all large-capacity components produced at Bremen and during individual component production.

An Airbus employee uses the Leica T-probe to check assembly tooling.
Source: Leica Geosystems
Source: Leica Geosystems
Airbus measurement technicians take on nearly all application cases and measurement tasks at the Bremen factory. The multi-use laser tracker also is used for cause-of-error investigations. The Bremen team possesses accessories for the Leica trackers including the T-Probe, a wireless, armless probe called the walk-around coordinate measuring machine. By using the trackers in combination with the new T-Probe, operators can inspect hidden points and probe in areas unreachable by traditional probing solutions.
"Until now, we have always measured the landing flaps continuously either from two separate tracker locations or from a single tracker location, but with the need for a rotation of the measurement object," says Hoffman. "However, our goal with the T-Probe is to work with a single setup which results in a major time savings. This is because both the handling of the flaps and the set up and preparation of the measurement process can be done more rapidly. In addition, the calculation process and the evaluation process become easier and more reliable because we no longer need to factor in reference points.
"The laser trackers have met our requirements in every conceivable way," Hoffmann says. "In addition to purchasing the T-Scan, we now plan to purchase two more Leica trackers. In the framework of the A400M program, which gets under way in 2006, we will have several stations with permanently integrated tracker systems. Both trackers will be used in the context of quality assurance procedures for the A400M, for examination of interfaces and handoffs before the fuselage is sent to the final assembly line in Spain."
Benefits
- The laser tracking system can record data from a single set-up position with a measurement volume of up to 80 meters in diameter.
- It has an accuracy level of ±10 points per minute at a measurement rate of up to 3,000 points per second.
- The set-up procedure for the laser tracker can easily be adapted to the object size or to confined spatial conditions.
- Periodic inspections, repetitive testing and other measurement tasks can be carried out automatically with the laser tracker's integrated absolute distance meter.
Leica Geosystems
(+ 41 71 727 3131)
Reply 11
