GF AgieCharmilles (Lincolnshire, IL) and Hexagon Metrology Inc. (North Kingstown, RI) announced their collaboration to incorporate measurement systems into machining cells. Integrating GF AgieCharmilles machining cells with CMM technology from Hexagon Metrology creates a complete closed-loop manufacturing system that introduces a new level of flexibility and efficiency for machining parts. Through this innovative collaboration, Hexagon Metrology is now a project and technology partner for GF AgieCharmilles automation projects worldwide. The new "ProductionCell" debuted in Europe at the Control Show.
The U.S. debut of this complete system will be in Chicago, IL at the IMTS trade show from September 8–13, 2008. At the AgieCharmilles booth A-8343, attendees can see the ProductionCell, which combines five-axis milling and wire electrical discharge milling with a Brown & Sharpe Global Advantage 7.10.7 CMM from Hexagon Metrology. Hexagon Metrology will also be attending IMTS in booth D-4303.
The GF AgieCharmilles ProductionCell is a system combining different assembly techniques such as graphite milling, wire and plunge electrical discharge machining (EDM), as well as three- and five-axis milling in an automated machining cell. With a newly developed interface for PC-DMIS measurement software, GF AgieCharmilles' machining cells can now incorporate the entire spectrum of Hexagon Metrology automatic CMMs into the production process.
Connecting the different elements of the ProductionCell is a seven-axis handling device, a linear rail-mounted industrial robot by Fanuc Robotics. The handling device transports parts from station to station. The robot tends to several collect chucks, which can be adjusted based on the individual project. The pallet magazine capacity is also variable depending on project requirements. A central PC running the cell control software automatically guides all processes. The cell control software automatically loads specific part programs into the CMM through a dedicated interface. Then, the inspection program is remotely initiated. The interface operates with all PC-DMIS standard part programs, and some interface-specific parameters can be inserted automatically into the program.
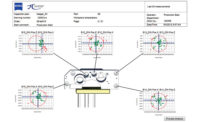
The Brown & Sharpe CMM performs two functions. First, the CMM is used to determine the offset data during the preparation for production. The collected offset data is transferred from the CMM to the cell control software. Tools then use this data as reference points in part machining. Second, the CMM is used for dimensional quality control of complete parts. During quality inspection of the finished parts, inspection reports can be output as a Word document, an Excel spreadsheet or a PDF file.
Get our new eMagazine delivered to your inbox every month.
Stay in the know with Quality’s comprehensive coverage of the manufacturing and metrology industries.
SIGN UP TODAY!Copyright ©2024. All Rights Reserved BNP Media.
Design, CMS, Hosting & Web Development :: ePublishing
