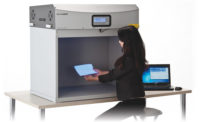
The Metrotom is predicated on a technology called metrotomography-the fusion of computed tomography (CT) and metrology. Metrotomography enables the measurement of both surface and interior geometries. Source: Carl Zeiss IMT Corp.
Everyday objects such as toothbrushes and shavers have to meet increasingly higher design and quality requirements. Shorter product lifecycles place high demands on development and production processes. In between the single product development steps, prototypes must be repeatedly checked for compliance with design specifications. Proctor & Gamble (P&G, Cincinnati) relies on metrotomography from Carl Zeiss IMT Corp. (Maple Grove, MN) to quickly develop high-quality, high-volume products.
Small electronic devices such as shavers, toothbrushes and hair dryers are frequently assembled from parts made of various materials. The die-casting tools used to produce these parts are developed and manufactured in Kronberg, Germany. These tools must be capable of producing elaborately shaped components that fit together perfectly.
The majority of components are produced millions of times. After parts are in production, it is very expensive to correct design or process flaws. Therefore, it is vital to use measuring technology during product development.
Headquartered in Kronberg, the P&G quality innovation center ensures that product production runs as smoothly as possible. The center offers measuring services for all of the company’s global production sites. The five-person team in the linear measuring technology and materials technology department supports the development of products for Braun, Gillette and Oral-B. The center’s services also are available to other locations and brands of P&G.
Optimizing Quality
In addition to other departments, the linear measuring technology department also is involved in the product generation process. In 2007, the quality innovation center looked for a way to further increase product quality and optimize the product generation process.With the center’s existing contact measurement technology, increasingly complex part shapes were complicating evaluation. Evaluation was only possible using time-consuming, technically involved processes. However, the center needed as much information as possible and as fast as possible regarding the dimensional stability and quality of parts. Contact and optical measuring technologies cannot capture complex interior geometries and elaborate surface forms or analyze porosities without requiring part destruction. This destructive technology takes time and renders the part unfit for additional inspection.
P&G found that the solution lay in Zeiss’ metrotomography-the fusion of computed tomography (CT) and metrology. Therefore, the P&G quality innovation center purchased a Metrotom 1500.
“Our good experience with Zeiss coordinate measuring machines [CMMs] and the outstanding Metrotom concept made our decision much easier,” says CT Project Manager Jochen Maass. “We were not disappointed; the implementation of this new technology was a success.”

The Metrotom captures both surface quality and interior geometry. A nominal/actual comparison is then calculated with the computer-aided design (CAD) model and evaluated as a false-color plot. Source: Carl Zeiss IMT Corp.
A Look Inside
For the requirements at P&G, metrotomography is the ideal measuring method for quickly and efficiently generating highly accurate measurement data on complex 3-D parts. But that is not all. CT technology enables one to look inside finished products and find inclusions in the structural elements.“In the past, this was very difficult,” says Maass. “The parts had to be covered with resin and then cut apart slice by slice.” Furthermore, it was often not possible to determine the cause of a material defect, as the defect was frequently located on the trimmed edge of the material. Because of the analysis methods of Metrotom, these complex procedures are no longer necessary.
A product is tomographed very quickly and the result can be graphically evaluated in a volume model. Products now can be nondestructively measured on a monitor and inspected for material defects. Metrotom also can be used for assembly checks. If there is a defect on a device, the cause can be quickly localized with metrotomography. Based on the results, it is possible to clearly identify an assembly, material, production or design flaw. The image data is available to everyone involved in the development process. After a scan, the data is available for additional inspections and analyses.
The Metrotom has further enhanced the evaluation possibilities at the P&G innovation center. Because of the measurement and materials analysis possibilities unleashed by Metrotom, employees from the design, development and production departments now frequently visit the measuring technicians, using everything the CT metrology device has to offer.
Carl Zeiss IMT Corp.
(800) 327-9735
www.zeiss.com/imt
