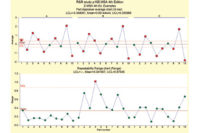

A gage performance curve will help communicate the results of the study. Source: JMP, a Div. of SAS
The sources of measurement variability are broken into three categories: part-to-part; repeatability or equipment; and reproducibility or appraiser.
Repeatability is the variability due to the gage itself, the closeness of the agreement between the results of successive measurements of the same characteristic carried out under the same conditions of measurement.
Reproducibility is the variability due to different operators using the gage differently, the closeness of the agreement between the results of measurements of the same characteristic carried out under changed conditions of measurement.
Repeatability and reproducibility together are called gage repeatability and reproducibility or simply GR&R.
Typical gage R&R studies rely on the assumption that a part can be measured without changing the characteristics of that part. If the part is changed by the measurement in a manner not allowing measurement of the same characteristic, the system is called a destructive measurement system.

Most software packages provide simplified analysis and data entry for GR&R studies. Source: JMP, a Div. of SAS
Assessing repeatability
In a typical GR&R study, repeatability is determined by repeating measurements on the same part several times. This is not possible with a destructive test. Extra precautions are required to perform a gage R&R study for a destructive measurement system. There also will be extra uncertainty in the study results.With a destructive measurement system there are two choices for assessing repeatability:
Find a nondestructive test that correlates with the results of the destructive test and use it instead.
Collect parts that are so similar in the property to be measured that it can be assumed they have identical measurements.
The first choice here is the better one, if it is possible. Let’s look at an example.
Printed circuit boards are used in a wide variety of electronic devices. They have copper traces plated onto them to act as conductors. Holes drilled through the board for component installation often have a copper plate through the board to create an electrical contact from one side of the board to the other.
In a destructive test, the thickness of this plating in the hole can be measured by cutting a piece from the board, being careful to slice through the middle of a hole. The copper thickness can them be measured directly. Unfortunately, this leaves the board unusable.
Fortunately for printed circuit board manufacturers, a digital meter can be used to measure the copper thickness in the hole. A small probe is inserted into the hole and the copper thickness dimension is displayed. This measurement system is nondestructive-the board is not affected by the measurement and can still be sold to a customer.
While this is a better option than a destructive test, some extra precautions are necessary. First, compare the readings from the meter with the cross sections of circuit boards to make sure they agree. You may need to determine the best technique for using the meter to obtain agreement, and may even need to create a calibration curve to correlate the meter readings with actual measured thicknesses. It is extremely important to check and make sure the methods agree and not assume that they will correlate and result in the same measurement.
After is has been determined that the nondestructive test will be an acceptable substitute, a typical GR&R study can be performed using the nondestructive measurement system.
Searching for a substitute
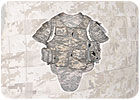
Sometimes it is not possible to find a nondestructive substitute measurement system. In these cases find parts that are so uniform in the property to be measured so it can be assumed they are the same part. Let’s look at an example.Suppose the penetration on bullet-proof vests needs to be measured. The only way to do this is to shoot at it and see if the bullet penetrates the vest. Whether or not it does, the vest is irreparably damaged. This is a destructive measurement system for which there is no nondestructive substitute.
Following typical GR&R guidelines, test 10 vests that are representative of the production capabilities and have three operators make the measurements. Now comes the nontraditional part of a GR&R study, each operator cannot measure each part twice because every measurement destroys the part.
In a typical study, each part (vest) would be measured six times, twice by each of three operators. Because the part can only be measured once, six identical vests for each “part” to be measured are needed. These vests will need to be made from the same roll of material, using material that is as close on the roll as possible to avoid within lot variation in the material.
Perhaps by looking at other testing data for the material, it can be verified that the variation in the material meets the requirements. Additionally, the vests will need to be sewn together as identically as possible, including stitch placement and spacing. This will require care above and beyond normal production procedures. The more careful the preparation, the more accurate the results will be.
A gage R&R study can now be performed on the vest measurement system in the normal way with this exception-each time a part is called for, use one of the six identical vests representing that part. Analyze the data in the usual way as if it were a nondestructive study.
Whether or not a suitable substitute measurement system is found, one will have greater uncertainty in the results. If using a nondestructive substitute, there will be some additional uncertainty in the correlation with the original method. A statistician can help account for this extra uncertainty.
If you must proceed with the original measurement system, you will not be able to separate the repeatability from the variation in the “identical” parts-the six vests, in this case. Not even a statistician can help here. Repeatability will always be overestimated. If sufficient care was used in preparing the “identical” parts, the overestimate will likely be low and not important.
GR&R studies help judge whether a measurement system is trustworthy, even with a destructive measurement system. Consequently, they help to increase profitability and product quality.
If you find yourself asking, “Do I really need a gage R&R study?” ask yourself, “Do I want high product quality and profitability?” The answer to both questions is the same.Q


