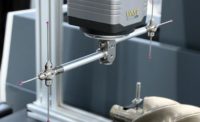
Most quality professionals whose work requires nondestructive thickness measurements are familiar with ultrasonic gaging, which can often be used to measure wall thickness of parts in situations where limited access prevents use of calipers or micrometers.
Eddy current testing, another well-established NDT technique, also is widely used in the metal tubing industry and related sectors.
Less well known, but equally important in certain thickness measurement applications, is a third class of NDT instruments: Hall Effect gages. As with eddy current instruments, they work through principles of electromagnetism, but like ultrasonic gages they can be used on plastics and composites and other nonconductive materials.
Hall Effect gages are particularly important in the blow molding industry for measurement of wall thickness in plastic bottles and similar containers, as well as many other situations involving relatively thin, nonmagnetic products such as aluminum containers, plastic and glass tubing, scientific glassware, and many small machined or molded plastic and composite parts.
Their operation is simple. A magnetic target ball is placed inside the test piece, and a magnetic probe is pressed against the outside wall. The probe attracts the target ball with the test piece in between, and the instrument measures the distance between them and provides an instant digital readout of wall thickness.
The blow molding industry provides an example of how Hall Effect gages can improve efficiency and measurement reliability. For many years, quality control for blow-molded bottles and similar parts involved cutting them up with utility knives in order to make thickness measurements with calipers.
There are a number of problems with this traditional method of testing. When a part is cut open, a burr is generally left at the cut edge. If the operator makes a measurement over the burr, it is not a true wall measurement. Assuming that the operator is careful and avoids distorted edges, there are still limitations as to where measurements can be made with mechanical devices.
Often, the part’s geometry will not permit access to tight corners or handle areas on bottles. After a part is destroyed for thickness measurements, it cannot be used for most other testing. Variation in operator technique is frequently a problem. Calipers can cause errors when they are held at an angle to the part, and when calipers are used on materials that can be compressed by jaw pressure, thickness readings will vary from one operator to another.
There is a potential safety problem as well. Operators are typically required to section parts with utility knives several times a shift, which creates a constant possibility of serious injuries. Hence the need for quick, simple and reliable nondestructive wall thickness measurement.

The target ball changes the shape of the magnetic field around the probe tip, which in turn changes the Hall Effect voltage. This voltage change will be related to the distance to the ball. Source: Olympus NDT
Opposite: A Hall Effect thickness gage measures the wall of a blow-molded plastic bottle by reading the distance between a probe tip and a target ball. Source: Olympus NDT
Applications
The Hall Effect is an electromagnetic phenomenon first discovered in 1879 by American physicist Edwin Hall. It can be briefly summarized as follows: if a magnetic field is applied perpendicular to a conductor carrying an electrical current, then a voltage differential will appear across that conductor. As the magnetic field changes, that voltage will change in a predictable way. A piece of magnetic material such as steel moving through the magnetic field will change its shape and relative strength, and thus the presence of a magnetic target can be correlated to changes in the Hall voltage.Hall Effect devices are used in a variety of industrial applications not related to NDT, including the wheel rotation sensors used in automobile antilock brakes, some common position and motion sensors, and the electronic joysticks used in a variety of controllers.
In NDT, Hall Effect gages employ a probe containing a strong permanent magnet and a Hall semiconductor connected to a voltage measurement circuit. If a ferromagnetic target such as a steel ball of known mass is placed in the magnetic field, it bends the field, which changes the voltage across the Hall sensor. As the target is moved away from the magnet, the magnetic field and hence the Hall voltage, change in a predictable manner. By plotting these changes, an instrument can generate a calibration curve that compares the measured Hall voltage to the distance of the target from the probe.
To make measurements, a Hall probe containing a magnet is simply placed on one side of the product to be measured and a ferromagnetic target, usually a small steel target ball, is placed on the other side of the product. The probe attracts the target, and the gage displays the distance between the target and the probe, which is wall thickness. The instrument is calibrated by placing a series of shims of known thickness on the probe, placing a ball over the shims, and keying into the instrument each known thickness.
The information keyed into the instrument during the calibration allows the gage to build a lookup table, in effect plotting a curve of voltage changes. When making measurements, the gage checks the measured values against the lookup table and displays thickness on a digital readout. Operators only need to key in known values during calibration and let the gage do the comparing and calculating. The calibration process is automatic.
In production use, an operator is able to scan an entire part in a few seconds, while storing several readings or scanning for a minimum wall. Frequently this type of unit is placed in a production area, where the molding equipment operators use it. This approach permits true statistical process control.

In applications such as plastic containers, the operator simply drops the small target ball inside the container. The magnetic probe held on the outsider of the container attracts the target ball. When the operator scans the probe along the surface or critical corners, the small steel target ball will follow. Source: Olympus NDT
Specialized probes and targets are available for measuring restrictive geometries. For example, a major application for Hall Effect gages is measuring the thickness of tear seams on automobile air bag covers, which is done with a probe with a narrow chisel-shaped tip and thin metal disk targets that fit into the seam groove. Small diameter plastic and nonmagnetic metal tubing can readily be measured in sections small enough to permit insertion of a ball target, and V-block holders are available to ensure stable positioning with respect to the probe tip.
Hall Effect thickness gages are often complementary to ultrasonic gages, which also can be used to measure many blow-molded parts and other products that lend themselves to Hall Effect testing.
The advantages of a Hall Effect approach are that no couplant is used, there is no need to compensate for sound velocity variation caused by material or temperature changes, and wall thickness in tight radii and in extremely thin samples often can be more easily measured.
Most blow molders have parts with complex shapes, relatively thin, flexible walls and corners that are difficult to measure with mechanical or ultrasonic gages. Additionally, it is often easy to scan the probe around the part to quickly verify thickness at a number of points or look for the minimum thickness in an area. The only significant limitation in certain applications is that it is necessary to place a target ball inside the part being measured, preventing use on closed containers or continuous tubing, which can, however, be measured ultrasonically. Also, Hall Effect gages measure total wall thickness only, while ultrasonic gages often can measure individual layers in multilayer plastic products.
Hall Effect gages are fast and accurate and represent an important tool in the field of nondestructive thickness measurement for quality control.NDT

