An operator performs corrosion inspection on a fuselage. Source: Olympus NDT

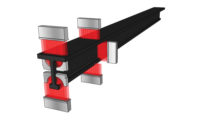
Eddy current array probes can replace one axis of a two-axis scan and offer greater flexibility in the eddy current setup. Source: Olympus NDT
Eddy Current Arrays
Eddy current array (ECA) technology electronically drives and reads several eddy current sensors positioned side-by-side in the same probe assembly. Data acquisition is made possible through the use of multiplexing, which avoids mutual inductance between the individual sensors.
Compared to single-channel eddy current technology, eddy current array technology provides the following benefits:
• Drastically reduces inspection time.
• Covers a large area in a single pass.
• Reduces the complexity of mechanical and robotic scanning systems.
• Provides real-time cartography of the inspected region, facilitating data interpretation.
• Is well suited for complex part geometries.
• Improves reliability and probability of detection (POD).

C-scan representation of galling defects in a friction stir weld is shown here. Source: Olympus NDT
Eddy current array probes
An eddy current array probe can be optimized for a specific application by changing the coil configuration and the probe shape. Different types of probe can be realized like absolute bridge, differential bridge, absolute reflection, differential reflection, transmit-receive, shielded and cross-axis.ECA probes can be used for a range of applications. Probes can be designed to detect a specific type of flaw or to follow the shape of the part being inspected. Standard designs are available to detect surface defects, such as cracks and pitting, and subsurface defects, such as cracks in multilayer structures and corrosion.

This is a width measurement of a friction stir weld for tool penetration evaluation. Source: Olympus NDT
Imaging
Representation of the data plays a major role in the use of eddy current array. New eddy current instruments allow the use of C-scan imaging, which is a color-coded 2-D mapping of the inspected surface. The data from each individual coil are recorded so the impedance plane is always available. The ECA probe moves over a flaw and each coil produces an eddy current (EC) signal. The C-scan representation is the color-coded image of the amplitude of the signal. The X-axis represents the movement axis while the Y-axis represents the probe axis. So, the C-scan gives the position of the flaw as well as its size.The use of a C-scan image increases the reliability of the inspection because it guarantees full coverage of the surface inspected.
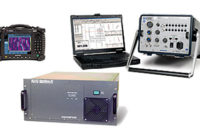
Existing modules of the eddy current instrument can drive ultrasonic phased array and conventional ultrasound as well as eddy current array. The configuration supports 32 sensor coils-up to 64 with an external multiplexer-working in bridge or transmit-receive mode. The operating frequency ranges from 20 Hz to 6 MHz with the option of using multiple frequencies in the same acquisition. Encoders can be connected. Data files up to 200 Mb can be recorded.
Applications
Eddy current array testing is used in a number of different fields such as aircraft and engines maintenance and manufacturing, power generation, oil and gas, and tube manufacturing. Two applications related to aerospace are presented.
On the right is a C-scan representation of a corroded fuselage. On the upper left is an impedance plan, on the lower left, a vertical and horizontal components strip chart. Source: Olympus NDT
Airbus has developed a technique for corrosion detection for the A330-340 with the eddy current instrument and an ECA probe. The corrosion is located between the first layer and the acoustic panel. The ECA probe used has a coverage of 112 millimeters, 32 coils and a working frequency of 50 kHz. This probe can detect 5% corrosion under 2 millimeters with a diameter of 6 millimeters. Used with an encoder, it performs a mapping of the surface.
The inspection of 12 meter square with regular eddy current probe would take nine hours while with the ECA probe it takes 1 hour. This technique has shown good reproducibility and reliability. The C-scan allows easier detection of small corrosion in large area.
Friction Stir Welding inspection
Friction stir welding (FSW), a new solid-state welding process, made a revolution in the aluminum welding industry of aerospace components. Offering high performance, this exotic state welding can be subject to defects such as lack of penetration, oxide layers and galling. Eddy current array is used to assure the integrity of this advanced welding.
The ECA probe sits on the opposite-tool side of the weld. As the ECA probe covers the whole width of the weld, only one pass over the weld is necessary. Lack of penetration is easily detected as well as galling. The oxide layers, also known as kissing bonds, are undetectable. But, the ECA measures and displays the conductivity of the parent metal and the welded metal. The C-scan representation shows the width of the weld and helps the operator to characterize the weld and identify areas with a high probability of presence of oxide layers.
Galling is a defect created by the rotation tools that creates parent metal shrink in the weld due to insufficient lubrication. Eddy current array can detect galling easily.
Eddy current array is a new technology that is used successfully in many different fields. The main advantages of the ECA technology are increasing inspection speed, better reliability due to C-scan imaging, and better reproducibility and probability of detection due to the coverage of the whole surface assured by the array.
Tech Tips
Compared to single-channel eddy current technology, eddy current array technology provides the following benefits:- Drastically reduces inspection time.
- Covers a large area in a single pass.
- Improves reliability and probability of detection.
- Reduces the complexity of mechanical and robotic scanning systems.
- Provides real-time cartography of the inspected region, facilitating data interpretation.
Andre Lamarre is the business development director - aerospace and defense at Olympus NDT Inc. (Waltham, MA). For more information, call (781) 419-3900, e-mail [email protected] or visit www.olympusndt.com.

