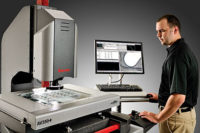
Computed tomography systems for industrial applications, such as R&D, production and quality, can see inside parts and quantify characteristics normally inaccessible to probing or optical sensors. The same dataset can be used to inspect the structure of material, such as porosity or wall thickness; measure external features; and generate fully surfaced or solid computer-aided design (CAD) models.
A technique known as metrotomo-graphy combines metrology with tomo-graphy. This fusion of metrology and computer tomography provides industrial quality assurance with unknown possibilities. Based on the principle of X-ray technology, metrotomography enables measurements in areas that previously could only be inspected with major restrictions - the interior of highly complex components. This is no longer the case-metrotomography allows operators to measure destruction-free with absolute safety.
X-ray technology is based on a simple principle: an X-ray source illuminates an object with an electro-magnetic beam-the X-ray beams. The beams meet on a detector surface and are recorded in varying degrees of intensity depending on the thickness of the material and its absorption characteristics. The result is a 2-D gray-scale image. However, this image is only meaningful for visual inspection when shown as a cross section.
In general, the interior of a component can be inspected using destructive tests. The more complex a component, the more involved the inspection method. A highly complex workpiece, however, can only be inspected if its interior becomes visible.

Computed tomography technology makes interior geometries visible and measurable. Source: Carl Zeiss IMT
Evaluation of a Tomograph
Workpiece data recorded using the metrotomography procedure can be applied to all areas of quality assurance and evaluated. From testing technology-assembly inspection, damage and porosity analysis, materials inspection and defect checks-to traditional metrology, reverse engineering applications and comparison of geometries, metrotomography stands for fast, precise inspection of highly complex components in all phases of the quality assurance process.At a glance, metrotomography clearly shows the defects in areas where previously an inspection was not possible at all, or only using time-consuming and costly cross sections.

Metrotomography can be used for assembly checks and damage analysis, material inspections, and porosity and defect analysis. Source: Carl Zeiss IMT
The Principle
During the metrotomography process, a computer tomograph uses X-rays to nondestructively measure the interior and exterior of complex and small workpieces and then accurately display the results as a 3-D image. The procedure is similar to the X-ray technology used in medicine. X-rays penetrate an object and display it on a suitable detector. The details of the object appear as a 2-D image in varying intensity depending on the geometry and absorption properties. The 3-D image is created by rotating the object 360 degrees along its axis on a rotary table and then converting this data to a 3-D volume model.
The computer tomograph makes the interior and exterior visible and measures what probing sensors cannot reach. Source: Carl Zeiss IMT
Workpiece Inspection
Metrotomography can be used for assembly checks and damage analysis, material inspections, and porosity and defect analysis. Parts up to 350 millimeters can be inspected depending on the material-steel, alloys, ceramic and plastic, for example.
Metrotomography allows operators to measure destruction-free with absolute safety. Source: Carl Zeiss IMT
Metrotomographic Generation
CAD models have become an absolutely indispensable tool in metrology. A computer tomograph can generate a complete CAD data set of each “metrotomographed” workpiece. This can then be displayed in all standard formats, thus enabling generation of fast, highly accurate data during the development of the design. The ability to create entire CAD data sets of complex interior structures that cannot be digitized or measured using traditional methods is essential.Precise linear axes with computer-aided accuracy correction of guideway error, as well as a rotary table with air bearings and direct drive, provide the foundation for accurate capture of the workpiece. This rotary table has a resolution of 0.036 arc seconds and can accept workpieces up to a weight of 800 newtons. Optimally adjusted CT components supplement the mechanical modules, thus contributing ideally to the entire system.
Quality assurance in industrial production has long desired a tool that can nondestructively inspect and measure the interior of workpieces. Furthermore, it should enable statements on geometry and volume, dimensions and tolerances in a single scan. Metrotomography provides this tool.
Metrotomography considerably expands the possibilities of process optimization in today’s production procedures. In addition to speeding up volume production processes, drastic quality improvements can be achieved for precision-manufactured or injection-molded workpieces that are becoming increasingly fundamental for optimized solutions in the consumer goods and automotive industries.ndt
Comparison of Geometries
Standard data formats such as IGES, STL, VDA and STEP can be easily compared using a 3-D model generated with the metrotomography procedure.
- Scan the CAD design data of the bearing.
- Enter the point cloud of the bearing from the metrotomograph.
- Align the data sets to each other.
- Display the deviations as measurement flags or extensive, colorful displays of the deviations.
Every metrotomographed component,whether a standard geometry or freeform surfaces,can be extensively evaluated with software. The technology is new, but the evaluation environment is the same as before.
- Read the features and orientation from the drawing and specify a measurement strategy.
- Generate a CNC measurement plan based on the computed STL or CAD data.
- Enter and align the CAD model with the CT dataset.
- Start a new CNC measurement plan and evaluate the protocol.

