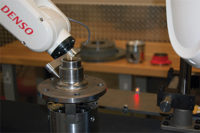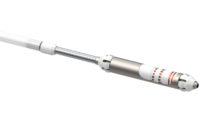
From ultrasonic phased array to digital radiography, technology has given the NDT technician improved capabilities. Source: BRL Consultants
In the past decade there have been tremendous strides in technological advances related to nondestructive testing (NDT). From ultrasonic phased array to digital radiography, technology has given the NDT technician improved capabilities.
In the past, many of the limitations associated with various NDT methods had to do with the available equipment. Today, with advances in computer processing and the availability of smaller, more powerful digital systems, NDT is a powerful tool. As there have been many technological advances in various methods, here we will focus on just two areas: radiography and ultrasonics.
Some of the advances in NDT are notable as the ability to store and share data makes the testing methods more accessible. While methods such as radiography, ultrasonics and eddy current have been around for many years, only recently has there been the ability to store, evaluate and share inspection data almost immediately on a wide-scale basis. Since the basic physics and theory related to the NDT methods have not changed, the advances are due primarily to the data processing and instrument capabilities. In addition to the ability to store data, the increases in test sensitivity and resolution have made for better inspections, which can improve probability of detection, and as a result, improve quality and safety.

With computed radiography systems, anyone with a computer and basic software can receive a JPEG image for review. Source: BRL Consultants
Radiography
Radiographic testing-often referred to as X-ray-has proven to be one of the most viable inspection methods used in industry. Since conventional radiographic testing results in a tangible record (the actual film), there is often little need to question the results of an inspection. Of course in order for a conventional radiograph to be of any use, it must meet certain quality criteria. Density, sensitivity, resolution and overall film quality must be acceptable. Often poor quality radiographic film is provided in an effort to satisfy inspection or testing requirements.The basic conventional radiographic process uses a source of radiation- X-ray or gamma ray- producing a primary beam placed on one side of a test specimen and a recording medium (film) on the opposite side of the test specimen. The process is similar to the medical X-ray process.
Many considerations go into the actual test technique, from radiographic source type and size, source to film distance, the type of film used, to name a few. Processing the film results in the actual image to be evaluated, which in turn relates to the condition of the part.
Limits using conventional radiography are numerous. Typically once an inspection technique is performed, there is nothing that can be done to alter the image.
With computed radiography (CR) the same basic process is used; however, instead of conventional film, some type of imaging plate or system is used. The imaging plates used with CR are typically a photo-stimulated phosphor plate. After the plates are exposed to radiation and placed into a reader, a laser scans the plates and converts the light into an electrical signal that can be digitized. After the scanning is complete, software is used to optimize the image.
Unlike conventional radiography, corrections can be made related to image density and contrast after the actual exposure process. Sizing of flaws can be performed with great accuracy using a variety of measurement methods. Some CR systems allow for imaging techniques such as 3-D modeling or an embossed appearance. With computer-based software, image storage is easily achieved.
Reusable CR imaging plates are another benefit of this technology. Film radiography is performed using single-use film, and therefore can be expensive for the operator. Imaging plates are much more expensive-but can be used many times. Since film radiography is a single image on a single film, the ability to share an image is difficult at best. With CR systems, anyone with a computer and basic software can receive a JPEG image for review. Editing of any image goes far beyond basic software, and would require the appropriate specialized programs associated with the system used.
Benefits of CR:
Ultrasonics
Ultrasonic testing uses high frequency sound waves to volumetrically evaluate test specimens. The conventional process of ultrasonic testing involves using a single or dual element transducer to introduce an ultrasonic beam (waves) into a test specimen. After the ultrasonic wave encounters a “reflector” or an area of differing acoustic properties, the energy is returned to the test unit. The amount of energy returned to the test system is related to the size and orientation of the reflector. There can be variations on this process, but this is a typical pulse-echo inspection process. Display presentations using A-scan readouts often are used to interpret the condition of the part. Dual element and through- transmission techniques may be employed based on the test applications.A-scan presentations provide for information related to time of sound travel and amplitude of signal. Calibration is critical in all cases to ensure that the information received and processed is accurate-no matter what type of UT is used.
Advanced UT systems such as phased array build on the basic principles of conventional ultrasonic testing. The difference in today’s advanced UT is the technological capabilities of the system.
Phased array testing utilizes a probe or probes with an array of transducers that can be fired or triggered in various sequences to achieve various beam characteristics. The process of establishing these beam parameters is known as generating focal laws.
Software is one of the main advantages of phased array testing. Due to the processor speeds now achieved, rapid data processing and image production are attainable.
After the inspection is complete, data analysis can be achieved using special software. With such software imaging the inspection area can be reviewed and evaluated with a high degree of accuracy related to flaw location and size.
One current application of phased array is the Boeing 737 Scribe-line inspection. This inspection is the result of damage that had been detected on the fuselage skin lap and butt joints of older Boeing 737s. The cause of the damage is attributed to sharp objects used to remove sealant and paint, which induced small stress risers from the scribe marks. The purpose of the phased array in this case is to increase inspection speed and reliability.
Another type of advanced UT is time of flight diffraction (ToFD). ToFD provides for accurate volumetric inspection of materials, the benefit being the ability to detect discontinuities regardless of orientation. Waves generated from the tips of discontinuities are detected and processed using an RF signal in conjunction with a gray-scaled cross-sectional view or B-scan display. Both detection and sizing of discontinuities can be accomplished with this method.
The ToFD process requires two transducers, one transmitter and one receiver set at a precise distance and aligned with each other. Various waves are used in this process. A lateral wave is generated and travels along the surface between the two transducers, while angled longitudinal or compressional waves are directed through the material being examined. Shear or transverse waves also will exist in the test material. This process is generally used for weld inspection.
Benefits of advanced UT:
While there are many advantages to advanced NDT methods, it is important that the personnel performing these examinations be properly trained. In all facets of NDT, training seems to be the weak link. In order to progress to the advanced methods of NDT, it is important that the technician be familiar with the conventional methods of NDT, as this is the foundation for the advanced technologies.
While these are great technologies, there are still times when the conventional methods of NDT, be it ultrasonics or radiography, would be the most effective and efficient process.

