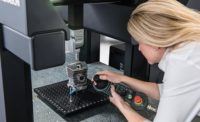
Most, if not all, quality professionals are aware that multisensor measurement systems have been around for a long time—since the 1980s, as some of us may remember—and they realize the obvious benefits when combining optical and tactile measuring into one system. We’ve seen improvements over the years on both the low-end and high-end systems, including more features, better optics and the inclusion of touch scanning. There’s no need to go into a detailed history of this product category, but it is important to note that these systems were usually good at performing one type of measuring, not so good at the other(s), and not good at all in using them together in the same measuring run. Today, that’s all changed with the convergence of the best hardware and, more importantly, the right measuring software to make it a capable system for all of your needs.
Shop floor Systems
TECH TIPS
|
Let’s face it. If you could move a multisensor measurement system to the shop floor to increase efficiency even more, you probably would. So what are the latest improvements in the hardware of systems that would give you the confidence to make that change? Multisensor systems are now resistant to many of the shop floor influences. Integrated dampening systems, for example, allow inspection machines to be highly resistant to vibrations and workpiece sensors allow the systems to compensate for temperature changes. To provide resistance to hazardous parts and water, some bases have various IP ratings. Historically, optical measuring systems alone have not been designed for the shop floor and lack many of these features.
Optical Lenses
And how important is the lens in the whole equation? When using an optical detection system, there are many options, of course. One is either using multiple fixed lenses or a zoom lens. Obviously, with a zoom lens, quality inspection is faster because lenses do not have to be changed and the defined magnification levels ensure high reproducibility of the results. Optical measuring technology also has two demands on a good lens: it must be telecentric to be able to measure characteristics dimensionally regardless of the distance to the object and it must be powerful enough to ensure that characteristics can be crisply and precisely imaged at any magnification level. A good telecentric lens adjusts to the measuring job: at the middle zoom levels where light intensity is less important, it is absolutely telecentric. At minimum and maximum zoom, light intensity takes priority over telecentricity.
Contact Sensors
The high precision and speed of a good optical system combined with the right contact sensor offer the most efficient and accurate 3-D measurements. Contact measurements are gathered either by single-point sensors, commonly known as touch-trigger, or by continuous scanning sensors. As most of you may know, both have their pros and cons. But parts being measured on multisensor machines are typically small, delicate, often made of pliable plastic, all of which would be well suited for a scanning sensor that offers a low probing force.
Accessory Options
Accessories also play a large role on the hardware side of things. Some manufacturers’ machines come with various tools including rotary tables, integrated pallet receiving systems, all making the measurement process as seamless as possible for a variety of workpieces. For parts to be inspected on all sides, a rotary table easily does the job. And pallet systems become more valuable for automation as more multisensor machines make their way to the production environment. Pallets can be set to calibrate systems, and pallet types can range from fixed, flat project, grid hole to adjustable.
Single Software and Setup
The data collected from the contact and optical sensors is different. Should the information be treated equally? Does it really matter? Software that treats all data the same regardless of sensor type saves time and allows for more accurate evaluation. When a single software controls all sensors for the data collection and also the analysis with that data, it eliminates some of the uncertainty of comparing measurements from several machines. Using a single machine with one software also saves time by only requiring a single setup, eliminating calibration time, and it can replace multiple tools. And beyond the optical and contact system, if all quality inspection systems at a company are using the same software, this can also reduce operator training time. Out in the field today I see numerous companies that own several measurement systems in addition to a multisensor system. Who wouldn’t want one, easy-to-use, robust software to operate all of the quality inspection equipment? Of course all of the factors have to be evaluated.
3-D CAD-based Software
When you have full 3-D measurements from a multisensor system, how do you fully utilize that data? Three-dimensional CAD-based software is a good place to start. These types of software often have a feature-oriented interface that provides ease of use and eliminates complicated code programming. Appropriate measuring strategies can be automatically generated, easily modified and even applied to other features. If a part has any changes, such as color, it is simple to edit an existing CNC run. And visual representation of measurement results enhances understanding and communication of those results. For example, form results such as flatness, cylindricity and roundness can be displayed in ways that clearly show manufacturing processes.
Convergence of Better Hardware and Software
With numerous hardware improvements, multisensor systems can now meet the market demands with the union of better optical and tactile measurement features, plus an optimized, 3-D CAD-based software. There has been a wide range of multisensor systems available for years. Many times customers want something priced in the middle, but still with the best hardware and software. And due to advances in technology, software with more optical tools such as a fast mode for focus, allowing speed to be a priority with autofocus, is now available. Several improvements in hardware components are allowing multisensor systems to function seamlessly on the shop floor. The optical measurement component can now fully function in the CMM world.
Common Parts
Medical devices are good examples of common parts measured on these multisensor systems. They’re usually small with hard to reach features, making it difficult for touch probes to get into those tight spaces and actually take decent measurements. Many of these parts are flexible plastic that are challenging to measure repeatably and reliably unless a contact sensor with a minimal probing force is used. And as more medical products are mass produced, engineers are looking for more shop floor metrology. System requirements also often include micron level accuracy, vibration dampening, and a small footprint.
In the end only you can really define what a complete measuring tool is based on your own requirements. Does complete mean replacing all the tools you currently use and need going forward? For example, are you replacing a microscope, maybe a contour measuring instrument, and a coordinate measuring machine? Do the hardware options make your measurements relatively seamless? Preparing for future needs in addition to current needs, keeping software as simple, powerful and adaptable as possible, to make manufacturing growth and change smooth are all factors that each company has to evaluate to ensure the success of their complete multisensor system.


