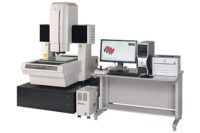
Since the invention of the vernier caliper in the 1850s, dimensional metrology has played a critical role in driving the manufacturing industry to its current levels of excellence. In an industry characterized by accuracy and precision of measurement, coordinate measuring machines (CMMs) have been on the top for several decades, combining latest advances in multi-sensor technology, modern electronics, software and computing, enabling measurement of complex geometry previously considered impossible. With tighter tolerances and growing complexity of today’s manufactured components, CMMs remain an indispensable tool for quality control in manufacturing processes.
However, in addition to accuracy, flexibility of equipment has grown in prominence as a key requirement for customers, especially in terms of where they can use their equipment (not being restricted to a fixed place or application) and how they use it (combining multiple dimensional metrology technologies).
What’s Driving this Trend?
An assessment of recent market dynamics and product introductions over the last five years indicates an almost palpable buzz around these portable solutions. However, CMMs occupy the prime position in 3-D dimensional metrology, and not just in terms of market share, of which Frost & Sullivan research indicates that they occupy approximately 55.1 percent of the total market, but also mind share. But what if customers are not looking for ultra-high precision or submicron level accuracy? In today’s frenetic pace and cost sensitive manufacturing and production environments, speed of inspection is often the most critical parameter and this is where CMMs tend to fall short. And what happens if a manufacturing facility can’t afford a CMM worth $100,000 to comply with quality procedures? There are thousands of ‘mom and pop’ machine shops across the globe that have similar accuracy requirements but cannot factor in a CMM in their overall quality control budgets.
This trend, however, isn’t new. The popularity of articulated arms, the shift from point scanners to area scanners and increased adoption of white light scanners are all strong evidence of customer preference for portability and flexibility. Articulated arms, such as the FaroArm from FARO Technologies or Romer, a Hexagon Metrology company, are basically portable CMMs that can be easily transported around a workshop for performing precise 3-D measurement. The articulated arms product segment was one of the areas of fastest growth in the global dimensional metrology market with growth rates in excess of 11 percent in 2011. While it may not be possible to make CMM-level measurements in certain industries, steady inroads have been made into segments such as automotive and aerospace since its mainstream introduction to metrology applications in the 1980s.
Similarly, various area scanning technologies such as white light scanners are growing in popularity, slowly stepping out of the realm of reverse engineering applications, and taking center stage in industrial and manufacturing facilities. Furthermore, as technology has advanced, customer awareness and acceptance has also improved, specifically in applications involving inspection of large objects in industries such as aerospace and automotive. White light scanners have become easier to operate and can be automated for a varied range of applications. Frost & Sullivan research indicates that revenue for the white light scanners market could reach approximately $120 million by 2014 at a CAGR of approximately 5.5 percent. Similarly, market participants are witnessing an increased interest in blue light scanners. Market experts indicated that the quality of results obtained by blue light scanners are superior in comparison to those for white light scanners, as the concentrated power of a single wavelength results in improved efficiency.
Trend Reversal
Conversely, on the opposite end of the price spectrum, the industry is witnessing a change in market dynamics. Hand tools are increasingly becoming more sophisticated, high-tech and savvy. Traditional metrology hand tools such as gages or calipers have typically been developed for low-end applications in mid-sized machine shops. The lack of any significant technological advancement, longer inspection times and the influx of low-cost Chinese made products into this industry have resulted in a stagnant market, with two to three percent year-on-year growth rates.
Now however, consumers of hand tools are demanding more functionality than what gages or calipers can offer, in addition to their portability. Previously used for making simple measurements, the evolution of non-contact sensors and trends in the consumer electronics industry, such as improved processing power, display technologies, memory, lithium ion batteries and shift toward touch-based devices, have been a key factor behind this changing landscape. Today’s consumer is looking for more and is willing to pay more as well. While a large number of traditional gages or calipers are available for under $1,000, products that fall under this advanced portable category can range anywhere between $50,000 to $100,000.
This market is still at a very nascent stage and most of the solutions that fit into this category are application driven. The Starrett SR100 Surface Roughness Tester, for example is a simple but effective surface roughness tester that can be used anywhere for periodic inspections in a wide range of manufacturing applications. Similarly GFMesstechnik GmbH’s (GFM) portable MikroCADlite is a 3-D surface measurement device that can make weld spot measurement in a matter of few seconds. Calipri-Wheel by NextSense is a non-contact, laser-based wheel-wear measurement system that has been developed for the wear test of railway wheel sets in order to precisely measure parameters such as flange height, flange slope, brake disc wear and wheel diameter. The GapGun wireless laser measurement gauge by Third Dimension is used for a wide range of applications such as gap & flush measurement, rivet protrusion, hole and countersink measurement, turbine blade leading and trailing edge measurement among others. It is capable of making a wide variety of complex measurements in a very short span of time. Nikon Metrology’s ShuttlePix and the Olympus DSX Series are other examples of advanced portable vision based systems.
Conclusion
While we are seeing two divergent trends in the opposite spectrums of the dimensional metrology market, the drive toward portability and flexibility of operation remain clear. Even as users of traditional CMMs continue to explore solutions that can speed up their measurement processes, consumers of metrology hand tools are now looking for sophistication and accuracy of measurement as key purchase criteria. While the advanced portable segment can be still considered a niche market, the spate of recent productions geared toward this segment is a clear and evident sign of what the future of dimensional metrology holds.
|
TECH TIPS
|


