|
Jump To: |
Height gages are a general purpose tool, which can be used in a variety of industries and applications by anyone who needs to measure precision parts. It is typically used to measure thickness, length, diameter, waviness, roughness, and the roundness of materials and objects. Nearly 90% of its use is for surface plate work including surface analysis or surface metrology for analysis of textures and features.
Gage Applications
In medical applications height gages are commonly used for analysis of the finish of medical implants such as knee or hip replacement implants. Jeffrey Bourque, manager, marketing communications for The Americas at Nikon Metrology said, “The current generation of implants use new finishes that reduce the friction, reduce the adhesion of bacteria or retard the development of detrimental biofilms.”
Height gages used in these applications have readings as small as 0.01µm. This is a fraction of the size of a strand of human hair which typically measures from 20-180 µm.
“When working with medical devices, obtaining a finish as close as possible to the original is paramount, with any deviations causing problems to do with excess wear, friction, both of which can lead to further replacement, as well as any voids or crevasses could lead to build up of fluid or biofilms and infection due to the adhesion of bacteria,” said Bourque.
If these measurements are out of tolerance, it could cause debilitating pain and result in limited function of the replacement hip or knee.
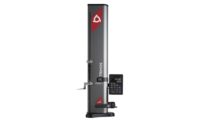
 The Digimar 817 CL M height gage. Source: Mahr Federal Inc. |
“Gages that read to 0.01 µm provide just the resolution and accuracy needed to find those issues,” said Bourque.
The versatility of the height gage is valued in manufacturing.
“Whether the manufacturing environment is making medical, automotive or aerospace parts the height gage can play many roles. In a receiving area it is invaluable for layout work on incoming parts to ensure the parts quality meets specifications. The height gage is ideal for these applications because of it versatility and performance,” said George Schuetz, director precision gages at Mahr Federal.
Schuetz gave three examples of how the height gage is commonly used.
“The height gage is not limited to the incoming inspection department. It can fit into the actual manufacturing environment and provide fast results for many different manufacturing inspection requirements—typically part process set-up inspection, serial production monitoring or 100% inspection,” said Schuetz.
The inspection process can entail inspecting only the first part, a series of parts, or every part. Although inspecting every part with a height gage is rare.
“Part process set-up inspection is used to check the first part off the machine to ensure that the machine made all the dimensions to print,” said Schuetz.
This determines if the part was made correctly.
“Serial production monitoring is used when there is confidence in the machining process but want to check it occasionally. For example, the process may be doing well and it is decided to measure every twentieth piece—this allows for monitoring for tool wear or other process change,” said Schuetz.
A 100% inspection process might be done when there are critical part dimensions and it is important to ensure every piece is acceptable. This is not common in today’s manufacturing environment because gages have the capability of storing information for automated measurements. Gages have digital micrometers that can output information to a computer work station. This makes the testing process fast and easy for the user. Before this technology, height gage operators wrote down the data and manually calculated it.
Motorized Drive Gages
According to Schuetz, earlier height gages were more like a digital caliper but more robust and accurate. The operator had to bring the contact point down to the part. The force and the speed the operator used varied; therefore, it affected the accuracy and repeatability of the reading. With the inception of motorized drives for gages, the part is lowered at the same force and speed every time.
“To get the best performance out of a height gage we believe you have to have a motorized drive, said Schuetz. “We won’t sale one without one.”
Other advancements in height gages throughout the industry are flawless contact-measurement.
“As long as these (height gages) are in calibrated condition, they will perform flawlessly,” said Bourque.
Calibrate Yearly
According to industry professionals height gages are on a calibration schedule of about every year to18 months. In order to calibrate a gage, it has to be calibrated with something more accurate than it. Users of height gages usually send them out to be calibrated. Many height gage manufactures also calibrate.
Accuracy and Repeatability of Gages
When using a height gage, the environment is the biggest contributor to errors in measurement. Moisture, sunlight, heat, and cold all are factors in error readings. The location of the gage is important in determining the accuracy and repeatability of the measurement.
“If it is kept on the shop floor where there is direct sunlight coming in, moisture, humidity, dirt, and dust in the air, the measurements will be much different than when it is in an inspection room,” said Schuetz.
In addition to accuracy and repeatability of measurement, height gage manufacturers are also introducing features that make it easier and more comfortable to operate. Among these features are ergonomic handles, dedicated buttons and soft keys. When the operator grabs the ergonomic handle the buttons are very accessible to their thumb and fingers to reduce extraneous movement of the wrists, hands, and fingers which could result in carpal tunnel or other strains. The dedicated buttons and soft keys with symbols make it easy to operate. Non-dedicated buttons are just activated when the keys are in use. This prevents cluttering up the keyboard with seldom used keys.
The principle way of using a height gage has not changed much; however, manufacturers are offering different aesthetics that improve the precision. Bases are being made in steel, ceramic, or granite for added stability for improved accuracy and repeatability.
Choosing the Right Gage
When purchasing a height gage industry experts advise to always keep in mind what will be measured. Height gages vary in size. There can be small parts with tight tolerances to large parts with more liberal tolerances. Many height gages come in 14 in., 24 in. and 40 in. sizes. Make sure it meets all your specific application needs, such as accuracy, resolution, measuring force, measuring angle, probe tips, measuring length and output formats.


