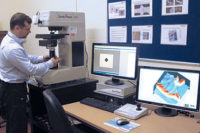
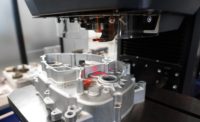
The Vickers hardness test, an offshoot of the venerable Brinell test, has been used since the early 1920s. Although the concept of using one test method to cover a wide range of materials hasn’t changed much in the last 90 years, upgrades to the equipment used to perform the test have expanded its use and accuracy.
The Vickers hardness number is the load (test force) over the resulting area of the diamond impression, and can be calculated by the formula:
HV = F ≈ 1.8544F
A d²
In the past, look up tables were commonly used to find the Vickers hardness number. Today almost all testers use digital encoders and built in calculators that not only give the Vickers hardness number, but also scale conversions and statistics as well.
Another area where significant changes have been made is the method of applying the test force. Early generations of the Vickers hardness testers used a foot pedal controlled by the operator to determine how fast the test force was applied to the part. This method evolved into the oil dash pot system that was used for many years until it was replaced by the synchronous clock motor that is common today. More advanced testers that require better control of the loading rates often use closed loop electronic force mechanisms with adjustable speeds and sub-gram force capabilities. The Vickers test is sometimes divided into the micro and macro ranges, above and below 1 kgf, however these latest generations of machines are often capable of testing in above and below this cutoff.
|
TECH TIPS A defining characteristic of a proper Vickers test is to include the test force used to perform the test. While the Vickers test is very uniform with regards to the test force, expected results for one load may not be the same as results for another. It is important to always indicate the test force used so that the tests can be repeated by someone else. |
Over the past 90 years, the Vickers test has proved to be an all-around respectable performer in a wide variety of applications, some of which the inventors never dreamed possible. However every test method has its limitations, including the Vickers hardness test. One limitation of the Vickers test is its speed. Most international test methods limit how fast the test can be performed so that repeatable results are obtained. Also, some kind of surface preparation is typically required so that the diagonal lengths required to calculate the area are clearly visible. Most importantly, by the definition of the test method, the diagonals need to be “read” by the operator, leaving room for error.
For every indentation that is made, the operator is required to measure both the horizontal and vertical diagonals. This puts the responsibility for measuring accuracy on the measurer. No matter how accurate the tester, poor measuring techniques will give poor results. To help eliminate human error as a factor, many attempts have been made to automate the measuring process.
Early attempts to automate the measuring process used cameras to determine the end points with varying results. Image analysis software used several variations of area, maximum chord length, perimeter and infinitely large circles to name a few. One manufacturer even designed a special chip for a camera that was only one pixel wide and scanned across the field of view. Most international testing standards simply ignore the differences between using a human eye and a camera system, assuming similar accuracy. Traditionally however, sometimes “extra” pixels were added or mathematical adjustments were made to compensate for the camera. Recently, the use of megapixel cameras has become more prevalent and pixel ratios have dropped from 0.25 microns/pixel in a typical 640 x 480 camera system to 0.06 microns or less per pixel.
The lenses have improved too. Long working distance infinity corrected optics are usually standard on all testers and greatly improve the microscope part of the hardness testers’ job. Most testers are available with a wide variety of optional lenses.
Another improved feature on the modern Vickers is the advent of LED illumination. LEDs last longer, burn cooler and give more even illumination on indentation that may feature some “Brinelling” at the surface. Studies have shown that even small increases in voltage to a halogen bulb can produce significant variations in readings by a camera system. Modern software includes routines in the program to automatically set proper lighting.
Having a good software program to read the indentations produced with a high resolution long working distance (LWD) lens and megapixel resolution camera is only one part of the measuring process. It is critical to focus the indent before it can be measured. This step is necessary for most testers to make the indent as indenter travel can be limited. Not too long ago, a motorized focusing system consisted of an o-ring that wrapped around the manual focus knob and a small motor mounted on a post. Many current methods are now being employed to give the automatic testers sub-micron focusing ability.
The final component of the fully automatic Vickers hardness tester is a motorized stage. Now that testing is capable of operation independently of the operator, a motorized stage increases the number of tests or adds the ability to run multiple patterns on the same part.
Larger stage sizes often allow many samples to be set up and run after everyone has gone home for the day. If you have effective case depth studies to perform, multiple samples can be run without operator intervention. Complex patterns or the entire surface of the sample can be run to produce a hardness contour map.
Other test methods have tried to usurp the Vickers test method over the years, but none have gained the worldwide acceptance that the Vickers test has. Some might be faster, less operator dependent, or require less sample preparation, but if the specifications call out a Vickers test, a proper Vickers test is required.
A defining characteristic of a proper Vickers test is to include the test force used to perform the test. While the Vickers test is very uniform with regards to the test force, expected results for one load may not be the same as results for another. It is important to always indicate the test force used so that the tests can be repeated by someone else.
For example: 771HV10 means that 771 Vickers hardness at a test force of 10kg were measured. The current practice is to use kilograms force, but some specifications are now listing Newtons.
If nonstandard dwell times are used: 771HV10/25
If scale conversions are used, list that as well: 513HV10 ≈ HRC50
Finally add the specification number being tested be even more descriptive: ASTM E384-12
The Vickers hardness test is an extremely useful tool for materials characterization and many manufacturers depend on it as a quality control method. Eliminating the most common error in the test method—operator error—helps to make more accurate quality assessments.


