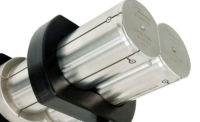
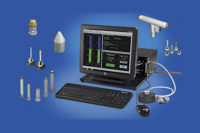
It is perfectly natural that machinists should have an affinity for mechanical gages. To a machinist, the working of a mechanical gage is both straightforward and pleasing. Air gages, on the other hand, rely on the action of a fluid material, the dynamics of which are hard to (shall we say?) grasp. But air gaging has many advantages over mechanical gages and should be seriously considered as an option for many applications.
Air gages are capable of measuring to tighter tolerances than mechanical gages. The decision break-point generally falls around 0.0005 inch; if your tolerances are tighter than that, air gaging provides the higher resolution you will need. At their very best, mechanical gages are capable of measuring down to 50 millionths, but that requires extreme care. Air gages handle 50 millionths with ease, and some will measure to a resolution of 5 millionths.
But let’s say your tolerances are around 0.0001 inch and mechanical gaging would suffice. Air still provides several advantages.
The high-pressure jet of air automatically cleans the surface of the workpiece of most coolants, chips and grit, aiding in accuracy and saving the operator the trouble of cleaning the part. The air jet also provides self-cleaning action for the gage plug itself. Mechanical plug-type gages, on the other hand, can become clogged with cutting oil or coolant and may require occasional disassembly for cleaning.
The high pressure jet is probably the one feature that makes air so unique and useful for so many measurement applications. This is because of its relatively small size and ability to be machined into some very small places, or be combined with many other jets in tooling to provide all types of measurement results. These are the features that set air apart for many precision multi-parameter checks that are virtually impossible with mechanical or electronic probe type contact gaging, and provide accuracy and performance that outdo many optical systems.
Air Plugs
The contacts and the internal workings of mechanical plug gages are subject to wear. There’s nothing to wear on an air plug except the plug itself, and that has such a large surface area that wear occurs very, very slowly. Air gages consequently require less frequent mastering and, in abrasive applications, less frequent repair or replacement.
On some highly polished or lapped workpieces, mechanical gage contacts can leave visible marks. Air gaging, as a noncontact operation, won’t mark fine surfaces. For the same reason, air gaging can be more appropriate for use on workpieces that are extremely thin-walled, made of soft materials, or otherwise delicate. Continuous processes, as in the production of any kind of sheet stock, rolled or extruded shapes, also benefit from noncontact gaging.
Air equipment can save time in almost any gaging task that is not entirely straightforward. Air plugs with separate circuits can take several measurements simultaneously on a single workpiece, for example, to measure diameters at the top and bottom of a bore for absolute dimensions, or to check for taper. Jets can be placed very close together for measurements of closely spaced features.
Air Rings
An air ring is the opposite of an air plug, and is primarily used to measure ODs. Typically, two-jet air rings are the most common for measuring basic diameters. But as with an air plug, the position of the jets is determined by the part being measured. The ring can act like a through-hole plug, where the jets are in the center of the ring and the part is passed through. This configuration allows for exploring the whole part from end to end.
But sometimes there are parts with multiple ODs, such as pulleys or gears, where it is critical to measure the diameter right up to the face it’s attached to. This is where a shoulder, or even a snout type ring, comes into play. These are basically blind hole rings that position the jets as close as possible to the face to allow for measuring the OD right to its end. A snout style goes one step further and is used when there are other clearances or obstacles to get around.
Also like an air plug, air rings may be designed with multiple jets—three, four or six—to help find lobing conditions or average diameters.
Another decision is whether to bring the gage to the part or the part to the gage. Air rings can be portable and held in the hand while the part is inserted. Or the ring can be mounted horizontally on a bench fixture—where it is often called a “pot gage”—and the part is placed into it. For smaller parts the ring can be mounted vertically, with vees or chutes that are used to help align the part to the gage.
Air Forks
Sometimes, however, it’s not possible to just take a part and place it in an air ring. On crankshafts, for example, there are many journals—some with tolerances too tight for a mechanical snap gage—and there is no way to place an air ring over the part. This is where an air fork comes in.
Making an air fork involves more than slicing an air ring in half. There are the same critical dimensions to worry about, but there are some added tricks needed to make it perform as well. One trick is to position the air jets on the expected diameter in a repeatable fashion. With an air ring, the whole inner surface acts as a part reference. With an air fork, we don’t have that luxury, so precision-ground locating stops are manufactured into the back of the fork. This creates the reference, based on the expected part diameter, and positions the jets precisely.
By customizing the position of the air jets, air forks can really begin to shine. Jets can be placed near the end of the fork so that diameter can be measured right up to a face. Or multiple jets can be added to check two or three diameters simultaneously. With a little computing power, the three diameters can be read as one, and taper or shape can also be calculated.
Special Plugs and Fixtures
Air plugs are available (or can be readily engineered as “specials”) to measure a wide range of shapes that would be difficult with mechanical tools. Examples include: spherical surfaces, interrupted bores, tapered bores, and slots with rectangular or other profile shapes.
It would be possible to design a fixture gage with a number of dial indicators to measure several dimensions in a single setup, such as diameters of all the bearing journals on a crankshaft. But using air to build a similar fixture gage will almost inevitably be simpler in design and fabrication, easier to use, less expensive and more accurate.
Measuring Shape
Because of the relative simplicity of fixture design, air gaging is especially suited to relational—as opposed to dimensional—measurements, such as squareness, taper, twist, parallelism and concentricity.
The basic principle here is that air circuits operating on one side of the gage’s diaphragm measure dimensions; Circuits on opposing sides measure relational measurements or differences between features. The beauty of the concept is that you can choose to ignore dimensions while seeing only relational measurements, and vice versa. You never have to add, subtract or otherwise manipulate gage data. It can all be done with direct reading.
Gaging the straightness and/or taper of a bore is a basic application that benefits from close jet spacing. All it takes is a single tool with jets on opposite sides of the gage’s diaphragm. The gage registers only the difference in pressure between the two sets of jets, directly indicating the amount of taper.
The concept can be applied to a fixture gage, to measure several diameters and tapers in a single operation. This fixture would be much simpler than a comparable gage equipped with mechanical indicators, each one outfitted, perhaps, with a motion transfer linkage and retracting mechanism. And the air gage could have an electrical interface to signal in- or out-of-tolerance conditions with lights, which are much quicker to read than dial indicators.
Or consider a fixture gage that allows a journal shaft to be rotated. Two jets on opposing sides of the journal, acting on the same side of the diaphragm, will accurately measure the diameter of the journal, even if it is eccentric to the shaft. As the shaft is rotated, the air pressure increases at one jet, but decreases at the other one. Total pressure against that side of the diaphragm remains constant, so we obtain a diameter reading.
But if the two circuits operate on opposite sides of the diaphragm, the gage reflects not the total pressure of the circuits, but the difference between them. Higher pressure on one side or the other indicates the journal’s displacement from the shaft centerline.
Or, one can position the jets and circuits to measure both features at once, and add another set to check for taper. A mechanical gage could possibly accomplish all this, but only at the cost of much mechanical complexity.
The same principles apply to gages designed to measure the squareness of a bore, the included angle of a tapered hole, or the parallelism (bend and twist) and distance between centers of two bores, such as a connecting rod’s crank and pin bores. Bore gages with the proper arrangement of jets can turn checking barrel shape, bellmouth, ovality, taper and curvature into quick, one-step operations.
You needn’t be a gage engineer to appreciate the flexibility of air gaging, or to understand how it can simplify gaging tasks. Just remember that virtually all kinds of measurements—both dimensional and relational—can be performed with air, and that the more complex the task, the more air recommends itself. Q
George Schuetz is the director of precision gages at Mahr Federal Inc. For more information, email [email protected] or visit www.mahr.com
TECH TIPS
Air gaging is especially suited to measurements such as squareness, taper, twist, parallelism and concentricity.
Virtually all kinds of measurements—both dimensional and relational—can be performed with air.
Keep in mind that the more complex the task, the more air recommends itself.
In addition, elements can be stocked by the supplier for immediate delivery when new gaging requirements emerge.


