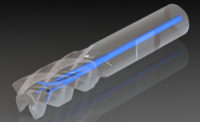
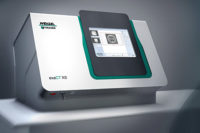
Computed Tomography (CT) has its roots in medical diagnostics during the late ‘70s and since the ‘90s it has been used in industry as a method for nondestructive testing (NDT). Recently, the technology has taken a step forward and entered a new field of use for high-precision dimensional measurement. For the first time there is a technology which is able to fully capture and measure three-dimensional geometry regardless of whether features of interest are accessible from the outside or hidden from sight inside an object.
Anyone who has used CT data from a modern system for dimensional measurement, reverse engineering or NDT will have been amazed at the quality of the data and how complete it is. This is particularly noticeable to anyone who has experience working with point clouds from tactile or optical scanners where many details are lost due to inaccessible structures, elastic deformation or transparent materials. CT suffers none of these problems. Most people having worked with CT data for reverse engineering purposes cannot imagine going back to their old methods. Similarly companies that have adopted CT scanning as the basis for PPAP and FAI of complex plastic parts made from injection molding or additive manufacturing cannot imagine doing it any other way. Despite all this, adoption of industrial CT as a technique for dimensional measurement can only be described as slow across the board and particularly in North America. How long will it be before CT becomes mainstream, and what’s stopping it?
What stops organizations from adopting CT?
As history shows, it was exactly the same for any other established measurement technology—from classical CMMs to optical scanners—it takes some time for new methods to be accepted. People don’t know enough about the new technology’s capabilities and therefore fear the unknown; nowhere is this more likely to be the case than with CT with its associations with radiation and perception as “rocket science.” Another major deciding factor is the price of a CT system. If the systems were less expensive they would sell better. New technologies need to be able to do things that other systems simply can’t do so as to create demand even at a relatively high price from early adopters. Early adoption improves sales volumes and makes lower prices and mainstream acceptance possible. In the case of CT, the “killer apps” that would make CT’s case by doing something that can’t currently be done include complex electrical connectors combining plastic housings and metal pins, diesel injector nozzles incorporating tiny critically designed holes and turbine blades in super alloys with internal cooling passages. The question is what can be done to improve the functionality of CT systems to be able to manage these tasks so well that return on investment justifies their purchase and starts the virtuous upward spiral of higher volumes and lower prices for all?
Hard and heavy facts
There are certain things that can’t be changed about the fundamental workings of a CT system that stand in the way of making them more useful, ergonomic or easy to use. A fundamental factor to understand about CT is that for a given thickness of any material there is a level of X-ray energy required to penetrate it. This means the thicker and denser measurement objects require higher X-ray energy. It is essentially required to keep the X-rays in the machine and safe from people and for this you need lead shielding. An example of the required amount of shielding can be used to show the dependency between the X-ray energy and the price of the complete CT system. All other factors being equal the components of a CT system become more and more expensive as the power of the X-ray source and the dependency is not linear.
One possibility to overcome this problem is to build machines with smaller footprints. This makes them more attractive as less space is needed and reduces the manufacturing costs. Another approach is to get more functionality out of the X-ray power on hand and thereby to get more functionality out of the price of the machine. This is done through software.
Software solutions
Smart algorithmic software solutions and automation of the process allow progress to take place making the most of what is available. Every manufacturer of CT machines is investing heavily in software development because as in so many fields of technology using software to best use hardware assets and optimize their performance is the only option when facing the limitations that can’t be changed. Software solutions allow us to get more from the existing systems without increasing costs dramatically. Dedicated algorithms allow for enhancement of the penetration length and as a consequence one can use a lower power X-ray source and therefore less shielding and lower costs. Much attention is being paid to the quality of the reconstruction of data and post processing, particularly with a view to improving multi material measurement and precise measurement of fine internal feature as demanded by the “killer apps” that will lead to mainstream acceptance.
Internationally approved and accepted norms
Another key factor in making users trust in the new technology is to establish internationally approved and accepted norms. By making the CT systems conform to standards, applications currently served only by certified tactile measurement tools can be addressed. This is something that has been worked on internationally for some time since 2003. Recently it was borne fruit in the VDI 2630 standards, which has been published in Germany first. Subsequent adoption of similar standards by ISO will enable a wider international use of CT metrology for quality applications where the cost is justifiable.
Usability - speed and automation
Decreasing the time of the CT process greatly increases the usefulness of the system. This means not only decreasing the scan time itself but also the post-processing and analysis time before the final dimensional measurement report is ready. The scan time is the time needed to rotate the part over 360 degrees in front of the detector. The time varies with the density of the object—the lower the density, the faster the scan. To improve this one can use a palette measurement setup when more parts are scanned simultaneously in one rotation which is the most dramatic way to reduce the elapsed time per part.
Super Computer Power
Unlike in a system that scans surface data, CT data describes a complete volume in three dimensions so a doubling of part size or resolution results in an eight-fold increase in file size. A typical CT scan results in 4 to 16 GB data and therefore the post-processing time such as creation of a surface strongly depends on the power of the computational hardware. Fortunately due to “Moore’s law” the computer power gets greater over time and with the adoption of multiprocessor PC clusters and GPUs developed for video games, what would not long ago have been consider “Super Computer” power available to only users such as NASA is now within the price range of industrial users.
For all of these incremental improvements to come together and become a measurement technology for the mainstream they need to be underpinned by an easy to use automated process chain that will take away any perception that CT is somehow rocket science and put the “killer apps” within the capability of normal metrology users. When that happens CT will be in the mainstream and with the current rate of development, we may not have to wait long.
Giles Gaskell is the applications manager, Wenzel America Ltd, as well as an advisor to the SME’s annual RAPID conference representing the 3D Imaging industry and co-chair of the SME’s 3D Imaging Technical Group. For more information, call (248) 295-4300, email [email protected] or visit
www.wenzelamerica.com.


