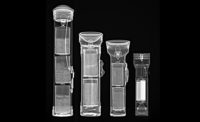
X-ray computed tomography (CT) is an important industrial tool that enables us to see not only external surfaces but also internal features of an object without cutting or disassembling the sample. CT is widely used as a technique for quality control, but it is not as well known for its capacity to evaluate dimensional information. With accuracies comparable to or (in some circumstances) better than coordinate measurement machine (CMM) data, industrial X-ray CT machines can acquire a specimen’s dimensions and contribute to the area of metrology and geometric tolerance control, which is very important in the assessment of a part’s functional features. With its ability to improve product quality, reduce inspection and analysis costs, and decrease manufacturing time to market, CT has attracted the interest of major manufacturing companies and is now being rapidly adopted in a variety of industries such as automotive, electronics, aerospace, medical devices, cast materials, injection molding, plastics, rubber, 3-D printing (additive manufacturing), as well as many other industrial fields.
HOW IT WORKS
CT is a technique that uses X-rays to create a 3-D volume/model of a specimen from a series of projection images or radiographs. Sir Godfrey N. Hounsfield patented the first CT scanner in 1972 and was awarded the Nobel Prize in 1979 for his invention. By the early 1990s, CT was already commonly used to detect and locate material defects and flaws for important applications in nondestructive inspection. At the same time, methods using comparative calibration were developed that enabled dimensional measurements to be made. In 2005, dedicated metrology CT systems emerged, sometimes called MCT, which allow for parts to be measured without using the comparative calibration step. In practice this means that MCT systems are pre-calibrated and can produce certified results. For the last 10 years, with several CT manufacturers producing dedicated metrology systems, the use of CT systems with dimensional measurement (CMM-like) capabilities has increased.
Tech Tips
|
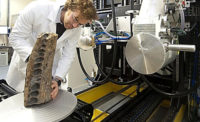
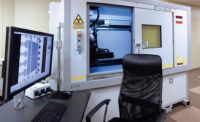
CT machines for industrial applications are primarily equipped with: an X-ray source tube, a detector, and a rotatory table in between which rotates 360 degrees while the detector takes radiographic snapshots of the specimen or part at different angular positions. From these two-dimensional X-ray images, the CT system is able to generate a 3-D image for both the interior and exterior of the part. The 3-D image represents a 3-D volumetric density map in gray values based on the composition of the sample. Each gray level offers information about what has been encountered by the X-rays in their traveling paths and their spatial location, thus revealing external and internal structures of an object. While the object’s surfaces are not explicitly defined in this technique, they can be extracted from the reconstructed volume using a precise surface determination algorithm. Once the surface determination is made, CT analysis can then provide the part’s dimensional results with measurement uncertainties as small as 4 µm. With special calibrations, small measurement deviations from CMM as low as 1 µm or less can be achieved, as have been reported by some university research publications.
The insight gained from imaging an object’s internal structure is quite valuable. The 3-D reconstructed model contains all internal and external geometry, allowing analysis using clipping views or cross-sectional images with high spatial resolution. Being able to see inside a product allows for easy validation of parts, identification of design issues, investigation of discrepancies, location of flaws, dimensional inspection, and other forms of quality control that can help to identify uncertainties quickly and accurately. Access to this type of information is important for ensuring that components are structurally and functionally sound, which can enable the prevention of failures or any other negative impact in the product’s performance. The 3-D volume can be inspected slice by slice, compared against a CAD model, inspected for defect analysis, measured for wall thickness analysis, and used for other kinds of dimensional metrology analysis and inspection. Parts made of plastics, polymers, ceramics, casting and light metals (e.g. aluminum), and/or composite materials among others can be measured with the X-ray CT method.
DEFECT ANALYSIS CAPABILITY
From defect volume analysis, for example, it is possible to determine voids/porosity, flaws, cracks, and inclusions within the manufactured parts, and reveal their spatial distribution, position, size, volume, and morphology within the whole part. This information is useful for the improvement of a part’s design during product development, as well as during the production phase of the manufacturing process for quality control. Strength, hardness, toughness, elasticity, resistance, and other material properties can become deteriorated by the presence of multiple defects like porosity or cracks, which can contribute to degraded performance and structural failure of manufactured parts. When porosity or other defects are ignored, there is the potential for product recalls and financial loss. This can be avoided by accurate defect measurement and precise failure analysis. X-ray CT can contribute to this area of quality control because it can easily assess the internal geometries and structural composition of objects in a nondestructive fashion. Failed parts can be inspected without breaking them up, thus avoiding the potential alterations produced by the disassembly process itself.
DIMENSIONAL METROLOGY CAPABILITY
In the field of dimensional metrology, CT can obtain dimensions of internal features normally inaccessible with CMMs, and thus parts can be inspected not only for go/no-go, but also for traceability with quantifiable measurements. In particular, tolerances can be contrasted with different processes using nondestructive measurement of the manufactured product. There is considerable benefit in measuring the products in the assembled state, not only for comparison of results but also for tracking dimensional changes after assembly or when modifications are deliberately applied to a single process or to a particular component. Dimensional measurements with CT allow for size and form determination, wall thickness analysis, and part-to-CAD or part-to-part comparison against a standard. This permits for the detection of dimensional deviations and identification of differences or accuracy issues. In addition, CT enables reverse engineering by converting the 3-D reconstructed model of a part to an STL model, which can be used for rapid prototyping, 3-D printing or additive manufacturing, and computer-aided manufacturing.
PRACTICAL CONSIDERATIONS
Parts of varying size and complexity can be measured. By changing the position of the specimen with respect to the source-detector distance, different magnifications can be achieved and the resolution of the scans can be modified. A high resolution close-up view of a specific region of interest can be obtained. Accurate measurements can be performed using high resolution scans, and faster acquisitions can be achieved with lower magnifications. If time is a constraint, a loss of image quality can be tolerated as a trade-off for a reduction in scan time. A reduction in measurement time of several minutes may lead to a reduction in measurement accuracy of only a few micrometers. Reduction of scanning time down to 30 seconds is possible depending on the application. Automatization is also possible to allow for the use of CT systems on production floors. High power CT systems from 225 kV to the 750 kV are already on the market to ensure enough penetration capabilities for larger components and high density materials. Ultimately, the quality of the CT data depends on the sharpness of the X-ray images and the signal-to-noise ratio, which is dependent upon the quality of the X-ray source, the detector, and the precision and stability of the manipulating system.
CONCLUSIONS
To summarize, industrial X-ray CT is a 3-D measurement technique with many advantages for inspection and quality control, mainly because it allows for the extraction of internal features in a nondestructive fashion with accuracies in the range of micrometers. CT has the ability to generate geometric data for a complete characterization of material structures (including external features) and detect manufacturing defects and dimensional deviations from CAD design. To study complex structures produced by a manufacturing process, with the current metrology technologies, CT might be the only available option to extract component dimensions of inner or hidden structures in an assembled product. With a destructive method, the dimensions extracted from the disassembled state of a product may differ from the actual geometrical dimensions in the original assembled state. This is particularly relevant for parts built with a variety of manufacturing processes including additive manufacturing. In addition, X-ray CT can be used as a quality control tool from optimization to production or to identify or prevent failures quickly, which saves both money
and time. Q
Acknowledgments from the Author: Thanks to Ed Glaser, David Schlaud, and Andrew Ramsey from Nikon Metrology for contributing some of the X-ray/CT images, and to Jim Clark for suggestions and edits.


