Inspecting medical parts such as orthopedic implants and medical instruments pose a number of arduous challenges to manufacturers. Due to their vast array of geometries and materials, medical parts are difficult to manufacture and can be even more difficult to inspect. Regulatory requirements must be met as well as timely deliverables, adding to the need for a fast and accurate inspection system.
The challenging obstacles of inspecting medical parts
There is a vast array of parts that a typical medical OEM manufactures and then needs to inspect. For example, bone plates are either flat or close-to-flat, whereas knee implants are complex, full-contoured 3D parts. A single family of parts, such as bone screws, comes in many sizes ranging from very small to large, and in dramatically different geometries. Each part needs to be accurately and quickly inspected in order to be cost efficient and meet specified regulations.
Another concern for manufacturers is the type of material that is used. Implants, for example, can be made of different materials. Many metallic implants are made out of titanium due to its resistance to corrosion from bodily fluids, bio-inertness, capacity for osseointegration, and high fatigue limit. However, other metals—such as iron, cobalt, chromium and tantalum—are also frequently used. Furthermore, specialized plastics such as high-density polyethylene are generally the most common material used for parts designed to be a replacement for cartilage. All of these materials present different appearances to visual inspection systems, making the task of inspection all the more challenging.
To further complicate the inspection process, parts made out of the same material can appear very different when they have varying surface finishes. For example, some parts, such as condyle implants, are highly polished and appear extremely smooth and shiny whereas porous surfaces, such as those designed for bone integration, are nearly the complete opposite.
Additionally, many medical devices are manufactured in small lots that present further challenges. To meet the demands of today’s OEM manufacturers, an inspection system must require minimal programming. If a complete batch of parts can be manufactured in just a few hours and then an inspection system requires extensive programming, this will minimize throughput, adding unnecessary cost and downtime for the manufacturer.
An inspection system for these parts must also be usable on the shop floor and have the ability to accommodate frequent part changeovers. The operator making the part should be capable of running the inspection system easily and efficiently, without extensive involvement of specialized quality control personnel.
In addition, medical parts often have very tight tolerances. Thus, the system used to carry out the inspection must be highly accurate. A very wide range of inspections and verifications are needed for these parts. Different profile tolerances are common, as well as numerous dimensional measurements and even qualitative inspections. The inspection of medical parts is also subject to strict regulatory requirements—measurements must be completely documented for transparency and accountability.
The complexity of inspecting medical devices with digital optical comparators
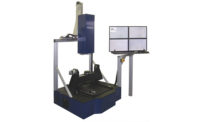
Modern day digital optical comparators were designed as a solution specifically to overcome the optical/noncontact inspection challenges faced by medical manufacturers. Digital optical comparators are able to produce accuracies down to ±0.0001”, and are available with standard XY travels of 12” X-axis and 6” Y-axis to accommodate the vast majority of medical parts. Extended travels of up to 36” are also available to ensure that all part sizes can be inspected. These systems are not limited to the camera’s field-of-view, but can compare a part to its CAD data across the entire stage travel, enabling even large parts to be checked at high magnification with very fine resolution.
These digital optical comparators are available with various types of adapted illumination to ensure that diverse materials and different surface finishes can be handled effortlessly. The system’s illumination is all computer-controlled to ensure repeatable illumination conditions and is LED-based to provide long life, low heat and low power consumption.
Digital optical comparators are available in both vertical and horizontal configurations to accommodate all geometries. Vertical configurations are perfect for flat parts, as they can simply be laid down on the system’s glass insert. The horizontal configuration has industry-standard dual dovetail grooves that can accommodate existing fixtures for all part geometries. The rugged design is adaptable for use directly on the shop floor.
Specialized options, unique obstacles
Digital optical comparators that feature unique CAD Auto-Align and CAD Auto-PASS/FAIL tools consistently produce operator-independent results that eliminate human subjectivity. These tools work directly with the part’s CAD data, in comparison to traditional operator-subjective inspection approaches that required viewing Mylar overlays. These digital optical comparators require no programming, making the system ideal for small lots and quick part changeovers. In addition, they can automatically measure parts, display deviations from nominal and identify out-of-tolerance areas.
The inspection of bone screws is an exceptionally demanding application. For these parts, many features need to be checked when the screw is at its helix angle. In this position, one end of the screw is closer to the camera and the other is farther away. These two extremes would normally be out of focus on traditional systems. With extended depth-of-field (up to 3”) on the digital optical comparator, everything remains perfectly in focus and the part can be checked in a single step.
New systems are able to produce a very high contrast, high-resolution image which ensures that defects are clearly visible. They support automated image and data capture to meet the medical industry’s documentation and device history requirements, as well as compute statistics and produce charts and graphs. These systems can be easily set up to automatically send data and inspection results to external applications, including Microsoft Excel and many others. In addition, the software has an intuitive interface that enables an operator to easily and reliably carry out the inspections, right beside the production machine. The machine can even be set up so that the operator only needs to scan a part-specific barcode and the inspection, with its related documentation and data collection operations, will be carried out automatically.
Today, thanks to fully-digital optical comparators, medical manufacturers have been able to overcome the many diverse challenges they face when inspecting medical parts.


