Despite the mountains of paperwork and sophisticated systems, occasionally a glitch makes all of that effort appear to have been a waste. It happens to the best of us with the only winners being therapists and system developers claiming to have the answers that will save us from a repeat in the future. But if you think about it, wasn’t the system within which the glitch occurred supposed to prevent them? If yes, will more of the same improve things? Maybe yes, maybe no.
I’m no system developer but I know there are standard programs available to assist you in tracking down the causes of glitches but they only kick in after the fact. Yes, some of the usual ‘best practices’ will assist on the prevention front but if they aren’t done properly, they will not prevent them from happening. Typical of this is calibration reports on your equipment. Too often, if they do not have a red flag, they are simply filed away when a brief review of the data could point to a potential problem that could be avoided.
If you want to guarantee your measurements you could calibrate everything before each measurement is made but management might get uptight at the costs and delays this would entail. Such a scheme would mean you are wasting time looking at inputs when you might be better off looking at the outputs.
In the dimensional calibration field this is done using ‘check’ standards. It is effective, cheap, and fast and doesn’t require special software—or even a computer for that matter. It can be used at any level of precision whether the items being measured are gages or production components.
In effect, what you are doing is feeding your process some known values to see how well it performs on an ongoing basis. Basically, you retain sample parts/gages representing the most popular items you are called upon to measure and you put a few of them through your process from time to time and compare the results. This will give you an indication of the stability or repeatability of your process—not its level of precision. When you see things changing you can start to get picky and try to eliminate the usual suspects until you are left with one area that is the cause of the change.
You can use this method for your overall measuring process or to monitor an inspector’s performance or that of a particular piece of equipment.
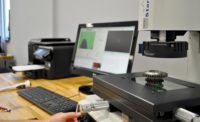
This is an easy way to keep on top of your CMM’s performance since there are so many elements that can mess up its readings. If you have a few small components that are representative of what you use it for you can use them as your check standards. If this is not practical, get a couple of masters made up that represent the type of features you measure the most such as holes, outside diameters, lengths, and tapers. Make them different by a few thousandths of an inch and have your supplier focus on giving you clean ground surfaces to work with rather than trying to make them to really precise dimensions.
The next time your CMM is calibrated, make these check standards the first items measured and then monitor the results from there.
The same process can be used when simple tools like micrometers or calipers are involved but don’t use setting rods for the tests because they won’t cover interim values.
If your process covers large or very precise dimensions, temperature can be a problem so it is wise to record it when running these tests. You can waste a lot of time looking for mechanical problems when temperature is the cause of the variations.
Yes, you can use SPC routines to assist you in this process as you may already do for your production parts but now you’re getting more involved than you need to. And, to make matters worse, some smart aleck quality auditor will now want you to verify your software, justify your sample size and it will go on from there.
Tell him/her it’s for internal use only and you’re using the ‘experience’ program in your head. Keep it simple and hack-free. Use some paper and pencil.


