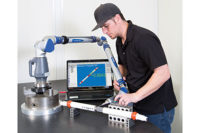
Verisurf Software, Inc. announced the release of Verisurf X9, software for 3D measurement. The new release includes the addition of Verisurf SOLIDS, a complete 3D solid modeling application, as well as major productivity enhancements to each of the modules that comprise the Verisurf solution – CAD, MEASURE, ANALYSIS and REVERSE. Three components, which were previously cost add-ons, are now included in the Verisurf CAD module: creation and editing of solid models; raster-to-vector conversion of images and photos; true shape nesting of 3D geometry for use in composite materials, 3D printing and many other applications.
New Speed Menu options for point cloud and mesh objects greatly reduce the time necessary to scan, align and inspect part data. In the improved point cloud display with shading, the fine details of live scans look great and appear in real-time, as the data is collected. Analysis functionality has been optimized for increased speed and accuracy when using large scan data with the capability to process and display one million points per second in real-time. These enhanced capabilities have enabled new productivity features, including a ‘Do It’ icon to run the macro for quick alignment, registration, analysis, and reporting.
The new Verisurf Software functionality and added features are designed to make stationery coordinate measuring machines (CMMs), portable CMMs and 3D scanners more productive for automated inspection, guided assembly, and reverse engineering. Built on a powerful CAD platform, Verisurf Software provides a variety of manufacturing measurement solutions to meet the needs of the quality lab and in-process applications on the shop floor.
A full list of Verisurf X9 enhancements are available from Verisurf, the following are highlights:
Verisurf CAD
Solid Modeling - creation and editing of solid models
Raster to Vector Conversion - automatically convert raster files to fully scalable vector files
True Shape Nesting - can be used to optimize the placement of many 3D parts on a CMM for automated inspection
Gap Flush Dimension - inspect Gap and/or Flush of scanned points to the CAD model
Integrated Verisurf Validate - can validate two files or validate a part file as the check file against the source part
Merge Files Tool - allows multiple CAD files to be brought into Verisurf all at once
Verisurf MEASURE
Faster Real Time Scan & Display of Point Clouds - capable of processing and displaying up to one million points per second
Point Cloud Display Enhancement makes live scans look great; as data is collected, point normal are calculated in real-time
Auto Hole Axis improvements - can now create MBD tolerances from selected reference holes
Create MBD/GD&T annotations on Verisurf meshes and clouds.
Verisurf ANALYSIS
“Dot It” Macro - Fast Align, Analysis and Reporting; significantly improves point cloud based inspection and reporting
Analysis Module Optimized for speed and accuracy of large scan data using clouds and meshes; enhanced graphics
Improved 3D PDF including better text, MBD/GD&T, default viewing, MBD/GD&T report option – AS9102, QFI output.
Report Consolidation - Quickly combine multiple reports into one
Verisurf REVERSE
Expanded File Support for Importing/Exporting Cloud or Mesh Files allows Verisurf Reverse to quickly and easily accept data from virtually any scan/capture source or other software and export to all CAD, modeling or rendering applications
Point Cloud and Mesh Object Tools ‘Right Click’ Menu access tools for Reverse, Measure and Analysis modules. Provides ability to register multiple
clouds or meshes to each other, align scan data to similar shaped CAD part, best fit alignment of scan data to CAD part and more
Mesh Smoothing - for better reverse engineering of surfaces
Verisurf Software, Inc.
www.verisurf.com


