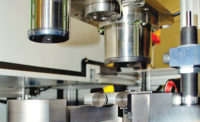
Air gages are an accurate, reliable and inexpensive metrology tool used in the quality control process of production. Patented for manufacturing in 1943, historians document this tool has been in use for nearly a century.
“Air gages are one of the most specific and accurate tools that can measure a direct known pressure,” says Chris Janutol, quality manager at Intra Corporation(Livonia, MI).
The instruments measure changes in air pressure by using compressed air to measure changes in air flow. This measurement is achieved through the laws of physics.
“As clearance increases, air flow also increases and air pressure decreases proportionately. As clearance decreases, air flow also decreases and air pressure increases accordingly,” says Robert Edmunds III of Edmunds Gages (Farmington, CT).
According to Edmunds maximum air flow occurs when an air tool blows into an unobstructed nozzle. This produces the minimum amount of air pressure which is called back pressure. Conversely, as the obstruction gets closer to the air nozzle, the air flow is decreased and the back pressure increases. When the air nozzle is completely closed, air flow is at zero and the back pressure is at its maximum. This example shows how air flow and back pressure are proportionately related, as one increases the other decreases.
Air gages are ideal to use with small spaces or products with several components to inspect.
“It is often used when you don’t have a lot of real estate but have multiple checks within the spindle,” says John Robson, design engineer at Birdsall Tool and Gage (Farmington Hills, MI).
Air gages can measure tight tolerance with resolutions as small as 0.000002 inch. The tool does not touch the part being inspected. This is ideal when checking soft, delicate, highly polished, thin metals.
“The steel gage and the aluminum part may mark up or put holes in the part,” says Janutol.
In addition to not scratching the part, no touch testing reduces the chance of the air gage breaking the part or damaging it in any way. The force of the air cleans the part and removes particles and coolants at the measurement point. This eliminates the need for separate cleaning in most operations.
“Since air gage tooling has no moving parts, it’s virtually immune to fouling,” says Edmunds.
Air gages are cost effective because they do not require skilled training to operate. It gives a quick assessment. This reduces operator fatigue and saves time on the production floor. Once the initial air gaging system is purchased, it is relatively inexpensive to add reading indicators and other tooling devices.
Back Pressure Bleed System
Many companies have chosen the back pressure bleed method because of its versatility and flexibility. Using a fixed regulation to control incoming air pressure, this system has a second adjustable restriction in the feed line which is opposite the output leg. The second restriction allows users to adjust for different air gage tooling and read out by varying incoming air pressure. The typical adjustable restriction between the regulator and air tool controls the magnification while the second adjustable restrictor releases excess air to adjust the zero position. Minimums and maximums are calibrated using both ends of the tolerance range.
This system operates at higher air pressure which allows the air nozzle to be used at a farther distance. This protects the nozzles from wear that could affect the accuracy of the measurement. This results in the air tools lasting much longer than conventional options.
Back Pressure System
The back bleed pressure systems become back pressure systems by removing the second adjustable restriction. If using the two-master system, it operates just as the bleed method but requires dedicated tools with limited ranges and lacks the tool diversity of the bleed method. As a result, the back pressure system is limited with modern application.
Single or Double Master
The single master system uses just one fixed limit standard. It measures an air gage readout/amplifier at just one scale location. Only the nominal or zero point of tolerance is measured with assurance. Therefore, the operator must trust the read out has correctly translated size differences into correct scale readings at multiple scale locations throughout the part tolerance.
According to Edmunds, inaccurate readings are more likely to happen with a single master especially when parts are manufactured at the edges of their part tolerance.
The Differential System
The differential system is also called the balance system. “The air stream is divided and flows through two fixed restrictions. On one side of the system is the bled leg which ends in a zero valve, which balances pressure to the fixed second leg of the system, terminating at the air plug. The difference between these two legs is measured by means of the differential pressure meter that bridges these legs,” says Edmunds.
The set up is faster because the system is set to zero. This amplifier can only be set to zero. An inaccurate reading could occur from damaged or worn tooling especially in a single master
Back pressure bleed, back pressure and differential are air gaging systems commonly used in manufacturing. The part, cost and operator determine what air gaging system is used. While each system has its advantages and its challenges, air gaging is still one of the most simple, accurate and inexpensive ways of quality control testing.


