In a perfect world, or in a fully integrated manufacturing environment, metrology systems would be able to measure all necessary parameters in one pass, without error, and feed back results seamlessly to computer-integrated manufacturing networks, in the formats most useful for machine control and process management.
In a perfect world, or in a fully integrated manufacturing environment, metrology systems would be able to measure all necessary parameters in one pass, without error, and feed back results seamlessly to computer-integrated manufacturing networks, in the formats most useful for machine control and process management.
One aspect of that utopian vision is the ability of an automated instrument to measure a part, or family of parts, with one setup per part. This vision is what has been driving increased use of coordinate measurement machines (CMMs) and now, increasingly, toward the use of multisensor CMMs.
Demands on metrology technology have never been greater, and the migration of measuring technology toward the manufacturing process means a higher level of functionality is required on the measuring side of this equation.
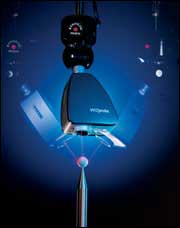
Multisensor CMMs can be the common denominator in this equation. The CMM can combine various sensors including a contact stylus and a noncontact laser that are driven through 3-D space to accumulate data points and vision sensors that are able to take measurements of all types. The CMM also has the structural ability to work closer to the actual manufacturing process.

Maximize ROI
If CMMs are already in use, making the move to multisensor capability might be less difficult, less costly and offer more functionality than one may think.Paradoxically, the costliest elements in a CMM are its heavy granite base, rigid chassis structure and X-Y-Z drives, not in its high-tech sensors or software. And that is fortunate because sensors and software, which evolve constantly, are likely to be upgraded frequently, while the CMM's basic platform can have a service life of decades. CMM hardware is also highly upgradeable, making it a “base“ instrument around which to build multisensing functionality.
If the profile of the application justifies it, and the CMM configuration allows it, today's sensor and software packages make retrofitting CMMs with multisensor capability possible.

Making sense of sensors
Contacting probes are standard in typical CMM setups. In terms of its ability to measure 3-D geometric features for location, size and fit, contacting-probe technology is proven across a broad range of metrology applications. Many manufacturers are most comfortable with contacting-probe technology because it is most analogous to taking measurements.And the capabilities of contacting probes are continually advancing. For example, a recently developed probe uses an elastic stylus linked to a strain gage to measure internal screw thread contour. As the stylus traces the internal thread, deflection pressures are generated proportionally to the thread form and detected by the strain gage that outputs a signal. The signal is then processed to correspond to thread contour and hole tilt.
Noncontact laser and laser scanning probes have been developed as an alternative replacement for contacting styluses where actual physical contact is not possible such as soft, warm or delicately finished surfaces, highly polished or rough surfaces and those with sharp edges. Laser probes also have the ability to measure surface finish.
Vision-system video cameras take over where probes don't work, such as the measurement of microscopic radii such as holes of less than 1 millimeter in diameter, easily deformed elastic or soft features, or flat, even stepless features such as printed stripes.
A vision-equipped CMM can also significantly increase the measurement speed of items that would otherwise require time-consuming, fine positioning, or in cases where multiple, small features, or multiple small parts can all be imaged at the same time.

In context
A multisensor CMM allows comprehensive metrology capabilities to be placed into the context of high-speed, automated manufacturing, providing what is close to a 100% in-line inspection device.Consider this theoretical, but highly probable, scenario: a multisensor CMM sitting in the center of a machining cell that finishes a complex cast-metal part. The metrology requirements might look like this:
1. The need for 100% inspection: A number of factors make multisensor CMMs useful for 100% inspection regimes. High drive speeds provide the high inspection rates required to keep pace with cell robotics, assuming that the multisensor CMM is loaded and unloaded by robotic material handling equipment. And, the multisensor CMM is suitable for placement in the middle of manufacturing cell operations: Its robust chassis resists vibration and particulate contamination while the available temperature-compensation software gathers both ambient and part temperatures and adjusts for them in real time.
2. Large part dimensions: The part inspected has a large Z-axis capability that can be handled by the CMM chassis.
3. The part has complex topology, delicate features: The hypothetical cast-metal part incorporates complex, compound curves that can be measured with a scanning laser probe. It also has deep heat sink fins and the fins' depth can be determined by a vision probe and the spacing by a touch probe. It also features a large flange with critically positioned bosses that have widely separated points that are quickly measured by touch, an array of small precision-located holes that are vision measured and an area of mirror surface finish that is measured by laser scanning.
4. Closed feedback loop. In this scenario, the robotically-loaded multisensor CMM feeds the measurement data back to the machining cell for automatic compensation should measurements drift to out-of-process limits.
The lines are blurry
If vision-equipped CMMs have many of the capabilities of vision measuring systems, the reverse is also true. Many suppliers of vision systems add touch probes or laser or scanning laser probes to overcome the limitations of vision systems to reach hidden features and other features parallel to the camera lens.So, should one think in terms of equipping one or the other type of machine configuration to handle all metrology needs?
For the foreseeable future, multisensor CMMs will not be able to match all the resolution, accuracy and sophisticated capabilities of dedicated vision systems that require both highly refined optical lens and lighting systems. That is because physical size constraints make it impossible to pack all necessary components into the envelope of automatic probe-change systems of a coordinate measuring machine.
But the closer an application is to fine measurement of 2-D features, the closer it is to depending on dedicated vision systems. If the inspection rate is going up and the capacity to measure a variety of parts and a range of features is needed, then take a hard look at the CMM chassis.
With the stability of its structure, the speed of its drives and the size of its measuring envelope, multisensor capability may provide the most flexibility and measurement capability for today's and tomorrow's measuring challenges.
TECH TIPS
• Already owned coordinate measuring machines can be reengineered to include vision, laser and other sensors.• Multi-sensor CMMs can be placed inside a closed-loop machining cell for 100% inspection of parts with large dimensions, complex topology or delicate features.
• Multisensor capability may provide the flexibility and measurement capability to meet future manufacturing needs.

