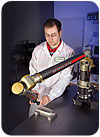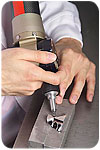
The Romer Infinite 1.0 articulating arm allows the capture of 3-D data from all critical aspects of a part as well as CAD-model-to-part comparison. Source: Romer Inc., a Hexagon Metrology company
Maintaining Quality
To maintain a high level of part quality, LSI began the search for a high-precision measurement system that would enable it to verify the thousands of parts manufactured in-house or arriving each day. The quality assurance technician would need to capture 3-D data from all critical aspects of a part and conduct a computer-aided design (CAD)-model-to-part comparison.The search led the company to a Romer Infinite 1.0 articulating arm from Romer Inc. (Wixom, MI) and PowerInspect inspection software from Delcam plc (Birmingham, UK). The portable coordinate measuring machine (CMM) is used to ensure part quality and manufacturing productivity in industries such as automotive, aerospace and ship/boat building.
“Our business is changing and developing,” says John Hamel, LSI quality assurance manager. “To compete successfully in this aerospace lighting market, we needed to change with the market. Our new designs primarily use LED and high-intensity discharge (HID) lighting sources that are intended to have high reliability with long service intervals. These systems require new thinking in terms of directing light using multiple parabolic curves and reflectors. These surfaces cannot be measured with 2-D measuring systems, and this need led us to this particular articulating arm technology.”
The Romer arm operates much like a human arm, but uses the company’s Zero-G counterbalance that offsets the weight of the arm and probe, allowing one-handed operation from any position. The counterbalance works equally well from any position in the arm’s reach, above and below the midline. The infinite rotation of the principal axes enables inspection of hard-to-reach areas and avoids damaging the arm against rotational hard stops. The carbon fiber arm enables high-precision probing and optional scanning capabilities.
Originally, LSI relied heavily on its suppliers for quality assurance. In some cases, suppliers missed the mark and parts were sent back. Hamel made the move to gain oversight of the process. At first, LSI sourced its quality control to a company specializing in industrial metrology. But eventually, they purchased the same portable CMM used by the metrology services firm-the Romer arm.
Since the purchase of arm, Hamel says it has not set idle for a single day. “We use it eight hours a day. Our business is booming, and our customers require quality products. In order for us to hit their requirements, we are obligated to buy and implement the best metrology solution for our quality control.”

Astronics-Luminescent Systems Inc. uses a portable CMM to inspect components that go into its aerospace lighting system products. Source: Romer Inc., a Hexagon Metrology compan
Manufacturing and Quality Converge
LSI handles millions of parts for its lighting systems. Some are manufactured in-house, and some are bought from distributors; however, the majority of components are produced by contract manufacturers. LSI brings all of these parts together under a quality management system and inspects them to specified criteria.The place where manufacturing and quality converge is Quality Assurance Technician Jared Demers’ work area, which consists of the CMM on a granite table, a computer, fixtures and magnets to help lock items into place for measurement. Demers has been using the measuring arm for nearly two years. He was originally trained to use an X,Y machine to gather 2-D measurements. There were similar features in the new PowerInspect 3-D inspection software, which he was quick to learn. During the learning curve, he invested time into devising ways to position parts on the table so the arm could reach all areas, some requiring two setup programs.
Each day LSI’s incoming inspection department receives parts from vendors or its sister company. Three samples are taken from each part run requiring CMM verification and sent to Demers for analysis. For every component inspected, there is an equivalent CAD file originating from one of LSI’s design engineers. An initial graphics exchange specification (IGES) file is requested from the owner engineer, as well as a blueprint denoting the areas for inspection, such as critical curves or reflectors, or the side of an encap or hole locations. If it is a special component, there is a lot of dialogue between Demers and the engineer.
As Demers gathers points from a part’s surface, the software lets him visualize whether the part is good or bad. After the session is complete, he generates a report and prints model views in a PDF format for documentation. If the inspection goes well, parts go forward. If not, a nonconformance report is written and then heads to engineering for rectification.
New Product Development
During the product development phase, LSI design engineers send Demers new parts and the related CAD models to see how close they come to the final iteration. “The organic shapes created by our engineering team are certainly the most challenging aspect of inspection and most often require surface data to help with dimensional verification,” says Demers.David Breault, LSI design engineer, creates both external LED-based and HID-based lighting systems. On a daily basis, he could generate initial concepts of a new product or interact with the quality assurance department. Breault was the first engineer to work closely with Demers after the implementation of the 3-D CMM. To begin the process, he created a CAD model that was exported into an IGES file from Solidworks or PRO-Engineer, their in-house CAD systems. Demers imported the 3-D data into the inspection software program. If there were any problems, Breault jumped in to troubleshoot the process.
“In the ramp up period, Jared and I worked through many projects and inspection routines,” says Breault. “It was a highly interactive process. I would provide a CAD model, and he would take the measurements based on our discussions. He could come back with questions on certain part features, and ask for particular data points in specific locations. I would export this data for another round of inspection. With odd contoured parts, I would also have to create surfaces for best fit calculations.”
Addressing Today's Needs
“With many of our lighting products today, conventional measurement tools are just not feasible anymore,” says Breault. “With a height gage, we would have to completely fixture a part with multiple angles or orientations. With the portable arm, within one or two setups, all points can be reached-including under the part.”Until about four years ago, the type of products manufactured by LSI could be measured with traditional gages. Today the company builds parts that it says would be impossible to inspect without the portable CMM.
“A major advantage of working with the 3-D measurement system is that I do not have to create multiple page drawings with many views,” says Breault. “The data is all there in the CAD file and can be transferred easily into the inspection system, which includes GD&T [geometric dimensioning and tolerancing] and more.”
Demers sets up inspection programs using Breault’s CAD models and targets a relatively even set of points. He can generate a data report and a visual reference showing points and their compliance with set tolerances.
“Our lighting systems have reflectors critical in mass that have to meet requirements set by a regulatory agency or the FAA,” says Hamel. “And to comply with those standards, we need to measure those items. The arm’s versatility sold itself. Our 3-D measurement capability sped up our in-process inspection and delivery has increased.”
Romer Inc., a Hexagon Metrology company
(248) 449-9400
www.hexagonmetrology.us
Delcam
(877) 335-2261
www.delcam.com


