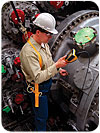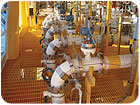
Thickness gages now allow metal thickness to be measured through coatings, both reducing the possibility of error and saving time and effort in removing coatings. Source: GE Sensing & Inspection Technologies
The president of NACE International, the U.S. professional technical society dedicated to reducing corrosion, said recently, “The cost of corrosion is a waste of resources and investments.” He then went on to state that the total cost of corrosion in the United States amounts to 3% of GDP. That is in excess of $300 billion annually. However, industry experts estimate that up to 30% of these costs can be saved by the implementation of current best practice corrosion control and mitigation techniques.
Corrosion is a natural electrochemical process that can break down metals-in particular steels-the primary means by which metals deteriorate. In fact, most metals corrode on contact with water and moisture in the air, acids, bases, salts and oils, as well as on contact with acid vapor, formaldehyde gas and gases containing sulphur. On an atomic level, when metal atoms are exposed to an environment containing water or aggressive elements, they can give up electrons so that they become positively charged and the metal simply dissolves as the electrons flow away. The net effect of this process can range from localized corrosion, where pits or cracks are created, to large area corrosion that results in substantial wall thinning.
The effects of corrosion can be considerable. It can create safety issues, affecting a company’s workforce. It can cause catastrophic failure of structural assemblies, such as bridges and buildings. It can have a detrimental effect on the local environment. It can be extremely costly, not only in production downtime and lost output, but also in possible compensation costs or fines imposed by regulatory bodies.
As result, all industries that use metals and metal assemblies, from the aerospace sector to oil and gas to power generation to civil engineering, are continually seeking ways to detect, mitigate or control the effects of corrosion. These measures range from using expensive, corrosion-resistant materials at critical points in a plant or structure; applying corrosion mitigating techniques, such as corrosion inhibitors and sacrificial technology; and measuring and monitoring the plant, structures and equipment to identify trouble spots and assess the extent of corrosion in order to take early remedial action.
Today, there are corrosion measurement techniques using all the major nondestructive testing (NDT) modalities: ultrasonics, radiography, eddy current, electromagnetics and remote visual inspection.
Eddy Current Systems
Eddy current technology is predominantly used for detecting corrosion in tubes, especially in heat exchanger circuits, although it does also find application in measuring coating thickness and in identifying any corrosion that is leading to near-surface cracking.Recent developments also have taken place in pulsed eddy current to detect sub-surface corrosion, primarily in the aerospace and oil and gas sectors. The wide frequency and depth range of instruments, which use pulsed eddy current technology, is much greater than that associated with conventional eddy current, as more information is generated for post-processing for display or for further analysis. With this advancement, there is no need to select a specific frequency for every inspection. Specific applications include rapid imaging of aircraft fuselages for corrosion in aerospace and inspecting for corrosion under insulation in oil and gas.

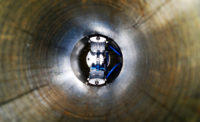
The latest developments in remote visual inspection have seen significant advances in the way that inspection data is managed, stored and used, in the quality of the digital data and in the portability of equipment. Source: GE Sensing & Inspection Technologies
Remote Visual Inspection
Remote visual inspection (RVI) is now an important inspection tool in every industrial sector, in much the same way that endoscopy and “key hole” surgery is now such an important procedure in the medical field. RVI is professionalized as an official NDT discipline and is a module within ASNT’s TC1A Level-III testing and certification process.RVI has been used to perform routine or emergency inspection in inaccessible and hazardous areas, such as small diameter pipes and tubes in boilers, product transfer lines, mechanical plant and equipment and small tanks and vessels.
The latest developments in RVI have seen significant advances in the way that inspection data is managed, stored and used, in the quality of the digital data and in the extreme portability of equipment. For example, the latest video probes allow inspection information to be stored in real time on an on-board DVD/CD drive and an inspector can create folders and organize and delete files on the on-board drive and even create reports, containing integrated saved images. The information also can be downloaded by means of flash drives or it can be transferred to remote sites by means of the Internet for collaboration and confirmation during live inspections.
The ability to carry out remote visual corrosion inspections in confined, hard-to-reach places with no compromise on image quality has been greatly improved with the introduction of new lightweight instruments weighing less than 4 pounds, while the introduction of application-specific software such as menu-directed inspection (MDI) is helping to improve probability of detection, while reducing the occurrence of false calls.
Digital Radiography
Radiography also is used in the fight against corrosion and especially for corrosion under insulation. Today digital radiography, and specifically computerized radiography (CR), is being increasingly specified.CR equipment is finding application throughout industry, where it helps to improve detection and provide accurate remaining wall thickness measurement and productivity due to the extremely wide dynamic range and high signal

One of the most recent developments in manual corrosion monitoring has been the introduction of phased array technology into thickness measurement. Source: GE Sensing & Inspection Technologies
Ultrasonic Inspection Techniques
Ultrasonic inspection techniques have long been applied to detect and assess corrosion. Because of the versatility of ultrasonics as a modality and because ultrasonic techniques offer minimum disruption to production and manufacturing processes, ultrasonic methods of corrosion inspection and monitoring are probably those most widely adopted and tend to be the technology of choice for many corrosion monitoring applications. These can be conveniently divided into manual and automated techniques and equipment.Manual ultrasonic monitoring essentially relies on measuring wall thickness on a regular basis at given locations. This is usually done using a thickness gage. Many years ago, thickness gages simply used compression probes to provide a reading of wall thickness, and conventional flaw detectors with a suitable compression probe often found application here. In fact, this is still done, especially with some of the new generation of flaw detectors.
However, conventional thickness gages have advanced somewhat and the latest equipment now offers features that allow metal thickness to be measured through coatings, both reducing the possibility of error and saving time and effort in removing coatings. Large capacity, built-in dataloggers make the measurement data available for further processing, as data files can easily be transferred to a PC via a USB interface for further analysis and storage.
One of the most recent developments in manual corrosion monitoring has been the introduction of phased array technology into thickness measurement. Using field-proven instrument platforms and specially developed phased array probes, phased array corrosion measuring instruments provide extensive linear coverage with every scan so that even the smallest corrosion pit can be identified, measured and evaluated, while inspection times are significantly reduced.
Typically, a phased array probe for corrosion monitoring provides 28 adjacent and discrete elements to allow extensive linear coverage. The instrument’s software then provides the ability to select and display the thickness measurement in each discrete beam, the minimum thickness in a current view and the minimum thickness recorded during a current scan since the last time the instrument was reset. There also is the ability to freeze a top view, which is similar to a conventional C-scan, and an A-scan is provided to confirm the readings in a traditional format. All data captured by the instrument can be downloaded by SD card in jpeg format for subsequent analysis and printing and the instrument’s on-board memory is sufficient to store the data of a meter scan.
However, there is often a downside to manual inspection, notably in the cost of erecting suitable scaffolding, transporting personnel to remote sites, removing insulation or lagging, excavating buried pipelines or even shutting down the plant. Moreover, the ever-growing shortage of suitably qualified NDT personnel has led to increased sophistication of corrosion monitoring systems and equipment, which aims to address this skills shortage by automating some of the inspection procedures.

Ultrasonic coupling is provided by the self-adhesive and, once installed, this sensor array can be coated in any conventional insulating or proofing material used to protect the pipe or plant. A remote sensor system is shown here. Source: GE Sensing & Inspection Technologies
Automated inspection is yet another area of increased sophistication in the inspection sector, in order to reduce inspection costs, address the skills shortage, minimize operational disruption and provide accurate data on demand. Long-range ultrasonic inspection is one such sophisticated technique. It is predominantly used to detect wall thinning in pipe runs, especially under-road runs, and uses the wall thickness of the pipe itself as a waveguide. However, most automated corrosion monitoring systems rely on remote sensors, which are located at points, where corrosion and erosion can be expected. Once installed, there is no need for all the subsequent tasks associated with manual inspection.
Automated inspection using remote sensors offers great potential for application in every industrial sector. Currently, remote sensors are used extensively in the oil and gas sector.
Remote sensor systems can be manual, semi-automated and automated and can be used upstream, midstream and downstream.
A basic system uses a flexible, multi-element, self-adhesive ultrasonic transducer array that is permanently bonded to the plant or pipe to be monitored. Each discrete transducer in the array can be accessed by means of a small, integrated control module. Ultrasonic coupling is provided by the self-adhesive and, once installed, this sensor array can be coated in any conventional insulating or proofing material used to protect the pipe or plant.
With a manual system, inspection data is collected by a portable data logger, which can be operated by unskilled personnel. It is used to fire up the sensors and can display inspection data in terms of wall thickness or rectified and unrectified A-scans on a built-in LCD screen. Typically, it can store data records from up to 100 sensors before uploading is required and a single data logger can be connected to up to 10 sensors on the same cable using a multiplexer. Measurement data also can be viewed on a PC.
The system can be semi-automated for use in hazardous areas by locating an ATEX-approved datalogger in the hazardous zone and downloading data at regular intervals. ATEX is a European standard relating to fitness for purpose of equipment in hazardous zones where there is a risk of explosion.
Automated inspection using remote sensors uses a system that is certified for operation in ATEX zone 2 locations. Data analysis can be carried out using bespoke software with data viewable via the operator’s corporate WAN/LAN system to any location.
An exciting recent development in remote sensing has been introduced with the introduction of high temperature systems, which will find particular application in downstream refineries. These can operate at temperatures up to 350 C, are clamped directly to the pipe or vessel to be monitored and connected to a single sensor interface. This interface contains the ultrasonic instrumentation to drive the sensors and transmits received data to a local PC via an RS485 serial connection.
Data collection intervals are programmable to meet specific needs and allow data on demand. A flexible software interface allows communication with a variety of inspection database management systems via open software interfaces and standard industry protocols such as OPC and MODBUS. As a result, sophisticated data analysis can be performed to provide accurate and reliable trending information. Both sensors and sensor interface are intrinsically safe for use in zone 1 areas. Typically, the new high temperature system can monitor the corrosion rate to control inhibitor, for example, to improve both plant versatility and profitability.
Corrosion is very much a fact of engineering life. Any structure, process plant or machine will be subject to some degree of corrosion or erosion unless it is held in a sterile environment or manufactured from an expensive, exotic material. As a result, measures to combat corrosion, and its effects, are vital for the structural, operational and financial integrity of anything that is man-made.
It also is important that the data produced by these advanced techniques can be reviewed, analyzed, locally and remotely, shared and archived. This is now possible using specially developed software. Some software platforms use off-the shelf hardware and the DICONDE protocol, which allow images from the major NDT modalities to be saved with context. This means that all the technique information and information on location, date, time and inspector is saved with the image. Such information can then be included in any report generated, while its inclusion with the image into databases means that database searches can be carried out on a variety of criteria.
Furthermore, systems also are being developed to incorporate process parameter data within total inspection information so that probable cause information can be assigned to corrosion effects to allow ever more accurate and speedy decision making and corrosion mitigation. NDT

