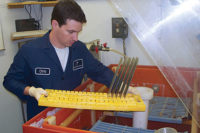
"They would look through the eyepiece, take a reading, and then look over at a sketch and write down the reading by hand," observes Gary Weller, a Sermatech program manager. In one program that requires 140 points to be evaluated on a series of cross-sectioned samples, the procedure could take five to six hours, Weller says.
But that changed in June last year, when Sermatech acquired a digital microscope system from Buehler Ltd. (Lake Bluff, IL). The set-up relies on an Epiphot 200 microscope from Nikon Inc. (Melville, NY), which links through a camera to a personal computer running Buehler software known as the Omnimet Archive Digital Imaging System.
Once a component sample is positioned under the microscope, the image is displayed on the computer monitor, eliminating the need for viewing through the eyepiece. "With the new system, you're looking at the monitor and you're using a mouse to measure the thickness, and as you take a reading, it actually documents the reading on an Excel spreadsheet for you," Weller says. The result is that the 140-point job that previously required five to six hours can now be done in about two hours, Weller notes. "This particular evaluation is done at least three times a week," he adds. "So we're seeing a big cost savings."
Sermatech applies a wide variety of protective coatings to turbine components for major power generation, industrial and aerospace customers. Sermatech aluminum ceramic coatings can improve aerodynamic surface finish on airfoils and stator vanes, for example. Other compositions that combine metals such as nickel, cobalt or iron with chromium, aluminum and yttrium are used to protect gas turbine components from heat and erosion.
"The majority of these coatings require a destructive method of evaluation," Weller says. The evaluations using the digital microscope system are made on cross-section samples cut from coated turbine components. The Nikon microscope provides magnification up to 1000X but is used most typically at 200X or 500X, says Weller. The Nikon unit was recommended by Buehler for its clarity and digital capabilities, he notes.
Besides measuring coating thicknesses -- which are typically specified at 0.005 to 0.015 inch-Sermatech technicians also perform structural analyses. Among other things, they check coating porosity and look for so-called "unmelts," where particles of coating material have not melted completely. They also check the interface between the coating and base material, looking for oxides, contamination particles or delaminations, Weller says.
In addition to being significantly faster than Sermatech's previous through-the-eyepiece evaluation method, the new system also serves as a good training tool for coatings equipment operators. "You can bring in the operator who sprayed a part and point to things on the monitor," Weller says. "It's a lot easier way to teach things than trying to get the operator to look into a microscope and saying, 'Look at 3 o'clock,' or 'Look at 6 o'clock, and see this or see that.'"
Depending on the application, some Sermatech coatings are machine-applied, while others are sprayed on by hand. For the hand-sprayed components in particular, the Buehler system has paid dividends by enabling operators to more easily see and understand problems and make needed corrections, resulting in what Weller says are "real improvements in quality."
In general, says Weller, "we've been extremely pleased with the whole set-up. It worked well from day one and we've had absolutely no problems with anything."
Buehler Ltd.
(800) 283-4537 Reply 11
www.buehler.com
Nikon Inc.
(800) 526-4566 Reply 12
www.nikonusa.com
BENEFITS
- The digital microscope system enables one evaluation job involving 140 different points to be done in about two hours, compared to five to six hours previously.
- The system is a good training tool for coatings operators, enabling them to easily view problem areas on the computer monitor.
- Coating thicknesses can be measured with the click of a mouse, and the system documents the readings an Excel spreadsheet.
