Quality engineers have a number of different technologies and approaches available today, each having their own strengths, to perform the measurement and inspection required to meet tight part tolerances and increasingly more stringent QC requirements. Options include hard gaging, touch-probe CMM, laser, air gaging and vision, to name a few. In this article, the question we’ll address is: when is optical measurement the right approach, and why?
The Need for Speed
For many applications, the number one benefit of optical measurements is speed. Optical approaches can capture a great many high accuracy data points within a single field-of-view, almost instantly. This will always be faster than a contact-based method, such as touch-probe CMMs that must physically move either the part or the probe to capture multiple data points. With the introduction of digital optical comparators, measurement is even faster as a result of advances in lens, camera and software technology which provide in a wider field-of-view than was previously possible with traditional optical comparators. For example, the image below shows a part that is almost three inches in size being measured in a fraction of a second.
Here, thousands of data points are captured over this roughly 3 inch x 3 inch area and various dimensions (i.e. diameters, angles, distance to edges etc.) are computed in the blink of an eye. In these types of applications, where an optical system is able to capture a great many high accuracy data points of a feature within a single field-of-view, the speed of optical measurement simply can’t be beat.
Single Solution
Applications can have a broad range of requirements and in many instances the ability to combine measurements and general inspection capabilities in one measurement platform is a tremendous benefit when using optical technology. For example, vision-based measurement provides the ability to take dimensional measurements as well as enables many different types of inspections including defect detection, color verification, pattern matching, assembly completeness verification, optical character recognition and verification, surface inspection, presence / absence detection and many more.
5-Axis Capabilities
As a noncontact technology, optical measurement can solve certain challenges where other approaches cannot practically be applied. One example is a situation where a part might be altered or deformed by a touch probe’s contact. Users of optical measurement should proceed cautiously, though, if the camera cannot detect a feature because it cannot see it—for example, because one feature is hidden behind another. To overcome this challenge, new, advanced 5-Axis digital optical comparator systems have recently been developed and introduced.
A 5-Axis digital optical system is able to tilt and rotate parts to view areas and features that would not be visible to the camera in a 3-axis system. These new 5-Axis systems are especially well-suited to work with parts with complex geometries and are opening up a whole new range of applications for optical measurement. Due to their precision double-rotary stage assembly, the new 5-Axis systems make it possible to properly view parts from all sides and angles to carry out fully automated inspection and measurement of complex parts to obtain operator-independent results.
Automatic Comparisons to CAD File
Offering a unique benefit for optical measurement, some optical comparators can offer the ability to both carry out measurements and also automatically compare a part to its CAD file. This is extremely useful in many applications, including those where profile tolerances need to be checked. Using the CAD Auto-Align tool with the system’s 3-axis joystick, the user only needs to coarsely position the CAD file on-screen near the part. The system then automatically lines up the CAD data to the part along one or multiple datum, or carries out an overall best-fit (the user can specify which approach is to be employed). And once the CAD data is properly aligned to the part in this way, the CAD Auto PASS/FAIL tool can then be used to automatically compare the part to its CAD file.
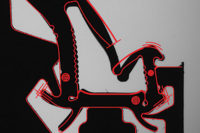
Along with an overall PASS / FAIL result, this tool can also provide deviations from nominal output, as well as many other types of measurements. The image on the left an example of the CAD Auto PASS/FAIL tool applied on a medical part. Results are operator-independent and much more accurate than those obtained using a traditional optical comparator. Situations where a part needs to be compared to its CAD data like this are ideal applications for this optical measurement technology.
A Case for Combining Optical Measurement Solutions
In some instances, there is a case for combining optical measurement with other technologies to produce more comprehensive results than using just one technique. A good example of this is when vision and laser are combined. The vision portion provides fast and accurate X,Y-Axis dimensions and the laser allows for fast and accurate Z-Axis measurements. The image above shows an example: it shows a seal slot on a forged aircraft engine turbine blade. Vision can measure the width and length of the seal slot and the laser can measure its depth to great accuracy, almost instantly. This is an excellent solution to an application that has historically been considered difficult and time consuming in the aviation industry.
Critical Documentation
Finally, and like many other measurement approaches, optical measurement solutions can be used to provide critical documentation for a QC process. Measured dimensions can be transmitted to and saved in databases, included in reports, etc. A benefit that is unique to optical-based approaches is the ability to capture images of both good and bad parts, to include them in the documentation along with the measurements themselves, and the resulting statistics for groups of measurements.
Quality engineers have many different technologies available to meet an application’s specific measurement requirements. Recent advances in the capabilities of optical measurement have greatly expanded the scope of the applications it can serve. And as a very fast, accurate, flexible and noncontact approach, optical measurement is expected to continue expanding its range of applicability in the future.


