Robert M. Smith has forged his career on embracing technology.
Smith grew up in the business - his father owned and operated a small machine shop with a diversified customer base and Smith spent several years learning everything “old school”- grinding, vertical grinding, turning, basically every type of machining using all forms of conventional tooling.
After earning his business degree from Boston College, he joined Raytheon and spent the next decade procuring a wide array of mechanical components in the both the Service and Missile divisions. And in dealing with machining shops of all types around the country, he perceived the groundswell of the wave to come - computerized functions of all types.
So in 1988, Smith made the leap. Armed with his background and a cashed out 401K, he purchased a small CNC lathe and some hand tools and started S&S Machine Company in Marshfield Massachusetts. “I invested in technology my whole life,” he says. He bought one of the very first office computers, installed early accounting software, and even managed to construct and program a homemade interface to convert his tape driven CNC to a digital model, saving time over standard tape entry or laborious hand entries.
Smith built a good reputation supplying high tolerance parts in the aerospace and defense fields and the company eventually grew to have 10 CNC’s and four more full time employees. But as the complexity and precision of customer requests grew, so did the need for faster QC with greater accuracy. Inspection was performed conventionally with indicators, height gages, sine bars and an optical comparator. It could literally take longer to check a part than it did to make it. S&S had moved from conventional inspection to 2 dimensional inspection using MicroHites and TesaHites, but Smith felt it was time to look into 3D inspection technology with CMM’s . And for Smith, that meant it was time to do some serious research.
Because of proximity and name recognition, he started by talking to Hexagon Metrology in nearby Rhode Island. He looked at the Browne & Sharpe Micro-Hite 3D, but quickly moved up to their shop floor 454 - even though it fell on the high end of his price range. He also researched Wenzel, Helmel, Nikon and Mitutoyo for pricing and specs on similar size machines. Through this research, he became aware of Advanced Industrial Measurement Systems (AIMS) near Dayton, Ohio - and particularly their AIMS Revolution CMM.
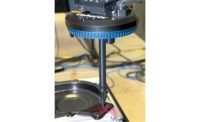
AIMS had married a Coord3 frame with the latest generation of Renishaw probing heads and tied them together with Modus software. He figured that if Nikon and Zeiss were also using Coord3 frames, then it had to be a solid foundation. But what impressed him the most was Renishaw’s PH20 head. It was a true 5 axis system that could handle everything he wanted to do. He started frequenting online machining and metrology forums - anywhere he could go to learn as much as he could about CMM technology and AIMS in particular. He wanted to hear first hand from users what they liked or didn’t like.
Smith spent months doing exhaustive research, weighing facts and finally decided on purchasing the AIMS CMM - even though it was 3 times his original budget. Everything he learned about the technology and the AIMS team convinced him that it was an investment that would repay quickly. He pulled the trigger and purchased it in 2011.
“They basically put the machine on the floor, gave us a little training and we’ve been happy ever since! This machine offers automation that dramatically reduces my time to check a part. The PH20 head has infinite motion and is far ahead of the others - you can check most anything - usually with just one probe...” He continues, “...and it’s automated enough that I could probably have my secretary do an inspection if I wanted to.”
We got a part in for a client in the defense industry - very complicated with multiple cuts and angled holes. It has a + .0001 tolerance with a surface profile of .004” and takes 4-5 operations to create with about a 1.5 hour cycle time. Speed is critical for us and inspection on that part was taking 2-3 days using a sine bar and an optical comparator for surface profiling. With the Revo (AIMS Revolution ®), we literally cut that time to 9-12 minutes!
“It’s fast and that speed is critical. Once programmed, it really reduces the time it takes to perform a first piece inspection prior to releasing it into production. I’ve always believed that technology pays, and the Revo has backed that up. And I like the printouts it creates - makes me look good to my customers.” Smith went on to state that it’s really the trio that makes it work - Modus, Renishaw and AIMS together - “In my opinion they’re ahead of everyone else in the field and the Revo is within the budget of any quality-oriented shop”.
After three years, Smith says it’s still the backbone of their QC operations. And despite the constant use it receives, he has every reason to believe it will last them a long time. “We’re very, very happy with it. I love the machine and the people - if I had to do it over again, I’d do it in a minute.”


