Anyone who knows anything about gears knows that gear manufacturing is a specialty requiring a great deal of expertise and expensive, dedicated equipment. For this reason, most machine shops leave gears to the experts. But what does a subcontractor do when its customer needs it to make gears?
"Take the job," was the response of a British supplier to a large American jet-engine manufacturer. This 50-person organization was asked to manufacture and warranty cylindrical gears for the aerospace manufacturer. Because orders from the manufacturer represented 30% of the shop's business, saying no was difficult. Management decided to accept the job to avoid losing the customer's confidence and the rest of its work.
"The shop wanted to prove that it could provide service," says Gary Hobart, general manager for the United Kingdom operation of CEJohansson (Irvine, CA), and the coordinate-measuring machine (CMM) builder that helped the shop offer it. "The difficulty was that the shop had never manufactured gears before. The whole gear world revolves around tables and data sheets, which can be a complex problem for the occasional manufacturer who can't go to a gear specialist."
Because noise in the gear set was one of the jet-engine manufacturer's major concerns, the shop had to learn in a hurry how to measure the pertinent parameters that can cause gear noise. Hobart says a growing number of contract manufacturers are finding themselves in similar predicaments. As large OEMs continue to consolidate their supply chains to keep component suppliers to a manageable number, they lose many of the specialists. Now the surviving suppliers are trying to recapture those pockets of expertise.
Among the difficulties in tooling up for the job was that the volume of gear production at the shop did not warrant an investment in a dedicated gear-inspection device. "The traditional choice was either to inspect from first principles, which involves a lot of hard work with sine tables, or to buy a dedicated gear inspection system, which can cost more than $250,000," says Hobart. "For people manufacturing gears only occasionally, a quarter of a million dollars is too much to invest in one part of the inspection process, especially if the gears are part of a crankshaft or a drive shaft that needs other measurements."
An untraditional choice
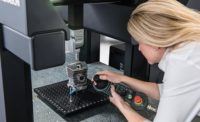
To get around the dilemma posed by the traditional choice, the company bought a less expensive, more ubiquitous piece of equipment, a $70,000 Topaz 7 CMM from CEJohansson. When outfitted with the builder's JoGear and JoWin metrology software, the 700-by-450-by-450-millimeter computer numerical control (CNC) machine can inspect gears and other parts made in the shop, allowing management to amortize the cost over a variety of jobs. Because the machine uses a relative scale for moving quickly and an absolute scale to establish position, the machine's volumetric accuracy by VDI standards is 3.8 + 4L, which is good enough for measuring Class 2 cylindrical gears.
The gear-measurement software, which can be used for beveled and rack gears in addition to cylindrical gears, is an attribute inspection system that compares the measured flank forms to the theoretical specified by the designer. Once an operator enters measurements into a gear datasheet, the software generates a master gear, stores it in memory, and generates the CNC calibration and inspection routines to industry standards. "It drives the machine following the master trace and compares the measurement data against a master gear," Hobart explains. "The reports are identical to those generated by a dedicated gear inspection machine. After a day of training, operators with limited to no experience in gear inspection can inspect gears."
Consequently, the shop was successful at offering a new service and keeping its customer's confidence. Hobart reports that work for this customer is now half of the shop's business.
According to Hobart, the JoGear and CMM combination also can be a good match for high-volume manufacturers and gear specialists. In fact, he notes, the impetus for developing the software was a request from a major automotive supplier for help in inspecting gears. "We reviewed about 18 standards and a whole library of gear information before creating the software for this large automotive manufacturer." Since then, the company added it to the package and has been offering it to job shops for a little more than a year.
The package also can help gear specialists by giving them the means to perform 100% inspection of low to medium-class cylindrical gears at the point of manufacturing. "Because of our CMMs' design, they can go into a manufacturing cell next to the production machines, which would free up time on dedicated gear inspection machines in these facilities," says Hobart. "Freeing up time on those machines allows them to offer faster turnaround and lower inspection costs. Therefore, their products are cheaper."
Although the software and CMMs have their advantages, Hobart does not recommend trying to replace quality engineers with such systems. "You want to make them part of the production process for measuring attributes that are likely to change," he says. "It can replace a dedicated fixture or gage, but don't try to reinvent the wheel by trying to put a standards room on the shop floor. It'll only bottleneck the process there.
"Let the quality engineers perform the analyses, rather than use them as inspectors. Everybody talks about zero defects and inspecting at the point of manufacturing. Ultimately, we have to free up people's time to do that. The CMM does that," Hobart says.
Software, good technique and a lot of common sense might not make the sometime producer an expert gear manufacturer, but they go a long way for those that are conscientious about offering service and making parts to print.


