There was a time when contact inspection equipment ruled the precision measurement world. Touch probes have been at the forefront of high accuracy applications since the inception of the dimensional metrology industry and physical contact was required for a precise recording of the material’s characteristics. The popular belief was that if touch probes were not involved, then everything was conjecture.
Before we delve any further into the topic, let us be clear on the definition of non-contact inspection. It primarily encompasses technologies that function using methods that involve no physical contact with the object under test. It is made possible by different light sources (such as lasers, or any broadband or narrowband light sources) that are directed toward the test object to record its characteristics and project it back to a receiving target. Following this, the data obtained undergoes post processing, where it is interpreted and analyzed via software algorithms to provide an accurate representation of the required data.
Technology Analysis-Trend Toward Non-traditional Technologies
While the earliest forms of industrial laser scanners came into existence only a couple of decades ago, coordinated measuring machines (CMMs) have existed for over half a century. These high precision machines continue to epitomize the exacting standards for high-quality in the dimensional metrology market. With consistent quality deliverances involving near sub-micron level accuracies, CMMs are the go-to equipment for customers in search of high accuracy metrology systems. In recent times, variations of the traditional CMMs, namely portable CMMs such as articulated arms and laser trackers have now made its way into the market. Currently, a combination of market dynamics and evolving customer needs have positioned non-contact inspection equipment as equal, if not better suited for certain applications, in comparison with CMMs.Laser scanners were among the first non-contact equipment to be commercialized and widely adopted among the dimensional metrology customer base. These precision systems have a different set of attributes that grant it access to a wide variety of applications across several end-user industries. The common denominator in these systems is the use of lasers as the light source. Barring that, there are several technologies within this category of equipment, with varying accuracies and modes of operation. Laser scanners can be broadly classified as those used with fixed CMMs, with portable arms and standalone scanners. As the name suggests, laser scanners with fixed CMMs and portable arms are used in conjunction with those technologies to perform the measurement; generally used in industries that require high resolution. The standalone category of laser scanner may refer to scanners that are either handheld or used with tripods for positioning. Laser line scanners are known for their speed of data acquisition and the flexibility they provide to the operating personnel with respect to acquisition and post processing of collected data.
Structured light scanners are known for their ability to measure large areas in a matter of seconds. These scanners predominantly use a white light source or a narrow band light source such as blue light or green light. While several vendors manufacture systems belonging to this product segment, a majority of solutions employ different techniques to make the measurement. As a result, the product range of system providers differs significantly in speed of measurement or maximum resolution obtained.
Vision Measuring Machines-Driving Non-contact Inspection
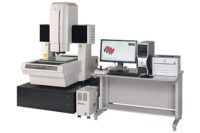
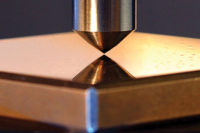
Optical metrology systems such as microscopes and optical comparators are among the earliest forms of non-contact inspection. These systems use visual inspection to compare components with an accurate scale or by magnifying the objects to several times its actual size for a closer examination. Measuring microscopes have been an integral part of the metrology world, primarily because of its simplicity and ease of use. Another product type with these highly desirable traits is profile projectors, also known as the optical comparators. These optical metrology systems continue to be among the first metrology equipment chosen by a customer, be it automotive or machine shops, looking to invest and build its portfolio of dimensional metrology solutions.Multisensor systems are a class of vision systems which rival CMMs, primarily due to the fact that they give the user the option of using multiple probes. One could argue that among these probes, contact probes are also used to a great extent depending on the application. This does not necessarily make it a contact inspection solution, though, as the primary probes used are video-based measurement systems. The video and touch probes, along with the laser probes, make for an enviable arsenal of sensors that can break down any application with the appropriate probe for its best suited operation. The touch probes are used to access hard to reach areas, especially in objects with complex geometries. Laser probes are used to take measurements of the various features and with high speeds. Video probes are used for an accurate measurement of edges as they can prove to be very tricky while using most metrology equipment, as any experienced metrologist would know.
Laser Micrometry-Precision to the Fore
Laser micrometers are used for sub-micron applications in a rather different set of applications when compared to the equipment discussed earlier. They are used for the measurement of parameters such as the inner and outer diameter, eccentricity or ovality, alignment, among others. As this equipment can also be integrated into the production line, they are capable of performing these measurements extremely quickly. As a result, they are primarily employed in a select group of industries, the most notable being the wire and cable industry where this equipment is irreplaceable because of its value proposition. Frost & Sullivan’s research has indicated that this market is growing at approximately 7 percent, placing it in a strong position for the future.Considerable progress has been made in non-contact inspection technology, with considerable research and development (R&D) efforts from a majority of dimensional metrology solution providers. Non-contact inspection has played a critical role in improving the market penetration capability of dimensional metrology. With new innovation seemingly absent or limited in a majority of CMM equipment, barring the portable CMMs market, scanners and other non-contact inspection have the driven this market to respond to changing customer needs.
Competitive Structure
In terms of the competitive landscape, the non-contact inspection equipment market is of a highly dynamic nature. Several renowned participants have different spheres of influence in the market, with a predominantly stable market structure. The major industry participants include Hexagon Metrology, Nikon Metrology, Mitutoyo, GOM mbH, FARO Technologies, Quality Vision International, Steinbichler Optotechnik, Perceptron, Kreon Technologies, Creaform, Breuckmann GmbH, ST Industries and Micro-Vu Corp., among others. The leadership positions of a great number of these product segments have remained with a single participant. Also, the top three to four market positions have remained with the same group of vendors in the optical metrology market, giving it a reasonably stable market structure.Hexagon Metrology, Nikon Metrology and Mitutoyo are present in a majority of product segments in the both the contact and non-contact inspection market. With tremendous market expertise and reputation, they share the leadership positions of most product segments between them. Both Nikon Metrology and Hexagon Metrology have a strong presence in the laser scanners market across the globe. Cognitens, a brand of Hexagon Metrology is a prominent participant in the white light scanners market and are known for its systems having the best inspection speeds in this market.
GOM mbH is the market leader in the white light scanners market. They were the first-to-market with the blue light scanners, and are expected to pave the way for other participants. Steinbichler Optotechnik and Breuckmann Gmbh are the other major participants in the white light scanners market. Quality Vision International, with its Optical Gaging Products (OGP) brand, is the market leader in the multi-sensor systems market. Other prominent participants include Micro-Vu Corp, Mitutoyo and Nikon Metrology. Mitutoyo is also the global market leader in both the measuring microscopes market and profile projectors. Nikon Metrology is also a strong participant in these markets, but they have a greater presence in the Asian market. LS Starrett Co. and ST Industries are other notable participants in the profile projectors market, while Olympus IMS, Leica Microsystems, Carl Zeiss Industrial Metrology and Vision Engineering are other prominent participants in the measuring microscopes market.


