A truck driver, seeking to overtake another vehicle, flips his turn signal. A busy mom opens the door to a washing machine. A CNC machine operator presses the start button to begin a cycle.
Throughout these everyday occurrences, a force was applied to a part or assembly to engage it. As consumers and employees, we are accustomed to applying a certain amount of force to accomplish a task. This amount of force is not coincidental, as engineers take into account the intended use in the design process. Whether meeting human ergonomics, safety, or other requirements, manufacturers must thoroughly evaluate samples from production lines to ensure that these specified forces remain consistent.
Numerous force tests result in sample destruction, such as the peeling force of a sealed medical device pouch or the crushing force of a pharmaceutical tablet. However, the focus here is on nondestructive force measurement, which engages an item in a way that does not preclude it from onward use. Let’s take a look at some applications:
Typical Nondestructive Force Measurement Applications
Spring testing
The first coiled spring appeared in the 15th century, and although advancements in materials and manufacturing processes have greatly increased their consistency and cost effectiveness, the basic operating premise remains. Springs are designed to store and release mechanical energy by changing the length of the spring itself. Tension (extension) and compression springs of many force ranges are used in countless products we use every day, from ballpoint pens to cars. For any spring, verification of the spring rate is critical. Determining this rate is accomplished by compressing or extending a sample until a desired deformation is achieved. Dividing the resulting force by the change in height equals the spring rate.
Wire crimp pull testing
Wiring harnesses help power and control everything from refrigerators to commercial aircraft. In helping to prevent failures, the quality of crimped terminals can be assessed by measuring the force required to pull off a terminal—a destructive test. However, nondestructive tests, such as those prescribed under UL 486 A/B, require a specified load to be applied to the sample for a specified period of time. If the terminal remains attached, the sample is considered acceptable.
Flip caps
Force measurement cannot escape us, even while taking a shower. Shampoo and hair care bottles are a perfect example of nondestructive forces. A common shampoo bottle contains a flip cap, featuring a small tab that can be flipped up by the user and re-secured. The amount of force required to flip the cap open, and then click it closed again, must be closely monitored to ensure acceptable operation by the consumer. A cap that was too easy to flip open might cause a spill, while one that is too tight would frustrate the bather.
Force Measurement Instrumentation
Measuring force is achieved with a wide range of portable and cost-effective instrumentation, reflecting the complexity and force range required for the test. In any force test—destructive or nondestructive—a minimum force requirement or force range is established by the manufacturer and test results are compared to these acceptance criteria.
Force gage
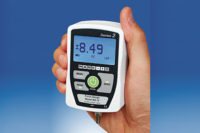
One of the most basic force measuring instruments is the digital force gage, a handheld device containing a load cell and digital readout. The gage will typically display force in units of pounds, Newtons, or kilograms. A force gage is at home in virtually any lab or tool crib, and is a versatile instrument for numerous destructive and nondestructive requirements. Force gages are available in a wide range of force capacities, generally from 0.12 lbF (0.5 N) full scale up to 2,000 lbF (10 kN).
Test stand
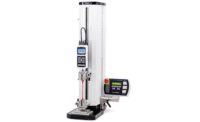
Although handheld force gages are useful in basic measuring applications, it should be mounted to a test stand for better accuracy and consistency in more stringent testing environments. Test stands axially align the force gage and provide ample fixture mounting locations. Certain samples are more sensitive to off-axis loading, as extraneous stresses can lead to an invalid test result.
Test stands vary by force capacity, sample size, and loading type, but motorized versions are recommended because of their ability to move at a consistent rate of speed. Consistent speed reduces variability from operator to operator, which can affect the accuracy of measurements in some cases.
For tests requiring the characterization of a sample based on force and deflection, such as spring testing, travel measurement is a generally available option.
Accessories
Thousands of different sample holding fixtures were developed over the years to cover a broad range of industries and requirements. However, tool and die makers are still needed for unique sample dimensions or testing needs.
Making Sense of the Data
Data is typically transferred from the instrument to a PC via USB or RS-232 communication in one of the following ways:
Discrete data points
Individual data points may be saved from multiple tests, typically a collection of peak force measurements, such as the force required to flip open a bottle cap.
Discrete force data points at a specified distance
The force measured at a specified distance is common in applications such as spring testing, foam testing, tensile testing of materials, and other applications.
Continuous output of force vs. time
A continuous output of force vs. time, with corresponding graph, can help the user better understand the behavior of a material or assembly. For example, an acceptable sample may produce a straight curve from the start of the test to the finish. An unacceptable sample can be detected if the graph is bowed, for example, or has spikes or other anomalies.
Continuous output of force vs. deflection
As with force vs. time, a graph of force vs. deflection is helpful in evaluating the performance of samples which compress or stress in a controlled manner, such as springs, elastomers, foams, etc. Advanced materials testing values, such as Young’s Modulus, rupture, and ultimate tensile strength may be calculated from the raw force and deflection data.
Force measurement instruments and their associated data collection software can automatically calculate statistics from the test data to provide actionable data for quality control managers.
Conclusion
Through the use of nondestructive force measurement techniques, many materials, assemblies, and components can be properly evaluated without damaging them. Force measurement results arm quality control and production professionals with the data they need to ensure a reliable supply of high quality products, the way their engineers intended.


