
What is it?
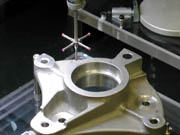
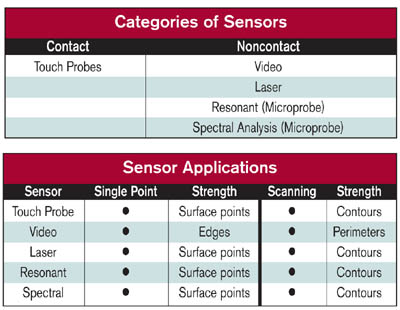
There may be some confusion about what a multisensor measurement system actually is. All measurement systems use at least one type of sensor technology. The sensor collects data points from a part to obtain a measurement. It is the probe, or detector, that "senses" the part.Sensor technologies can be grouped in two major categories-contact and noncontact. Contact sensors are those that apply any pressure to a part to obtain a measurement. Coordinate measuring machine (CMM) touch probes are the most common type of contact sensors.
Noncontact sensors do not require physical contact with the part. There is a broad range of noncontact sensor technologies that use cameras for optical imaging. Laser scanners use optics and detectors to capture laser light reflected from a surface. New microprobing technologies use resonance technology or spectral analysis of light related to the distance between the probe and the surface. Any combination of contact and noncontact sensors on a single measurement machine makes it a multisensor measurement machine.
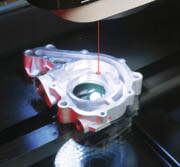
The three sensors commonly referred to are touch probe, video and laser. Touch probe typically refers to a touch-trigger probe such as those commonly found on a CMM. Video refers to video measurement, as with dedicated measurement machines with lighting, optics and software for measurement of video images of a part. Laser means a light source to illuminate a specific part of the surface and the associated detector to collect the reflected or scattered light. But other sensor technologies are in use, especially those in the realm of microsensors.

Sensors in use
An important factor in sensor selection is in how it is to be used. At the simplest level, sensors are used in one of two ways-single point at a time, touching the surface of an object to gather data, or continuous scanning of the surface to collect a multitude of data points. In touch-trigger probing, the probe is moved to individual locations on a part, point-to-point. The sequence is to move to a location, approach the surface, make a single contact and collect that data point, back away, move to another location and repeat the process.It is possible to use a scanning probe on some multisensor metrology systems. To scan, the probe makes contact with the surface and maintains contact as it moves across the part. While scanning the surface, data points are continuously collected. Scanning probes acquire more data points more quickly than touch-trigger probing, but they have the added complexity of stage control requirements to maintain surface contact across surface deviations as the probe or part moves. In addition, system software must retain the spatial relationships of all the data points.
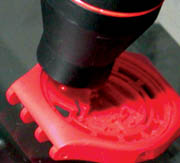
New versions of most sensors are capable of scanning. Laser scanners move a laser point or line across a part, continually collecting data points.
By scanning a part while collecting focus points in the optical field of view, a video measuring machine can develop a three-dimensional contour map of the surface. Edge scanning, or tracing, uses a video system's edge-detection capabilities and closed-loop stage control to scan the perimeter of a part, even if the perimeter extends outside the field of view. A video measuring machine can continually acquire focus points as the part or optics are moved. Zoom optics allow scans to vary in resolution, to accommodate changes in surface texture and feature sizes of a part.

Sensor data
In multisensor measurement systems, data points can be acquired by numerous sensor technologies. For example, a touch probe can access single points at the base and sides of a counterbore. Video can trace the outer perimeter of the entire part. A laser can scan an undulating surface. Microprobes can collect data points in a critical orifice too small for traditional probes. Analysis of all the points from all these sensors is based on where those points exist in the system's measurement volume.
Acquired data points are used to determine dimensions or angles between the points. It makes no difference whether those points were acquired by single-point probing or scanning-a data point is a data point. This means that a multisensor metrology system can use a sensor best suited for specific part attributes. It can produce measurements of complex dimensional forms and surface relationships simply not possible with single sensor systems.

Why use multisensor systems?
Once a measurement routine is created, computer numerical control measurement machines follow that routine automatically. So, no matter how many sensors are used, how many measurement steps are involved or how many times sensors are changed in a routine, that process is followed every time that measurement routine runs. The automation of multisensor measurements leads to a fundamental benefit of multisensor metrology systems-they can save time.
The value of a multisensor metrology system depends on the complexity and mix of products to be measured. Complex products can benefit from the ability to use multiple sensors to more fully characterize parts than is possible on any traditional single-sensor measurement system. On the other hand, a mix of different parts, with varying feature sizes and dimensional tolerances, can benefit from the availability of sensors ready for every situation.
Choosing a system
When deciding on a multisensor measuring system, start by understanding which sensors are available on each system and what they can do. Then, look at how tightly the different sensors are integrated in each system's measurement software. Many systems are actually single-sensor systems with other sensors added. Such systems are optimized for the primary sensor, but not for the others. True multisensor systems have software functions that optimize the performance of all the sensors.
Another consideration in system selection is how well the system supports sensor changes during a measurement routine. Most people are familiar with a CMM using a change rack for switching probes during a measurement routine. The CMM drops off one probe and picks up another under program control. Similar mechanisms make it easy to switch between sensors on a multisensor metrology system without operator involvement. Some designs retract sensors into the body of the system, automatically deploying them only when called on by the measurement routine. Such designs speed access to other sensors, while reducing the potential for sensor damage because unused sensors are out of the way.

Total solution?
Many offices have a multifunction machine that prints, scans and faxes. They replace separate printers, scanners and fax machines that specialize in each function. The separate machines do the job, but each takes up space, has utility requirements, needs service and training and makes someone handle the paper several times to get all the jobs done.Multisensor measurement machines are similar to multifunction office machines. One measurement system takes up less space, uses fewer utilities, requires one training and service obligation, and minimizes part handling and fixturing. In this era of continual productivity improvements and cost reductions, a multisensor metrology system can be an important way to meet those objectives. Q