According to Al LaVezzi, president of LaVezzi Precision, closer tolerance ranges is a trend for manufacturers in the machining industry. "The tighter the tolerance in machined parts, the better," said LaVezzi.
One of the components LaVezzi Precision measures is aircraft planetary gear housing. True position of holes that have extremely tight sizes and position tolerances had to be exact. "We had concerns about being able to verify the true position of the machined holes on the part, and we did not want any reliability issues with our customer," said LaVezzi. "We did not feel that our coordinate measuring machines (CMMs) were up to the task."
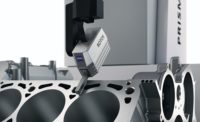
After researching several CMMs, the company chose the Eclipse with Calypso computer-aided design (CAD) software developed by Carl Zeiss IMT Corp. (Minneapolis) because of its precision measurement capabilities and part reliability.
With true geometric tolerancing, both the size and position of the hole is considered. The software allows operators to accurately measure the size of the hole and its position. The company had to meet a true position tolerance of within 0.0003 inch as the machine repeats to within millionths of an inch.
The machine has allowed LaVezzi to inspect parts to prove part accuracy. "Our clients often require 100% final inspection of machined components, as well as documentation to prove part accuracy," said Lisabeth Cummings, quality manager at LaVezzi Precision. The CMM and its software has enabled operators to take complex measurements quickly and accurately and document the collected data.
The software is compatible with CAD-based CMM programming, and works in a Windows NT environment. Operators using the software can import CAD model files to create inspection programs, which reduces the need to recreate part programs. If no CAD file exists, operators have the option of entering part data or gathering dimensions using a reverse engineering process to automatically generate CAD geometry as the Eclipse measures.
The program used in the CMM is object based and eliminates the need to write sequential part programs, said Cummings. Operators do not need special codes, languages or sequences to edit programs. The program allows operators to drag and drop graphic icons to create drawing characteristics or change the order of the inspection process.
Using the Eclipse with Calypso has resulted in increased measurement accuracy and decreased inspection time. The CMM measures up to or down to 0.5 true position, which is something that could not be obtained previously. Once a program is set up in the machine, operators load parts, push the button with that part program, and it runs. Because operators don't have to create or set up new programs each time, inspection can be done within minutes instead of hours, Cummings said.
Carl Zeiss IMT Corp.
(612) 533-9990 Reply 11
www.zeiss.com
