Until now, the power of seeing through walls has been reserved for superheroes with X-ray vision. This meant that manufacturers of plastic and composite components often had to cut or break apart a prototype or product to measure and analyze internal features and identify discrepancies. This was difficult, time-consuming and potentially expensive. If a manufacturer wanted to conduct a complete dimensional inspection (first article inspection), compare a product with its computer-aided design (CAD) drawing, or compare parts made by two different facilities or tools using traditional metrology methods, the process was complex and could take several days or weeks.
Today, three-dimensional X-ray computed tomography (CT) scanning (metrotomography) offers manufacturers the most advanced and powerful tool available for industrial metrology and the validation of products made from plastics or other low-density materials. With industrial CT scanning, manufacturers can literally see inside their products to identify design issues and production discrepancies, ensure lot-to-lot consistency and derive highly accurate and detailed measurements of internal components. This fast and nondestructive approach also helps accelerate project completion by reducing the time required to qualify parts for production.
Use Case: Inoperable Water BottleCT scanning is ideal for inspecting complex plastic parts, but it’s also a great tool for analyzing practical, everyday items. During a tour of 3D ProScan’s 3-D X-ray CT scanning facility by quality engineers and manufacturing experts, a water bottle fell to the floor and would not shut afterwards (see figure 2). The team decided to scan it to see what was wrong. The scan revealed that a chunk of plastic on the inside of the cap had broken off and prevented the cap from coming all the way down on the bottle (see figure 3). When this practical case study was presented to the audience, they immediately saw the benefit of using CT scanning to troubleshoot a part issue without breaking it or cutting it open. |
This sophisticated technology, which evolved from initial applications as a mold qualification tool, has been exhaustively tested for high accuracy and performance. In addition to its suitability for multiple use cases, industrial CT scanning offers customers the convenience of an easy-to-use, interactive software viewer that provides remote access to data and visual output of the scan.
How 3-D X-ray CT Scanning Works
Computed tomography scanning, invented in 1972, uses irradiation (usually with X-rays) to produce 3-D representations of the scanned object. X-rays are directed at parts or assemblies for the purpose of capturing precise images of all internal and external components.
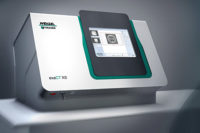
In a typical process for 3-D industrial CT scanning, a part or assembly is secured within the scanner on a custom expanded polystyrene foam platform, with no physical fixturing to affect the item, so that it remains in its free state. The CT scanner rotates the article a full 360 degrees, stopping every third of a degree to capture an image. During the scan, which typically takes 45 to 60 minutes, a total of 800 to 1,200 two-dimensional images are captured virtually. A detector and the computer linked to the detector then calculate volume and distances of the part. Then the 2-D images are constructed into a precise 3-D point cloud of the scanned part or assembly. Also, multiple smaller parts can be scanned at the same time for efficiency.
This technology is highly accurate—within five to seven microns (0.0002” to 0.0003”)—and provides a view of all dimensions and features. The degree of accuracy delivered by 3-D X-ray CT scanning is comparable to that of many coordinate measuring machines (CMMs).
This sophisticated imaging technology can provide virtual cross-sections and analyses of complex internal features, supply measurements such as wall volumes and distances between walls and indicate the size, shape and location of voids and inclusions.
Advantages over Traditional Metrology Devices
Many advances in CT scanning have enabled its use for metrology, analysis and inspection in the industrial field. A key benefit of 3-D X-ray CT scanning is the ability to view, inspect and measure interior areas, features and components without disassembly or destruction of the part, unlike other technologies—such as laser and white light scanners, CMMs and visual/optical instruments—that are able to measure only the exterior of a part unless it is disassembled. Also, unlike traditional metrology techniques, no fixturing is needed for the scan.
Once the scan has been completed, the customer can remotely examine and manipulate the results using a special software viewer. These results can be saved, recalled or exported at any time.
Another important advantage is speed of product qualification, troubleshooting, analysis and other procedures. Using a CAD model and blueprint drawing, a part can be programmed ahead of time for dimensional inspection. Once the part has been programmed, a dimensional inspection report can be generated in just a few minutes, which leads to faster decision making and faster product validation. For example, a dimensional inspection conducted with 3-D X-ray industrial CT scanning can take only two hours vs. the possibility of 20 hours using optical measuring equipment, and a highly complex, multiple-cavity part with 90 dimensions required seven hours with the CT scanner compared to 50 hours with traditional metrology (see figure 1).
The exceptional speed of 3-D CT scanning can cut development time, avoid time-consuming rework and accelerate the market launch of a product, helping to recoup research and development investment more rapidly and achieve a competitive advantage.
Applications for 3-D X-ray CT scanning
In addition to being fast and highly accurate, 3-D X-ray CT scanning is exceptionally versatile, offering customers a choice of services.
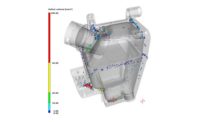
- Part-to-CAD comparisons: This time-saving process compares the CAD model with the part. The 3-D-generated point cloud is overlaid with the CAD model to spotlight dimensional deviations and identify accuracy issues. Different colors indicate deviation from the standard, including excess or insufficient material and positive or negative warpage.
- Part-to-part comparisons: Part-to-part comparisons can reveal dimensional deviations between different parts from the same mold, or between parts produced from different lots. By viewing the comparative, color-coded 3-D image depicting the CT results from the two parts, customers can identify dimensional differences, compare a “gold standard” part to production parts, pinpoint lot-to-lot or tool-to-tool deviations and troubleshoot issues.
- Dimensional inspections: With the ability to program dimensions using a CAD model and part drawing, CT dimensional inspections often provide results in half the time of traditional industrial metrology techniques. After programming is completed and the CT scanner scans the part, a full dimensional inspection report can be generated in a few minutes.
- Assembly analysis: Assembly details are often overlooked and missed because of the difficulty of observing them. Industrial CT scanning allows voids, inclusions, seals, fit, interface and interference to be reviewed and analyzed quickly and easily without sectioning or disassembly. Previously hidden components in an assembly can be easily inspected to find poor fit and function.
- Reverse engineering: The 3-D point cloud from the 3-D CT scan of a part or assembly can be converted to a stereolithography (STL) data file to be used for generating a CAD model. With the new CT generated CAD model, 3-D printing or molding of accurate prototypes is easy and efficient.
Conclusion
Industrial CT scanning is a high-precision, non-invasive technology for measuring, analyzing, comparing and reverse engineering plastic and composite parts and assemblies, whether small or large, simple or complex. This advanced technology saves significant time and effort, allowing projects to be moved into production quickly and providing convenient access to CT scan results via a software viewer.
Unlike other metrology tools, 3-D X-ray CT scanning provides a detailed view of internal components, features and dimensions without destruction or disassembly of the part, preserving valuable prototypes and components. By optimizing part measurement, troubleshooting and analysis, this technology can accelerate time to market and help ensure consistent quality across all manufacturing operations.


