Home » Keywords: » computed tomography
Items Tagged with 'computed tomography'
ARTICLES
Measurement
With its precision, 3D scanning distinguishes itself from conventional measurement tools.
Read More
NDT | X-ray CT
High Speed X-ray Computed Tomography for Quality Control
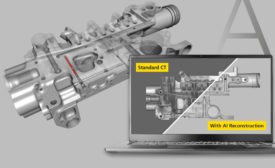
Advances in X-ray computed tomography enable rapid nondestructive, 3-dimensional inspection of die casted and molded parts.
May 20, 2024
NDT | Neutron CT
Neutron Computed Tomography Offers Unique Inspection Capabilities
Unlike standard x-ray computed tomography, neutron CT offers unique capabilities for inspections that cannot be effectively performed using traditional methods.
May 16, 2024
NDT | Computed Tomography
Revolutionizing Manufacturing: The Growing Trends of Industrial CT Scanning
The adoption of industrial CT scanning has transformed product development, manufacturing, and delivery cycles across various industries.
May 15, 2024
NDT | Computed Tomography
The most effective and precise battery inspection technology
It’s the tiniest defects that are the major problems today.
January 8, 2024
NDT | Computed Tomography
Creating the Future of Mobility with CT Inspection of Batteries
Industrial x-ray and CT inspection supports quality control and failure analysis at all stages of a battery's lifecycle.
September 21, 2023
Aerospace | NDT in Aerospace
How Advancing CT Analysis Capabilities Support Collaboration and Product Quality
The looping of CT analysis via digital models can improve every aspect of the design-to-production cycle.
July 10, 2023
NDT | Computed Tomography
Industrial X-ray/Computed Tomography Operator Training: Turning Expectation into Actualization
The system’s potential remains locked inside the machine unless employees are properly trained to operate it.
June 14, 2023
Case Study
A Complete View: Quality Assurance for Premium Headlights
Quality assurance at ZKW Lighting Systems had increasingly reached its limits with conventional measurement technology.
February 10, 2023
Stay in the know with Quality’s comprehensive coverage of
the manufacturing and metrology industries.
eNewsletter | Website | eMagazine
JOIN TODAY!Copyright ©2024. All Rights Reserved BNP Media.
Design, CMS, Hosting & Web Development :: ePublishing


