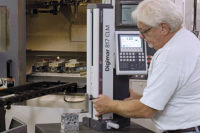
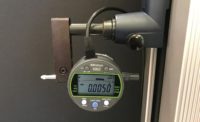
With its long range of motion, the digital height gage can be thought of as a giant caliper, but one with the accuracy of a much more sophisticated benchtop gaging system. As such, digital height gages are extremely versatile and capable of performing a wide range of measuring tasks quickly and reliably. Plus, they are easy to set up, use and maintain.
Digital height gages consist of the base plate, the height measuring station, and the control/evaluation display. The measuring station is suited for one-dimensional coordinate measurements in a vertical direction, and is therefore used primarily for determining diameters and distances between points on the test piece. Two-dimensional measurements are possible however, if the test piece can be tilted by 90? and the control/evaluation display has the capability of calculating the 90? coordinates.
Height gage measuring area is limited by the size of the base plate and the stylus. Some gages are capable of measuring up to 1,000 mm/40” or more, but most fall into the 600 mm/24” range, and are most often used in the lower 300 mm/12” of that range. Since the base of the height gage is part of the measuring circuit, the base plate on which it rests is important. Height gages should be used on a grade 0 or grade 1 granite base plate. The granite plate should be mounted on a vibration-insulated stand to help eliminate vibrations from punching machines, machining centers, fork trucks driving by, etc.
The quality of a measuring result depends on the quality of the measuring instrument and the care with which the measurement procedure is performed by the operator. Here’s how the operator can contribute to the quality of the measuring results.
On a day-to-day basis the gage should be given the once-over prior to use:
- Wipe off the table and contact probe, and clean up the area around the gage.
- Turn on the gage and let it set its “zero” reference location.
- Let it sit for a minute, then zero it again to check for repeat.
- Although the probe diameter is stored in the memory of most height gages, it does not hurt to re-master on the probe diameter occasionally.
The above basics are sufficient for probably 80% of the applications for height gages. Usually the electronic height gage is used to measure heights. But the world is not so simple. There are also diameters, center distances, bolt-circle patterns, teeny-tiny widths and grooves, and so many more seemingly inaccessible part features out there that need to be addressed. Here are some of the lesser known features built into today’s height gages that may help you not only make the measurement required but also speed it up and make it simple.
Probes for every occasion
We know from experience that using a height gage requires that once the height gage is set in place there are two critical references that must be set. The first is the zero reference for the measuring system. Today height gages include an automated system for doing this by driving the probe down to touch the granite surface to zero the gage.
The second and most important reference is the correction for probe diameter. If the height gage is to be used for grooves, diameters and hole location, probe diameter is critical, and must be taken into account. This is easy with today’s gages as an automated process and a special tooling fixture determine ball diameter automatically. Here are some tips on getting the most from your probes:
Multiple probe diameter storage: A feature built into many height gages allows multiple probe ball diameters to be stored in the height gage controller. What this means is that the general purpose probe which typically has a 10 mm diameter ball can be the working probe for most dimensions, but you can also recalibrate another probe—say a 2 mm ball for that small groove feature—which is only used occasionally. When the operator changes the probe for that small groove, he simply calls from memory the new probe diameter. Once the check is made the probe is switched out and the old probe ball diameter called out. This saves doing probe calibration in the middle of the measuring cycle.
Twin tipped probes: Most accessory probe kits for height gages include a probe that has two tips on it, one at a right angle to the other. The horizontal tip does the majority of the work while the vertical is available for getting into blind holes or grooves. The height gage controller can be set to store the probe diameter of the horizontal probe ball and the reference point for the vertical probe. During measurement the operator can select the correct probe for the check, and the right reference point is automatically brought into the measurement. Or if this was part of a stored gaging program that correct probe would automatically be used.
Probes with deviations: Sometimes special probes are designed and built for very deep small bores, and as such, they are apt to have an inherent deflection. Deflection is one of the big enemies in precision measurement. However, with a little testing, by comparing a standard probe to the special probe, a probe deflection constant can be calculated. There is a function in some height gages to store and use this proven deviation as part of the measuring process, thus improving the results.
When a probe has an edge
With a standard ball probe, measuring hole diameters is a piece of cake. There are automated functions that sweep the hole and calculate the diameter and locate the center of the hole to the reference point. But sometimes holes are not straight, but tapered, and we are challenged to measure the angle of the taper. For these measuring tasks a probe with a cylindrical contact is used which gives us a sharp edge to measure the taper angle.
To calculate the taper angle we need to know two diameters and the distance between them. So the question is: if the gage uses its height scale to measure the diameters, how can it measure the horizontal distance between them? The trick to do this involves the machined reference surface that is on the front of the bottom of the height gage. It acts as a horizontal reference for a part. With the use of a gage block you can precisely move the part away from the height gage to get the distance needed to calculate the angle:
- With the cylindrical probe in place, find its diameter using the procedure for a ball diameter.
- Bring the tapered hole to the height gage and position it to measure the large diameter. Measure the large diameter. Now place a 10 mm gage block between the part and the height gage, thus moving the part precisely 10 mm away. Measure the small diameter.
- The height gage controller will have a procedure to take these two diameters, plus your input of the 10 mm distance, and calculate and display the taper angle.
Multiple zeros
If life was really simple design engineers would set one side of the part as a datum and all part dimensions would be taken from that point. When using a height gage that would be ideal, simply rest the part’s datum on the surface plate, set the reference with the basic probe on the height gage, and start making length checks. Of course, things are not always that simple, but have no fear. There are many options available to use multiple reference points.
With some parts the datum is a machined surface somewhere on the part. From there all lengths may be taken. With the height gage reference set to the top of the surface plate, however, it would seem to require a lot of calculations (always subtracting) to determine the various part heights from the datum. Not so. Most height gages have the ability to set a new zero point anywhere on the part. It’s quite simple: the gage’s zero point has already been set when the probe was brought down to the surface plate. Now bring the probe over to where the new reference or datum is going to be and make a length measurement. Once measured, go find the “Workpiece zero point 01” and use it to set the new reference. Now this point will become “0” and all measurements will be referenced to this new point.
In fact most gages allow one, two or three zero points to be set on a part and then allow switching between these set points during the process. Thus, no calculations are needed and the results are easy for the operator to interpret.
When zero becomes a number
Just as we have made the measured value a reference point for the gage, you can also make the zero a specified value, as well as the measurements made from that point. So instead of being zero, it may be 20 mm or whatever value is deemed necessary: a pre-set value. Why are all these zeros and preset values needed?
Sometimes the part does not have a flat surface to rest on. Rather than trying to balance it on its side (in the case of a round part), fixturing is used to mount the part on a right angle knee and lock it in place. Then the height gage is brought over to the part and a datum is located on the part. This “found” surface now becomes zero or some preset value. In these applications the surface plate is a reference for the height gage, but the part has been found, a datum defined and zeroed, and measurements made from there. All within the computing power of the height gage controller.
Expanding the measuring range of the gage
Height gages typically come in one of three common sizes: 350 mm/14”; 600 mm/24”; or 1,000 mm/40”. But just because the slide movement is fixed at this length does not mean larger parts can’t be measured. With a long gage block and a flip of the probe, larger sizes can be accommodated.
Let’s say we have a 600 mm height gage and we need to measure a part slightly larger, 650 mm for example. Find a gage block that is larger than the length of the arm on the height gage. In this case a stack of 150 mm is good.
Place the gage block under the probe and use the reference function to bring the probe down to set the reference. The height gage will show “0” on top the of the 150 mm block stack. Here is where the preset function will add 150 mm to the height of the gage’s capacity. Use the preset function to set this reference point to 150 mm. Once done bring the height gage up to its tallest point and notice that it does not read 600 mm but rather 750 mm. You have just increased the range of your gage without having to purchase a larger one.


