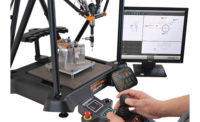
FARO announces the release of CAM2 Measure 10.5, its latest software for the FaroArm, FARO ScanArm, FARO Laser Tracker, and FARO 3D Imager.
CAM2 Measure 10.5 leads the market with its capability to connect multiple 3D measurement devices, within the same coordinate system, and simultaneously scan into a single seat of software on one computer. This capability allows users to seamlessly scan large objects with higher speed and more precise accuracy in order to complete 3D scanning jobs faster.
Significant advancements to Geometric Dimensioning and Tolerancing (GD&T) functionality provide users with streamlined analysis and visual reporting. A part inspection can now be displayed just like a print to easily visualize and determine part quality. This enhanced functionality eliminates the need to look at each feature in sequence to make the same determination.
Workflow efficiencies are maximized with the ability to automate repeat inspections by programing data analysis to automatically occur after the measurements are taken. This new capability reduces required training time, significantly reduces the risk of operator error, and accelerates job completion times.
Additional enhancements include expanded point cloud capacity and the ability to easily scan trim edges. Users are now able to collect over 20 times more data than our previous versions while maintaining accelerated processing speed. New capabilities also allow trim edges on materials such as sheet metal to be easily scanned, essentially eliminating the need to collect hard-probed measurements on part edges.
FARO


