The debate raging over fuel economy and global competition is fueling a quiet revolution in the auto industry. The automakers are converting increasingly to plastics to make their products ever lighter and more cost-competitive. Some have even gone as far as experimenting with plastic powertrain, chassis and suspension components.
The trick, of course, has been to develop manufacturing processes capable of producing parts that are both strong and dimensionally stable enough for these applications. Because many of these parts require very tight tolerances, these processes must account for shrinkage and correct for any warpage that might occur. The materials themselves also must resist wear at least as well as metal and remain stable over a range of temperatures.
For this reason, the automakers and their suppliers are turning increasingly to a laser measurement technique called holographic metrology to study the prototypes coming off molding machines and being tested on the road, according to Ron Swonger, vice president, product development, Coherix Inc. (Ann Arbor, MI), a manufacturer of holographic metrology and inspection equipment.
This technique creates detailed maps of surfaces from data collected at a high spatial sampling density in less than 1 minute. Consequently, automotive and other manufacturers are finding it suitable for inspecting parts in which the shape of the surface is crucial to performance, such as on seals to prevent leaks. In many cases, they are simply adapting what they learned while measuring other complex shapes made of metal, such as engine blocks.
The old method of making these maps with a touch probe on a coordinate measuring machine (CMM) takes way too long. It can take a day or so to map the surface of a part that is the size of an engine or body panel. And even then, the map lacks detail and is usually a series of traces along the edges and pertinent planes. “People involved in product development, launch and manufacturing need to measure the entire surface without waiting a whole shift or a substantial fraction of the day to generate a complete map of the surface,” says Swonger.
Laser holography satisfies this need not only by measuring contours within 1% of the diameter of a human hair but also by collecting a high density of these measurements in as little as 30 seconds, which is fast enough to be cost-effective for production. In fact, Swonger expects that his company will be able to demonstrate a holographic system capable of inspecting every part in an automotive engine production line by year’s end. “Our customers’ plans are to put the systems in line in early 2008,” says Swonger.
Until then, holographic metrology is used primarily for three basic kinds of applications. First is the scanning and analysis service offered by a number of captive and independent metrology laboratories for product development, quality control and warranty studies. Second is the certification of equipment during the launch of new production lines. Third is auditing sample parts near a production line, much as a CMM might do, but with a much higher sampling frequency.
“In fact, we have machines sitting next to CMMs in auto plants,” says Swonger. “The difference is that we’re measuring perhaps one out of every four or five parts, whereas the CMM is measuring one of a few hundred parts.”

As seen on this engine deck face, the ShaPix from Coherix can indicate exactly when a tool should be changed, instead of having the plant floor operator guess and either change the tool too soon or too late. Source: Coherix Inc.
A Different Technique
Holography is very different from conventional forms of laser measurement. Rather than triangulating a narrow beam bounced off a surface, it relies on coherent interferometry, which uses a wide beam of coherent laser light that is split in two. One arm of the beam floods the surface to be measured with light, and the other acts as a reference beam. As the 1-ft2 floodlight bounces back to a digital camera, the reference light shoots into it to create the interference pattern that appears on a picture called an interferogram.To extract measurements from the interferogram, the equipment changes the length of the path that the reference beam travels, usually at least thrice. By determining the phase shift in the set of interferograms, the software calculates the distance that each ray in the beam traveled to the surface. “If you call the distance to the surface Z and the other two dimensions across the surface X and Y, we are collecting a value of Z for every X and Y location,” says Swonger. Coherix’s equipment makes 4 million of these measurements with every shot because its digital camera sees that many pixels.
Conventional interferometry, however, has an important limitation called the ambiguity interval. Its range of measurement can be only one wavelength of light because it relies on the difference between the phases of the signals to compute distance. Consider a sine wave that goes out of phase by 360 degrees or more. After you hit 360 degrees, you’re back to 0 again. “So if two points on the surface were to differ by exactly one wavelength of light, you couldn’t tell whether they were the same height,” says Swonger.
Coherix has developed and patented a process that eliminates the ambiguity interval-or more accurately, widens it to the point that it is irrelevant. Its equipment changes the wavelength of the laser beams, collects a set of interferograms at each wavelength and generates a hologram that is usually a composite of more than 100 images. “With enough computer processing, you can combine the data that you get from multiple wavelengths into a hologram that has a mathematically produced, synthetic wavelength of centimeters instead of microns,” says Swonger.
Developing a holographic image can be more complex if the surface is larger than the field of view of the camera, which is often the case in the automotive industry. Just one surface on an engine block, for example, easily exceeds the field of view. To measure relatively large parts, therefore, the laser looks at various areas of the surface, and computer algorithms stitch the views together. The process can take a few minutes for large surfaces because the cycle time for each view is 30 seconds.
Because the 40-second cycle time on the typical engine line allows enough time for only one shot, the in-line inspection system that Coherix is developing for inspecting engines uses a multi-unit head. The software still stitches together several views of the surface, but all of the scanning is done at once, rather than sequentially, to complete the task within the line’s cycle time.
If measuring all of the part every time is unnecessary, then a cheaper way to inspect large surfaces with holography might be to divide the surface into sectors and to check a different sector on each cycle. For surfaces divided into five sectors, for example, this method would measure the same surface again every fifth part.

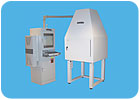
This ShaPix Surface Detective from Coherix measures surfaces within a micron using laser holography. Source: Coherix Inc.
Spectacularly Specular Surfaces
Despite these developments, it is sometimes impossible to jump the most important technical hurdle of all for laser measurement-the work material. The material’s bidirectional reflectance distribution function, the parameter describing the reflected signal for every angle of observation, must be such that the material reflects enough of the light shone on the surface back to the camera. “The question is how much of the light reflects back plus or minus a few degrees from the viewing angle,” says Swonger. “If you don’t get enough, you’re not going to be able to measure it.” Metals usually return adequate signals, but some plastics do not.The three major properties that affect this function for a particular surface are opaqueness, specularity and roughness at the wavelength of the light, which is the near infrared range in Coherix’s case. Opaque materials resist light and do not let it penetrate their surfaces, reflecting light from their surfaces only. “A translucent surface gives you partial reflections over a depth,” says Swonger. “You’d be hard pressed to decide where the actual surface is with accuracy.” Penetration of just a few hundred nanometers to a micron, for example, will prevent any optical technique from measuring to a micron.
Because some plastics are translucent to one degree or another, they often pose a common problem for any optical inspection technique. There are ways to treat the surface of some plastics to make them more visible. They can be as simple as coating them. The more sophisticated techniques are often proprietary.
Specularity and roughness are important considerations, too. Specular, or shiny, surfaces reflect more light than dull ones do and, therefore, are more conducive to laser measurement. Roughness diminishes the returned signal by causing reflections to scatter in directions other than normal. Although dull, rough surfaces might not be candidates for laser measurement, those that are either dull, but smooth or rough, and specular could be.
Despite the roughness of brake pads, for example, the microelements on their surfaces have enough sheen to reflect enough light back to the camera. Castings are common examples of dull surfaces that can be smooth enough to return adequate signals. Plastics are often trickier than metals and ceramics, though. “You just have to test them and see,” says Swonger. He thinks that the effort could be well worth the time if you have to inspect complex shapes quickly with high accuracy and precision. It could shed light on the parts and processes.Q