Test & Inspection
Shining A Light On Color Quality Control
Monitoring color during the entire production process can help manufacturers identify color drifts before they become a problem.

Image Source: X-Rite
Color is a critical part of any product. It’s the first thing your customer sees. Whether you are manufacturing components for assembly or finished assembled goods, the color has to be right every time or you risk scrapping, reworking, or discounting the product. This impacts your bottom line.
Monitoring and controlling color during the entire production process can help manufacturers identify and fix color drifts before they become a problem. To do this, most quality control and color professionals understand the importance of incorporating spectrophotometers into their color workflow for fact-based color management. While spectral measurements ensure a process is running within specification, a company could still be turning out unsatisfactory parts if the product color isn’t what the customer expected when assembled, arranged in a store, or unboxed after an online purchase.
Adding a well-defined visual evaluation process to quality control checks can help.
The Effect Of Light
Your customers accept or reject products—a finished appliance, new car, or parts for assembly—based on what they see. Whether they are viewing the product in a store, home, or warehouse/assembly plant, the type of lighting can change the color and appearance of the product.
The spectral quality or color content of the light affects how we see color. All light is different; even daylight is not consistent.
In the real world, the spectral quality of natural daylight depends upon atmospheric conditions, geographic location, time of year – even time of day. For example, the color appearance of early morning sunrise and late afternoon sunset can be as low as 2300 Kelvin (also known as horizon daylight). At noon, the color appearance of light is approximately 5000 Kelvin and can exceed 10,000 Kelvin (on a clear day facing a north sky). When assessing color, even small differences in the amount of light energy can skew color perception causing some colors to be accentuated while suppressing others.
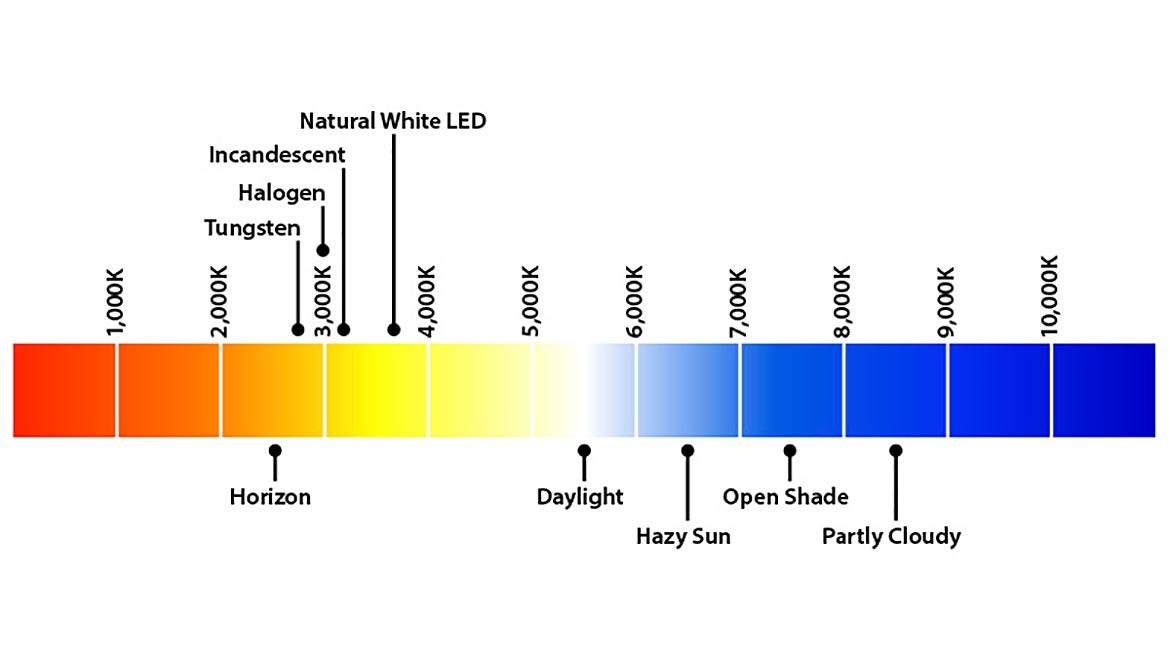
Color temperature in Kelvin. Image Source: X-Rite (Click on the image to enlarge.)
Controlled Lighting
Understanding the effect light has on an object is important when inspecting products for a quality control program. Quality managers should evaluate using every light source under which the final object will be seen to ensure the color continues to meet expectations.
Most industries have standardized on one or more lighting conditions to best reflect where and how their products will be viewed. These include:
A: Incandescent
C: Sunlight
D50: Noon sky daylight
D65: Average North Sky Daylight
F2: Cool White Fluorescent
F7: Broad Band white fluorescent
F11: TL84
F12: Ultralume 3000
Simulated illuminant D65 is commonly used to represent the color of daylight close to noontime, while F11 is a fluorescent tube and represents typical lighting in stores and offices.
Light booths (also called light boxes) allow you to select different types of spectral energy to simulate a variety of lighting conditions to assess color. They are painted using a spectrally-neutral gray color to eliminate color contamination and typically come with three, five, or seven light sources, including daylight (D50, D65), incandescent tungsten, warm-white fluorescent, and LED. Light booths also enable adherence to visual assessment requirements in accordance with major international standards, including ASTM, DIN, ANSI, BSI, TAPPI, and ISO.
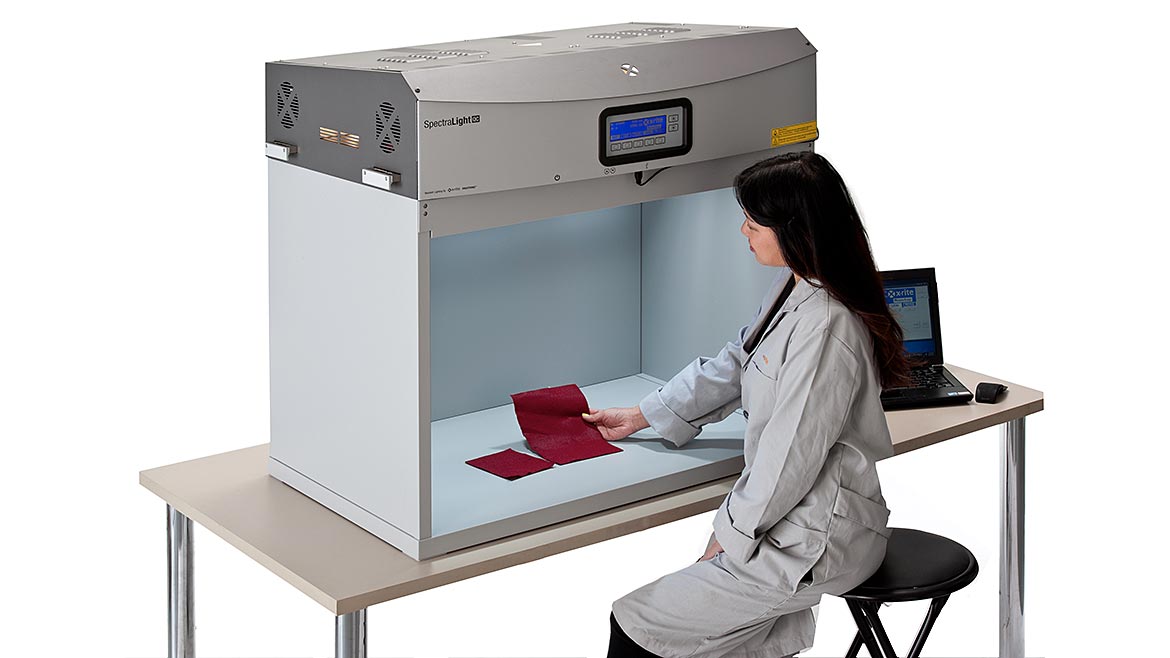
X-Rite SpectralLight QC Light Booth. Image Source: X-Rite (Click on the image to enlarge.)
Light booths are great for evaluating smaller samples, but what about large parts such as furnishings, durable goods, or a fully assembled car? This requires a custom-built Harmony Room, a fit-and-finish room that is dedicated to color evaluation. These rooms are painted using the same neutral gray as light booths and use mounted luminaries throughout the ceiling and walls to deliver controlled lighting.
Automotive manufacturers use Harmony Rooms to detect color differences between components provided by different suppliers around the globe. Controlled lighting can help visual evaluators assess the color and appearance of effect pigments providing color flip-flop or sparkle effects, and metamerism (which is discussed in the next section). Some custom evaluation rooms support detection of the Orange Peel effect, a defect in paint layering that occurs when paint dries too quickly or has surface bond problems that result in abnormalities in the surface layer. These rooms can also help identify a surface ripple effect that can only be seen at certain angles using a non-diffused light source.
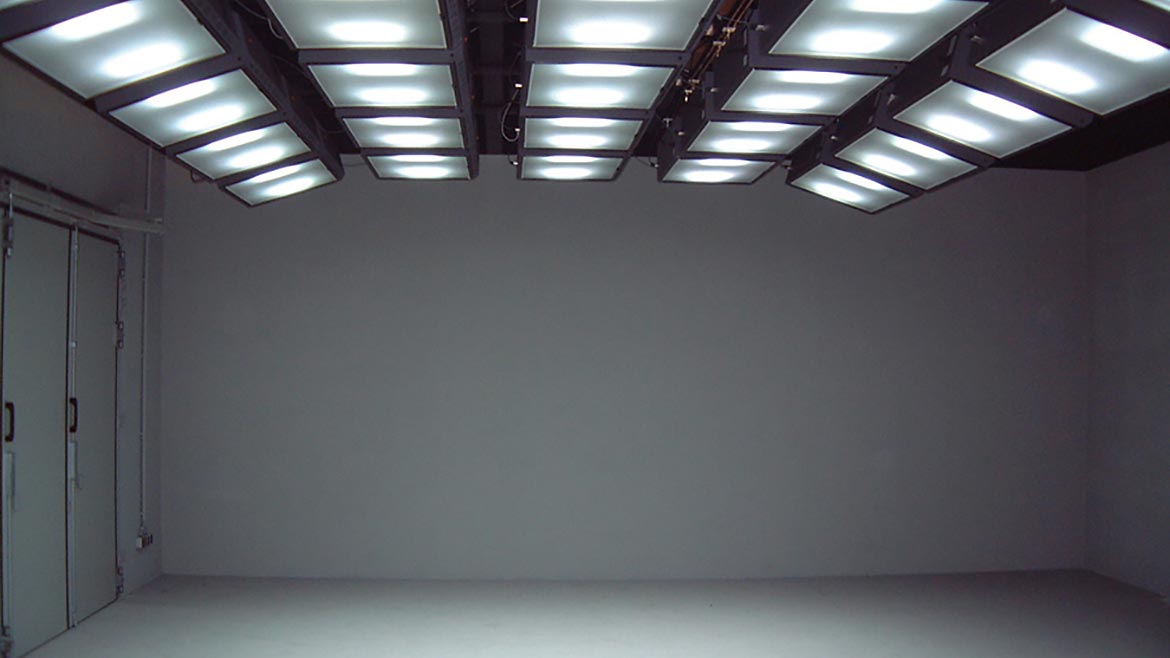
Harmony Room. Image Source: X-Rite (Click on the image to enlarge.)
Understanding Metamerism
Light booths and Harmony Rooms can help identify a phenomenon called metamerism, where two samples look the same under one lighting condition but different under another. When the reflectance curves of two objects cross one another three or more times, metamerism takes place. It is mostly caused by using different pigments or colorants for matching a reference.
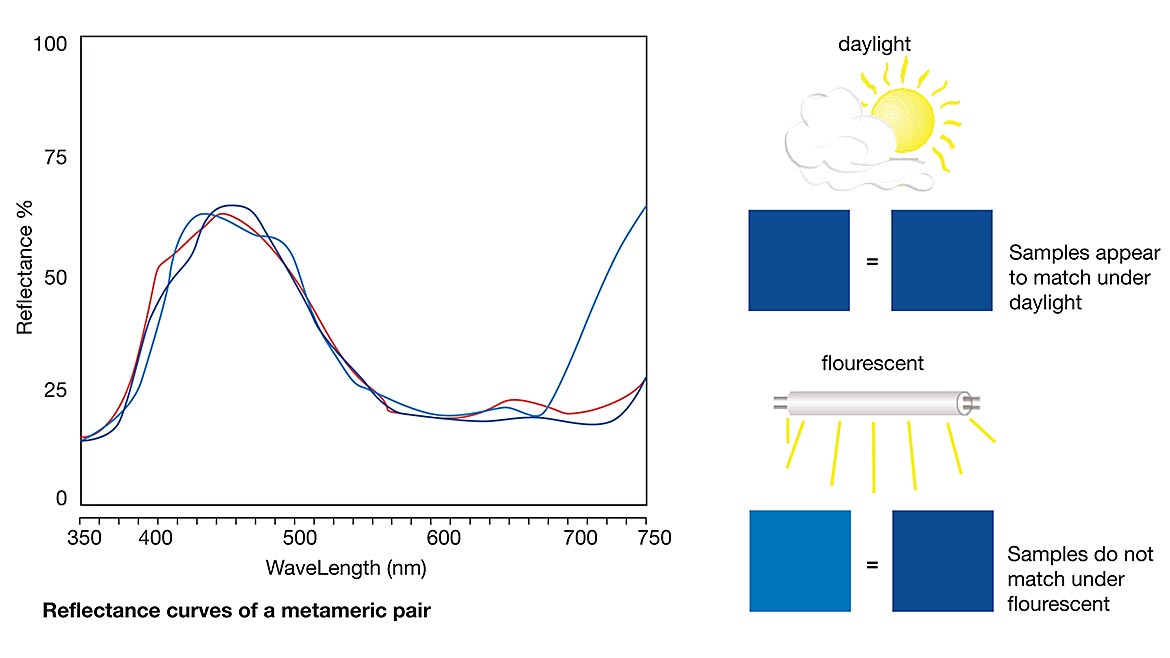
Image Source: X-Rite (Click on the image to enlarge.)
Industries such as automotive, apparel, and footwear must consider metamerism during assembly when components of different materials and colorants come together to match under all types of illumination.
The effects of metamerism can be minimized through early detection. It is important to visually evaluate samples under daylight and at least two other light sources in a controlled environment. Samples that have a directional characteristic, such as textured plastic, must be viewed from the same angle to avoid geometric metamerism.
Tips To Optimize Visual Evaluation
By implementing proper illumination and procedures for visual evaluation across their quality control teams, companies can identify color challenges and make adjustments before they become a problem to reduce waste, rejects, and rework.
Here are additional visual evaluation tips:
- Anyone assessing color should have their color vision tested yearly to ensure they are seeing accurately. The Farnsworth Munsell 100 Hue Test has been around for over 40 years and is an easy and effective method for identifying superior (or sub-par!) color vision.
- Choose the correct lighting conditions for color evaluation by selecting the type of light the finished object will be seen in. If you are producing parts for assembly, make sure to confirm lighting conditions with your customers so you are both viewing under the same conditions.
- Keep your light booth free of clutter. Any extra items in or around the light booth, such as plants, office supplies, etc., can influence color perception.
- Be aware of surrounding light and colors. The room color, your clothing, and even surrounding colors can alter your perception of color. Surround yourself with neutral colors like white and gray when evaluating color.
- Properly arrange samples for viewing. A general rule is to view samples at a 0°:45° geometry. If you are comparing samples, lay them side-by-side so they are parallel and touching. For curved or oddly shaped parts, move them around – left to right, top to bottom – and observe any changes in color.
- Visual evaluation should only take a few seconds. Our eyes become less sensitive after 5-10 seconds of looking at the same object. When judging color, look fast, then rest your eyes before you judge again.
- Evaluate early and often. The sooner you catch a color issue, the less waste you will incur.
Visual evaluation is one of those processes that appears simple on the surface, but in reality is quite scientific. In order to produce and ship products that pass inspection and please customers, companies need a color and quality control process that includes a solid visual evaluation process. The key to visual evaluation is controlled lighting.
Looking for a reprint of this article?
From high-res PDFs to custom plaques, order your copy today!


