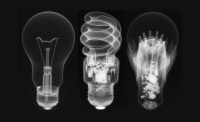
Two dimensional X-ray inspection is a nondestructive technology which has been used for some decades in the electronics manufacturing sector and much longer in oil and gas and general engineering. However, 3-D industrial computed tomography (CT) has been very much confined to the R & D environment and, in the manufacturing sector, its application has often been restricted to structure and defect analysis of high value and/or complex components and new materials. However, recent automatization, speed and accuracy developments have now allowed the migration of CT technology to the production floor. There it can be used as a powerful quality control and process optimization tool, providing fast and accurate inspection and measurement of components which are difficult to examine using CMMs or conventional radiography. This article looks at some of those developments.
Although the medical sector was the major user of radiography for many years, it is interesting to note that one of the first demonstrations of the technology, by William Roentgen himself, was to show his colleagues a radiograph of a set of metal weights contained within a box. However, radiography as an industrial inspection tool only began in the early part of last century and its first official acknowledgement was gained in 1931, when the American Society of Mechanical Engineers (ASME) permitted X-ray approval of welded pressure vessels with standards which still exist to this day.
These standards were based on wet film techniques and, indeed, wet film is still used today in many factory and even offshore environments. However it has its disadvantages, such as the time taken between exposure, film development and sentencing, the need to carry out inspection under protected conditions away from the production area, the cost of consumables and the space required to store exposed radiographs. Moreover, results-sharing is only possible by copying film or re-shooting and extreme accuracy of results is difficult to achieve, as flaw sizes must be measured manually and reference points such as visible edges are, in fact, optical illusions, while multiple exposures are often necessary to achieve the required results.
Many of these problems were solved with the introduction of digital radiography, which requires no consumables and provides easy storage and retrieval and storage of data. And one area where 2D x-radiography has found wide application is the electronics manufacturing sector.
Quality Control in Electronics Manufacturing
Whichever figure is applied to Moore’s law, 18 months or two years, there is no doubt that electronic components are becoming ever more complex. The reliability of electronic assemblies strongly depends on solder joint quality and acceptance criteria are mainly based on joint shape and dimensions. Advanced, high power, microfocus and nanofocus, 2-D X-ray systems, which provide both high resolution and magnification because of their small focal spot size and ensure penetration of high radiation absorbing components, are widely used today. They provide dedicated analysis and automatic inspection of any type of solder joint. All dimensions and features of the joint are imaged and all defects which have any influence on the joint’s shape are detectable.
Fig. 1 A radiograph of a pcb
Unfortunately, 2-D radiography has its limitations. This is especially true in other engineering disciplines, such as in the aerospace and automotive sectors, and in the manufacturing sector in general. It is sometimes unable to detect and visualize some of the indications and internal geometries to be found in many of today’s complex engineering components. Fortunately, 3-D computed tomography can.
What is Computed Tomography?
Computed tomography imaging begins with the acquisition of a large number of 2-D X-ray images. The acquisition can be by means of a fan beam, where discrete slices are radiographed as the component is rotated in small angular steps and moved linearly through the fan beam. As a result, the data collected is a series of slices through the component. Alternatively, it can be by means of a cone beam, where a cone of radiation captures the item to be radiographed and takes discrete 2-D images as the component is rotated through 360° in small steps. In both cases, the accumulated raw data is then used for reconstruction algorithms to calculate and visualize the volume data.
Essentially, the basic data-acquisition hardware components of a CT system are: a high power source of radiation; a manipulation table or mechanism; and an X -ray detector. The quality of the raw data and the accuracy of all subsequent evaluations is significantly influenced by the sharpness of the X-ray images and this is heavily dependent on the quality of the source and detector and the stability and precision of the manipulation mechanism.
Fig. 2 How Computed Tomography Works
Recent Developments in Computed Tomography
Computed tomography has been used for the visualization of flaws and other indications and internal features in the research and development environment for many years. However, recent developments are now seeing the migration of the technology to the production floor. These developments are not just in the hardware but also in the speed of volumetric reconstruction, in the ease of operation, in image quality and in the storage, retrieval and management of data.
Over the past 15 or so years, important hardware developments have included the development of nanofocus X-ray tubes, allowing focal spots of less than one micron, providing higher resolution and clearer images, high power X-ray sources, purpose-designed component-manipulation mechanisms and extremely fast detector systems. There have also been coincident advances in volume reconstruction packages and associated software, improving speed of availability of results and facilitating operation. However, the greatest practical advances have been in the development of CT systems utilizing these individual developments to meet quality control challenges in a wide range of industrial applications, both in flaw detection and in metrology.
Computed Tomography in Aerospace
As the complexity of aerospace components, manufacturing processes and manufacturing materials continues to increase, so does the need to move beyond the traditional quality inspection methods, such as 2-D radiography, ultrasound and eddy current. Quality control in the aerospace sector ultimately affects aircraft safety and performance, so the need for accurate, but affordable, metrology and defect detection assumes ever-increasing importance.
Over recent years, there have been giant leaps in CT technology, which have allowed CT to play an important role in production quality control. These innovations have seen volumetric data collection and reconstruction increase by factors greater than ten, while system and data workflows have been introduced to create simplified production line workflows, combined with easy and accessible data management.
Fig 3. Image of a turbine blade
A recent innovation has seen technology which enables fast, high quality imaging of complex engine components, such as high pressure turbine blades. The prime inspection requirement for today’s turbine blades is the precise measurement of internal wall thickness of these complex multi-wall castings. The latest technology uses a patented linear detector array (LDA) for high throughput, high precision beam imaging and the DICONDE workflow and long term data management, using software platform, which provides image analysis, quality control and automatic long-term archiving of results. A dedicated software module offers advanced functionality, such as wall thickness measurements of various turbine blade walls within each CT slice.
Fig. 4 Blade Line Workflow
Computed Tomography In The Automotive and Manufacturing Sectors.
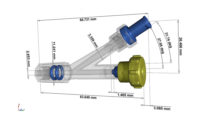
The quality control drivers in the automotive and manufacturing sectors are slightly different to those in the aerospace sector. Although product safety is still of paramount importance, it is also vital that any quality control procedures can provide fast and accurate results, so that there is minimum disruption to production. Digital 2-D radiography is often used here but there are instances where 2-D inspection is not sufficient. Similarly, failure analysis using traditional mechanical slicing destructive techniques is very time-consuming. Also, many quality control procedures in the automotive and manufacturing sectors look at dimensional tolerances, often comparing final product with original CAD drawing. Traditionally, this is carried out by tactile or optical coordinate measuring machines (CMMs). These can sometimes prove incapable of performing the metrology required with some products, especially when such products have internal surfaces which are difficult to access or have soft external surfaces which can deform with tactile measurement.
Fig. 5 A v|tome|x m
Fig 6 One button CT slide
Automated Computed Tomography on the Production Line
The latest innovation in CT brings the technology directly to the production line. Based on proven medical technology, it offers a new workflow concept for production process control. It features high speed, automatic helix CT, where a gantry with a X-ray tube and a corresponding 64 channel, multi-line detector rotates around the workpiece being transported on a conveyor belt. The reconstructed CT data of the part under examination is automatically evaluated, as the next part is loaded in the system. For example, by scanning a cylinderhead in 15 seconds instead of several hours with conventional fan beam CT, this means that quantitative production quality data is now available virtually immediately, allowing fast adjustment of production parameters if any serious defect is detected or any dimension is out of tolerance. This is of vital importance if the workpiece is to undergo subsequent production procedures.
Fig. 7 Rotating CT gantry with casting
As a result, reject rates can be reduced and reasons for rejection, whether dimensional or structural, can be quickly identified, saving time and money, while at the same time optimizing manufacturing plants and extending tool maintenance intervals.
Conclusion
The quality control function is forever trying to improve the service it provides to manufacturing organizations, while seeking solutions to the new challenges it faces, in terms of inspecting and measuring increasingly complex products made from new materials using new processes. Computed tomography is a continuously evolving technology which can meet those challenges, ensuring that quality control for production process optimization becomes more accurate and more productive.


