Medical device manufacturing poses unique challenges for maintaining quality and consistency. Medical devices must be built to exacting standards and their failure is simply not an option. Some medical devices are also constrained by the demands of mass production, while others are one-off products made with newer manufacturing technologies. In critical applications, defective devices could mean the difference between life and death in patients and result in severe consequences for manufacturers, suppliers, and clinicians.
With an estimated market value of over $500 billion by 2020, the medical device industry is projected to experience unprecedented growth in the near future. Technological innovations are no doubt a key driver in this growth, with increased developments in surgical robotics and advanced medical diagnostic devices.
The use of additive manufacturing in medical devices and implantable prosthetics is still in its infancy but is steadily growing. The technology is making it possible to build highly customized 3D printed replacements for body parts. For example, a 3D-printed titanium jaw built by LayerWise was the first of its kind to be transplanted into a patient. The implant involved complex structures with articulated joints, and cavities and grooves to promote muscle and nerve regrowth.
While additive manufacturing is expanding the scope of medical manufacturing and improving the quality of life, its use also involves additional challenges for quality management, especially in the case of implantable devices. Since parts are built layer by layer there can be high variability between parts or from their original dimensions. Ensuring that implantable devices are within tolerance during and after their fabrication through proper testing and inspection will therefore be vitally important.
Nondestructive Testing for Medical Devices
For medical device manufacturers and suppliers, there are a whole host of nondestructive testing options available, depending on their particular needs and goals. The medical device industry is highly diversified and the appropriate testing method will depend on a number of factors. In this industry, testing methods are not mutually exclusive but complementary, each with their own set of advantages and disadvantages.
Nondestructive testing is a suitable option for medical device testing as it can find defects in parts and materials without damaging or altering them and making them unusable. For example, liquid penetrant testing uses chemically inert colored liquid to reveal surface defects like pores or cracks, especially suitable for inspection of metallic surgical tools and implants. But penetrant testing can only find surface defects and requires additional documentation of materials used for testing.
Ultrasonic testing is another option for medical device testing and is easily implemented during manufacturing with automatic equipment. It can reveal wall thickness variations through sound wave irregularities. However, it is generally performed only on raw materials like round metal tubing as it is limited to identifying defects in simple part geometries.
3D scanning is another option for external surface scanning and is highly precise for metrology of complex surfaces. It has the added benefit of being noncontact, able to scan medical devices that are made from flexible materials like plastic and rubber. But as an optical technology, scanners must be able to “see” features and are limited to inspection of visible surfaces only.
Industrial X-ray and CT for Medical Device Inspection
For subsurface nondestructive testing of medical devices, available methods include radiographic testing and industrial computed tomography (CT). As both technologies are X-ray based they overcome limitations with other testing methods, proving invaluable when manufacturers need to look inside devices without destroying them. While radiographic testing is useful for part sorting applications and obtaining a quick single internal view, industrial CT scanning is a convenient 3D internal method for design validation and prototyping, as well as for providing data for failure analysis.
Industrial CT generates detailed views of part and assembly internals, especially for use with complex medical devices. CT has less material restrictions than other methods, meaning that it can scan a greater variety of materials, including higher-density materials for orthopedics and lower density materials like advanced polymers and flexible thermoplastics. Clear or reflective materials can also be inspected without difficulty as the technology is not light based.
Portability and scalability are typical limitations with X-ray and CT inspection technology. Machines are generally large systems that require adequate space and shielding for safe operation. Portable X-ray and CT machines are available but operate at lower energies and are limited to inspection of smaller components. As X-ray and CT systems are expensive to operate and maintain, manufacturers and suppliers often turn to third party inspection labs to access the technology while keeping costs low.
New developments with high energy CT operate on the same principles as lower energy, cabinet type micro focus CT systems, except that it uses X-ray sources within the megaelectron volt (MeV) range. This allows for inspection of a greater range of materials and sizes, including larger surgical/hospital instruments and medical devices as well as those made from denser materials like high strength steels and cobalt alloys. It also provides cleaner separation of mixed density materials in multi-material assemblies.
How do X-ray and Industrial CT inspection fit into medical device manufacturing?
Design and Prototyping of Medical Devices and Prosthetics
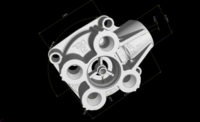
Industrial CT scanning affords a number of advantages for the design of prosthetics, medical devices, and implantables like stents. As medical devices often have complex geometries, industrial CT can cope with these challenges by quickly providing data for complex GD&T callouts like concentricity and cylindricity. Acquiring these dimensions can be slow and cumbersome with other techniques and can be near impossible for mapping internal features using touch probe CMM and other surface methods.
Industrial CT is often used to validate multicavity tooling designs so that molded parts are up to spec, function as intended, and have proper fit with mating parts. Since CT generates a permanent visual record with scans, design data can be referenced later on in situations where changes are needed. Industrial CT scan data is analyzed in a 3D workspace, so dimensional data and alignment can be easily manipulated to keep up with updated designs or revisions.
CT is also used for reverse engineering applications and for comparing designs using actual to nominal comparisons involving multiple medical device iterations. Using these analyses, CT can provide high resolution dimensional data of end of life implantables and prosthetics for insight into performance and wear.
Quality Control at Pre-production and Production
Computed tomography provides simultaneous dimensional validation and quality control with a single scan, saving costs associated with requiring different methods on the same part or type of part. CT is generally faster than traditional CMM inspection, yielding all required measurement data to ensure parts are within acceptable dimensional tolerances.
The technology is also ideal for identifying and characterizing virtually all types of external and internal defects that can lead to failures in medical products. These include defects like cracks, inclusions, porosity, uneven wall thicknesses, improper fit in assemblies, and excess material like residual powders in 3D printed parts.
Industrial CT scanning is also used to analyze samples that have gone through fatigue and mechanical testing at specific or random intervals during production. CT can reveal unseen changes in materials and assess defect growth, providing critical data for evaluating designs and material performance.
Sorting Applications During Quarantines and Recalls
The reality is that 100% defect-free parts is not always achievable. The hope is that manufacturers catch these defects early on during pre-production or before they reach the end user. Here, industrial X-ray testing can validate must-run devices and inspect suspect batches during production. But despite these proactive strategies, there are cases in which medical devices are unfortunately subject to recalls or quarantines.
In these situations, X-ray testing can be utilized to salvage acceptable parts from large lots and lessen costs associated with wasted resources and labor. For example, radiographic testing can help assess the condition of batteries in devices or improper alignment of mating components. Industrial CT is also another viable option for lower volume sorting requiring detailed internal inspection in 3D.
Summary
Consistent operation is key for medical devices, surgical instruments, and implantables. Ensuring this will require investments into proactive quality management to reduce or eliminate the risk of failures. Industrial CT and X-ray testing provide a host of benefits for assessing the quality of medical devices at all stages of manufacturing.


