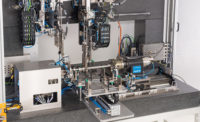
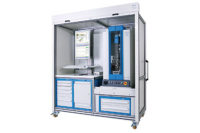
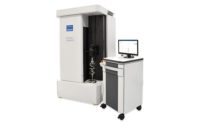
Shaft-type parts can be found in just about every industry, from screws, medical needles, engines, and injectors, to aerospace and power sports. Shafts help the world go.
There are three different types of technology that can be used to measure shaft-like parts:
Contact measurement can be accomplished through dedicated gaging systems capable of flexible roughness and form measurement to dimensional and geometric measurements like diameter, height, etc. These have the greatest range of possible measurements and offer many types of systems from manual through fully automatic.
Pneumatic measurement systems consist of dedicated semi-flexible units for both dimensional and geometric measurements. Pneumatic systems have the smallest range of system types, but much better repeatability, accuracy and speed. Manual through fully automatic systems are available.
Optical measurement systems provide the ultimate in flexibility for measuring any shaft-like part capable of installation into the system. Unlike contact and pneumatic shaft metrology, which has been around for decades, optical is a relatively recent addition to the quality scene. Optical systems are available in both manual and fully automatic configurations.
Measuring precision parts at production rates to micron, or sub-micron, accuracy is a job for a well-developed, reliable, repeatable measuring process. Today’s industry standard for realizing this type of accuracy is noncontact, optical shaft measuring systems.
For many manufacturers, high-precision noncontact optical shaft metrology is an investment which can pay off through not only utilizing manual SPC measuring stations operated by the workers but also by deploying fully automatic systems for 100% part inspection.
The hardware and software for these systems are optimized for use in a production environment and provide gaging component capability capable of delivering maximum reliability over long periods of time. The non-tactile, optical sensor system operates totally without wear and without the risk of collision. Ideal for worker self-inspection, the systems are supported by intelligent easy to use machine interfaces.
New technology in the field of noncontact gaging, mainly high resolution cameras and optics, permit even greater flexibility and accuracy.
As an example, there is a smaller form factor optical measurement unit that uses the silhouette principle to opto-electronically and fully automatically measure parts. The versatility of this type of unit permits static, rotation angle- positioned, or dynamic measurements. High resolution CCD line sensors and semi-conductor LED light sources combined with high quality telecentric lenses deliver repeatable results of .5 µmfor diameter measurements.
Operational software plays a huge part in the functionality of the system. Highly capable measuring software delivers optimum flexibility, allowing users to quickly scan parts and create measuring plans using just a few clicks on a menu.
The characteristic high precision and high reliability of these types of measuring systems is particularly beneficial to the aerospace industry, where rejects can run into the thousands of dollars. Carrier shafts for aircraft and helicopter engines are one example where a standard optical measuring system for rotary parts, with diameters up to 30mm and lengths up to 200mm, can be implemented. For larger applications, shaft measuring systems with a measuring capacity of 480mm diameters and 2,500mm lengths can be utilized.
These systems can measure any shaft-type workpiece, offering maximum flexibility, and the potential to replace any number of conventional gaging components. Dimensions such as lengths/distances can be measured as can geometry elements (angles, radii, etc.) and form and position tolerances (roundness, run-out) in a single pass.
With long-term gaging capability and accuracies in the µm- range and very short cycle times, measurement results can be completed within just a few seconds. With conventional measuring systems, complete evaluation of the programmed measurement parameters can often last several minutes.
Combining multiple evaluations into a single measuring program, an operator can (in a single measuring pass) generate many relevant data points that can be quickly analyzed for quality assurance during the production process. This is a big advantage, for example, compared to conventional measuring machines that have to be reset and where large numbers of measurements exist. Flexible workholding devices can be easily used in the noncontact instrument, enabling quick loading of new workpieces with near-zero set-up times.
Measuring principle
The workpiece is automatically scanned opto-electronically using the silhouette principle. The complete workpiece contour can be evaluated quickly and precisely by the high measuring resolution per single measured value. The outside contour data of each workpiece is recorded during the part’s rotational movement in the system. Any standard measurement functions can be combined depending on the measuring program, which then follow an optimized, automatic measuring run.
User control of the measuring systems is simple, and measuring programs can be created within minutes. The creation of part measuring programs, display of, and further processing of the measurement results takes place simply and intuitively by means of a simple graphical user interface. Depending on the measurement task, the worker can very quickly combine any standard measuring functions in one automatically optimized measuring run.
To create a new test program the workpiece is loaded into the measuring system, which performs a 100% part scan that is then saved into the program memory within seconds. Additional test characteristics can be selected by a mouse-click. This capability also guarantees future value for a wide range of applications.
The calibration states of these measuring systems are monitored automatically by integrated, high-precision step discs and temperature sensors, which also form the basis for intelligent temperature compensation. Integrated step discs replace an additional setting master for daily use. Active temperature compensation takes place automatically with every measuring run; the measuring system monitors itself for negative ambient influences.
Built for the long haul
Noncontact optical shaft systems have several advantages over competing technologies when it comes to system operational longevity. The single biggest advantage is the noncontact optical sensor, which helps eliminate contact wear on components. Robust, precision engineered mechanical components support overall system reliability. Combining these two features into one package allows optical metrology systems to deliver industry leading reliability, over longer periods of time, than more conventional technologies, and the high measuring speed means very high productivity.
Notably, noncontact optical shaft inspection systems offer maximum flexibility for automatic or manual self-inspection, and are proving their reliability in manufacturing settings worldwide.


