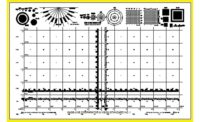
A new “non-linear error compensation standard” for vision systems. For calibrating and maintaining the accuracy of vision systems. A cross mark and dot array grid etched in chrome on a 14 in. sq. optical glass. Image area 12 in. sq. (304.8mm sq.) with 0.50 in. and 12.7 mm increments. Accredited ISO/IEC 17025:2005 Lab Calibration. NIST traceable.
Gage-Line Technology, Inc.
(585) 458-2000


