Digital gaging, or the software and hardware used to take and process digital measurements, has grown considerably in the past 20 years. It has also come a long way when it comes to advancing quality.
Gaging software assists quality operators in combining input data, or sensor readings, to produce final measurements. It simplifies and secures the measurement process, making it less prone to human errors. It also helps operators to gather data, produce reports, and perform statistical analysis to compare quality indexes over time.
There is no longer a ‘one size fits all’ approach to measurement and inspection, as customized solutions are now available for most manufacturing applications.
Measurement and inspection software should be interoperable with all digital measuring devices, as well as all CAD files.
Digital gaging’s efficiency has increased over time, enabling manufacturers to request and receive 100% inspection on processes that would have been impossible five years ago.
Ultimately, gaging management software increases the accuracy of records retained, provides greater visibility, and offers a wide array of analytics that can identify sources of variation in a measurement system. Without the use of software to perform measurement systems analysis, these sources of variation can remain hidden and negatively contribute to overall process variation.
As the industry embraces smart factories and automation, gaging software must seamlessly exchange information across all components in a production process.
Manufacturers that were staffed lean prior to the pandemic are stretched thinner than ever and quality professionals are feeling the burden. They need software that also comes with customer service to help with IT-related tasks like system setup, data import from legacy systems, and deployment in addition to the traditional software support.
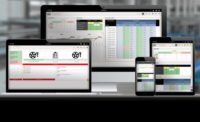
When in place, such technology makes operations more mobile.
Instead of being tied to a workstation, users can walk around and inspect work pieces, examine products, and maintain their gages via tablets, cell phones, and other handheld devices.
While quality inspection and reporting used to be an incongruent process isolated in a quality lab, it is becoming much more integrated with the shop floor through in-process inspection.
Most shops require a variety of digital inspection devices and accessories, depending on the type of parts being inspected at any given time.
Ideally, a manufacturers’ full spectrum of devices will interoperate and share accessories, such as probes, whenever possible. When all devices work in concert, an interoperable factory is born, which boosts quality and advances inspection.


