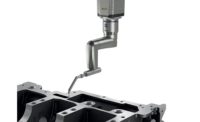
Del West USA Inc. (Valencia, CA) manufactures high-performance components for automotive racing engines. Its customers require 100% inspection, which contributes significantly to the company's manufacturing costs. Del West recently reduced that cost dramatically and improved the repeatability of its measurements by adopting an optically-based inspection technique for surface finish.
In auto racing, performance and reliability are the keys to success. A Formula One engine may cost a half million dollars and only have to run for a few hundred miles, but during those miles it must offer peak performance every time. The cost of failure is too high to allow anything into the engine without absolute confidence that it conforms to design specifications. Because of this, the race teams demand 100% inspection and start-to-finish documentation of all phases of the manufacturing process. Suppliers must satisfy their demand and still make a profit.
Racing engines reach speeds of 18,000 rpm and surface finish plays a crucial role in determining the wear characteristics of products in this extreme environment. Traditionally, the company characterized surface finish by measuring average roughness (Ra) with a contact profilometer. While widely accepted as an industry standard, profilometer measurements do not work as well in this particular application. These tools are relatively slow at 15 to 60 seconds per measurement. The 2-D sample trace is not truly representative of the three-dimensional surface and introduces sampling errors and
measurement-to-measurement variability. Stylus wear introduces longer-term variability that is difficult to quantify. The instruments are susceptible to environmental interferences, such as vibration, and generally are not suitable for installation on the shop floor. In high-volume use, annual consumable costs to replace worn and broken styli can equal the initial cost of the system.
In an effort to address these shortcomings, and ultimately reduce inspection costs, Del West engineers adopted a noncontact, optically-based measurement technology called LaserCheck from Corning Tropel (Fairport, NY). The technology is based on the scattering of light reflected from a rough surface. It is intuitively easy to accept that light will scatter more from a rough surface than from a smooth one. A laser pointer reflected from a mirror onto a wall will show a well-formed image of the beam. Do the same from progressively rougher surfaces and the images become increasingly diffuse. The LaserCheck uses a quantitative implementation of this same principle to characterize surface roughness.
On a practical level, the LaserCheck addressed all of the company's concerns with contact profilometry. Measurements are completed in about a tenth of a second. The sample area, approximately 2 millimeters by 4 millimeters, more accurately represents the measured surface and yields better measurement repeatability. There are no wearing parts, eliminating that as a source of error and also eliminating consumable costs. The system is robust; the handheld measurement head can be dropped to the floor without damage. Vibration does not interfere with the measurement.
The LaserCheck's scatterometry measurements are relative measurements specific to the particular material and manufacturing process of the sample surface. Thus the company continues to use contact profilometry to provide an absolute characterization of the surface finish. However, the LaserCheck has allowed the company to reduce per-measurement costs significantly by reducing labor, and consumable and depreciation expenses. In addition, the feedback loop in the process control has been reduced by moving the measurement on to the shop floor where the process occurs. As a result, fewer bad parts are made and those that are produced are caught earlier in the process-before additional investments in time and money are made. In the end, better products are made for less money, customers get the 100% inspection they require and the company can remain competitive and profitable.
Corning Tropel
(585) 388-3500
Sidebar: Benefits
• Measurements are completed in about a tenth of a second.
• A sample area of approximately 2 millimeters by 4 millimeters more accurately represents the measured surface and yields better measurement repeatability.
• There are no wearing parts, eliminating that as a source of error and also eliminating consumable costs.

