This website requires certain cookies to work and uses other cookies to help you have the best experience. By visiting this website, certain cookies have already been set, which you may delete and block. By closing this message or continuing to use our site, you agree to the use of cookies. Visit our updated privacy and cookie policy to learn more.
This Website Uses Cookies By closing this message or continuing to use our site, you agree to our cookie policy. Learn MoreThis website requires certain cookies to work and uses other cookies to help you have the best experience. By visiting this website, certain cookies have already been set, which you may delete and block. By closing this message or continuing to use our site, you agree to the use of cookies. Visit our updated privacy and cookie policy to learn more.
There’s no question about this column. I accept the blame for what appears in this monthly effort for better or worse. This column is all about the standards I often refer to in my rants. I frequently encounter folks who question the information these standards contain and sometimes the question is valid but there are ways to challenge or change technical details within them.
You’ve made the threaded parts and are confident they are okay because you’ve checked them with your gages. Then you get the call from the customer advising you that their gages have rejected the parts and they are demanding re-work or replacements ASAP.
In recent columns I’ve commented on information requests accompanying calibration orders. Some of these are common and effective but some are not. Occasionally, they are brought about due to their inclusion in one standard or another but are misrepresented. In some cases, the standard they are from relates to in-house systems rather than calibration activities by outside parties.
If you want to get technical, this topic is better dealt with by others since it is a quality matter rather than dimensional metrology where I hide out. But, disputes go on every day over measurements and sometimes resolving them can be quite challenging—when possible.
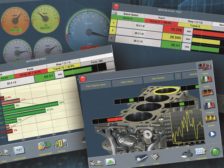
The platform aims to minimize overall delivery timing of custom automation, increase through-put, and reduce scrap through increased, 100% inspection and automated measurement.
Establishing calibration intervals for gages and instruments is a tricky business, particularly if you’re starting from scratch. Calibration data, knowledge of metrology and experience come into play in this game so before we begin, let’s look at the goal we hope to achieve.
Craig Kuchta, the new Fischer representative and technical adviser for this office, has more than 20 years of technical instrumentation sales and support of products by manufacturers such as Siemens, Honeywell and Wika.
Despite best efforts, auditors find things. It is their job. Why wait until audit day to uncover problems? In the words of Walt Disney, “The way to get started is to quit talking and begin doing.”
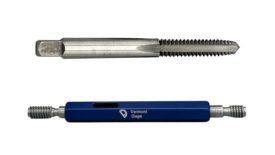
Nothing could be simpler than fixed limit gages which explains why they remain so popular. But nothing so simple can remain so when humans are involved.