The first step to process improvement is machine performance measurement and diagnosis. However, it’s a step that many OEMs and service providers—even quality professionals—fail to approach with as much rigor as other steps, like process setting and in-process control.
The point of calibration hardware and software is to establish a known and repeatable level of process capability. Therefore, employing the right calibration system from the start could save considerable time and money down the line, says Michael Wilm, business manager of calibration products at Renishaw.
“Calibration is the base of what we at Renishaw call the Productive Process Pyramid,” Wilm says. “If you don’t have your machine right to start with, then it’s hard to say that you’re going to have parts that will be in your acceptable range afterward.”
“The first thing I say to people is, ‘You calibrate all of your gages to measure all of your products after they come off the machine, but how often do you actually measure the machine that made it?’” Wilm continues. “That could actually be a shortcut to some of these problems: by making the machine right to begin with.”
Quality caught up with Wilm to discuss some of the best solutions for a machine tool upgrade, depending on one’s application, budget, and requirements.
Multi-Axis Calibrator: The Game-Changer
Multi-axis calibrators for 4- and 5-axis machine tools are relatively new, and still expensive as compared to other options. Yet the combination of speed, ease of use, precision, and unique capability it provides is unprecedented, Wilm says.
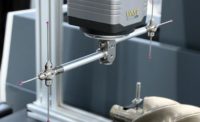
Take Renishaw’s XM-60 multi-axis calibrator. Released in 2016, the XM-60 can measure all six degrees of freedom—linear, angular, pitch, yaw, roll, vertical and horizontal straightness—simultaneously from a single set-up. In addition, all measurements are made optically, allowing use in any orientation.
“The difference between taking data with a multi-axis calibrator like the XM-60 and a single-axis calibrator is you get see all six degrees of freedom and their reactions at the same time,” Wilm says. “When you move the axes in a typical interferometer set-up, the six degrees of freedom are still going on at the same time, but you’re only collecting one at a time, and so you don’t know if all of the events actually happened at the same time. There’s a lag in the ability to match the data with when it happened.”
The XM-60 also can do what had been unachievable by any product like it before, Wilm says: measure in real-time and look at roll in any orientation.
“The receiver on the XM-60 has four ports, and three of those ports have interferometric beams in them; the other port has a LED beam that comes from a red light source, for measuring straightness and roll,” Wilm says. “So, we’re looking at a couple of beams that have been split inside that receiver, which allows us to look at absolute roll in any orientation.”
Mazak Corporation, a machine tool builder with an emphasis on automation, uses the XM-60 to save time when calibrating their machines, Wilm says. He adds that Renishaw also has been working with Mazak for the past six years to develop volumetric error compensation routines for all of Mazak’s machine tools, which Mazak can then offer to their customers.
Ibex Engineering, a provider of linear motion systems and custom stage solutions, also uses the XM-60 to verify the six degrees of freedom on every one of their products, Wilm says. One of the reasons for this is a new feature, introduced in 2018, called free-run.
“Free-run allows you to move the receiver along without CNC control, and actually capture the five degrees of freedom other than linear—and use linear to trigger the other five degrees,” Wilm explains. “The purpose of that is while you’re building the machine, you can actually see these errors, and they won’t be under CNC control—giving builders a new capability to use our system when the machine is not CNC-powered.”
Wilm says Renishaw will add a rotary capability to XM-60 next, which should be available by this year’s International Manufacturing Technology Show (IMTS). And instead of cancelling out Renishaw’s existing rotary axis calibrators, Wilm says the updated XM-60 will continue to work them, “so that our customers can utilize the equipment they already own.”
Laser Interferometer: The (Fast) Workhorse
Less expensive, more portable, and more widely used than multi-axis calibrators, calibration lasers have been around for more than three decades—25 years at Renishaw—and are more appropriate for dealing with individual errors, Wilm notes.
In comparison to the XM-60, Renishaw’s XL-80 laser system, introduced in 2007, is “more of a magnifying glass or a target tool,” Wilm says. But despite some overlap in duties, such as both having built-in laser interferometry systems, Wilm says that the XM-60 does not replace the XL-80.
“For the most part, the XL-80 is a separate item: for people who want to get on and off the machine quickly and get information fast, to find out whether things have changed and also to identify errors they’re unable to measure any other way,” Wilm says. “It’d the one you’re going to use to go back down and fix the errors mechanically, or use for particular application, like looking at dynamic measurements. And since the XL-80 can take 50,000 points per second, you can get that information at a higher rate and then look at it in detail, down to a nanometer.”
“There are plenty of people out there who don’t feel they need the entire six-degrees-of-freedom package,” Wilm continues. “They get along just fine with the machine the way it is, and maybe all they want to do is correct the linear positioning, because of their budget—so they purchase all of the individual items that they actually need, that only affect their workpieces or their project.”
Another reason why calibration laser systems remain so popular is versatility, Wilm notes. The XL-80, for example, works on machine tools and CMMs. It’s used in laboratories and nuclear power plants as a length standard. It’s used to measure the flatness of surface plates and the squareness of extremely long machines, such as 90-foot gantries.
“It also can do something that, right now, is not a functional capability of the XM-60: It can measure dual-axis drive machines, where you can put one laser on one side and another on the other side, and measure both drives at the same time,” Wilm says. “The XM-60 will see that as a yaw, but the XL-80 will actually give the linear positioning for each side, so you can apply compensation and correct it.”
For this reason, Wilm adds, the XL-80 is often used on extremely large bridge mills.
“And in the case of a standards lab—for nuclear power plants, for instance—they need traceability for all of the standards in-house; and in order to do that, they need to have a laser interferometer,” Wilm says. “Do they need a six-degrees-of-freedom laser there? No. They need something that’s going to give them linear, or give them angular, and they can identify the individual components themselves.”
Speed is another factor. After all, every second that you’re on a machine and measuring it, you’re not inspecting a part, Wilm says.
“With the XL-80, you can go into the part program of the machine tool and trigger the laser at one-microsecond intervals,” he explains. “In other words, the machine can actually tell the laser when to take a point. So, there’s ways to speed up even the individual degrees of freedom.”
He also refers to a new product, jointly developed by Renishaw and the company’s CMM partners, called the Dynamic Mapping Tool (DMT), which works with XL-80’s UCC controller.
“The DMT allows CMM OEMs and service people to dynamically move their axes and collect data with the XL-80, so they don’t have to stop and trigger it multiple times; the DMT automatically triggers it,” Wilm says. “And it’s a relatively inexpensive tool to add to the package.”
Ballbar: The Entry-Level Tool
As discussed in a previous article, having a wireless ballbar system in place should be priority one.
“The ballbar is the entry-level tool,” says Wilm. “It’s the tool you want to start with, to start benchmarking your machines and then identifying whether they’ve changed.”
However, if a multi-axis calibrator happens to suit your business, Wilm suggests using an XM-60 for benchmarking, too.
“Let’s say you’re going to move some machines: There’s no better way to benchmark your machines then using an XM-60,” Wilm contends. “You get all six degrees of freedom for all the axes; and then when you set the machine down in a new place, you can benchmark it again and see if it’s changed before it’s installed.”
Software: The Rapid Analyzer
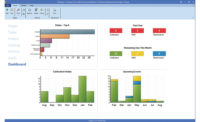
Currently, Renishaw is moving all of its platforms to its CARTO software—so customers can take full advantage of the database that is currently available only for XL-80 and XM-60 laser measurement, Wilm says.
As a result of this move from file-based to data-based software, Wilm purports that customers will not only be able to utilize ballbar, laser, and rotary information in one program, and also access all of this information much faster and easier than they could before.
“Now, there’s no need to store it in a bunch of different folders, and try to remember what folder it was in,” Wilm says. “You just go to the search bar, type in exactly what you’re looking for—machine name, or the serial number of the item you used to calibrate the machine, or the customer’s name, if you’re doing this as a contractor—and it will pull up what has been done. So it will enhance your quality program as well.”
Another advantage for contractors is the Report Generator, a feature that Wilm says came out in the latest service pack because so many customers requested it.
“If you take XM-60 and six channels of data, you can now decide which graphs you want to output every time with those particular degrees of freedom—so you don’t have to sit there and click each one and say print and then do it again,” Wilm says. “You just tick a few boxes and the software automatically does them all.”
Wilm adds that as long as the customer is connected to the Internet, the software will automatically check for a new version; and a pop-up in the lefthand corner of the screen will ask if you would like to download it for free.
“We’ve had two updates within the last two months,” Wilm says. “And as new features become available, the user is getting an enhanced product—one that’s more than what they purchased when they got it—because we’re not charging for the downloads, just the plug-ins [that are optional and machine-specific]. They’ve already paid for their software.”
In particular, Wilm notes that CARTO’s integration with the XM-60 helps to solve a problem mentioned earlier: being able to quickly and accurately compare errors from six channels of data.
“You’re seeing the relationship of what happens with pitch and what happens with yaw, and how that affects linear; and what you could do is pull those three individual errors onto the screen and compare them,” Wilm says. “That’s the power of the new software.”


