Measurement
Beyond Calibration: What a Calibration Sticker May (And May Not) Tell You
While calibration has been with us as long as gages, the concept of a third party performing regular calibrations is relatively recent.

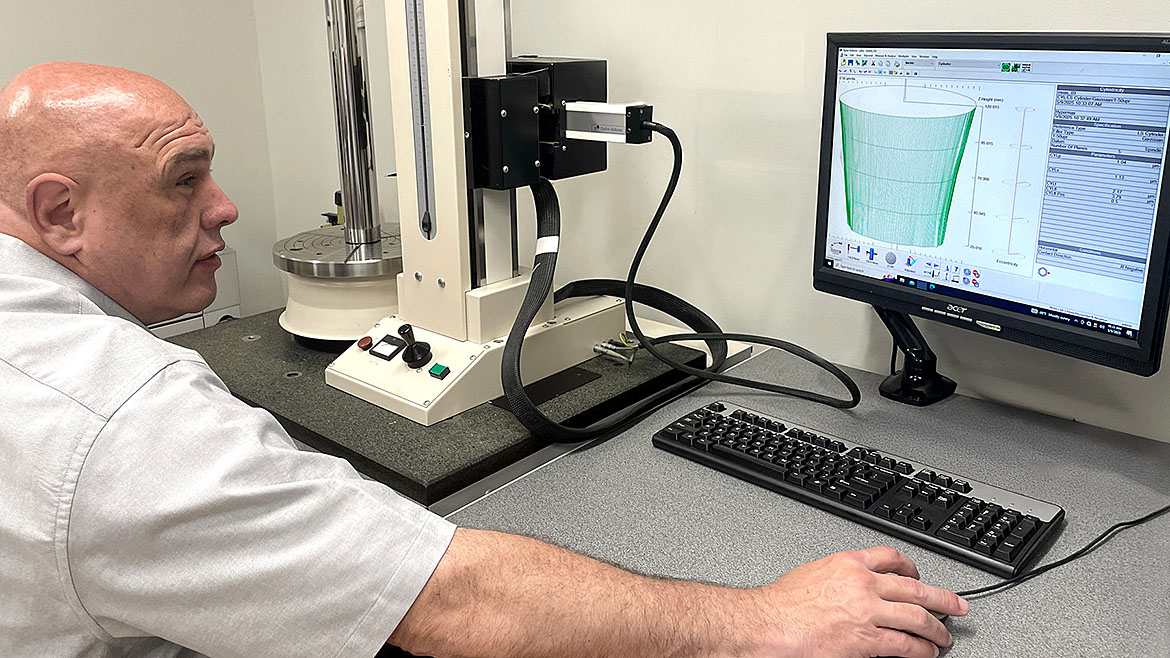
Figure 1. A radius artifact standard being used to verify calibration of a surface texture/form gage.
Gages need to be calibrated—it's a fact of metrology life. But an annual calibration sticker can be misleading, especially to personnel who may not be metrology experts but are still tasked with making measurements.
In addition to regular calibration, a gage must be maintained and operated correctly, with frequent verification of the results. The best practices described below can help ensure that a gage will measure reliably at the times of calibration and over the periods in between as well.
Periodic calibration
Regular calibration certifies that gages produce reliable results that are tied to traceable standards, such as those supported by the National Institute of Standards and Technology (NIST).
While calibration has been with us as long as gages, the concept of a third party performing regular calibrations is relatively recent. According to Jeff Dax, president of EMI Gage, much of the drive for third party verification came from the automotive industry, where quality initiatives such as ISO/TS16949 (now IATF 16949) specified third party certification from a qualified lab. Initially, few labs were available that could meet the new demands. Today, ISO 17025 qualified labs such as EMI Gage (which primarily calibrates computer-controlled gages for surface metrology and roundness) are more abundant.
What does a calibration sticker really mean
"Calibration" can suggest that a gage is certified to measure accurately and follow applicable standards, from the date of calibration until the next scheduled renewal.
The reality, however, is more complicated. According to Mark Cobb at EMI Gage, a calibration sticker is a snapshot of the gage's performance. Per Cobb, the sticker means, "The day that I visited, the gage produced the appropriate numbers, in that environment, using that set of standards." Cobb points out that during the time between calibrations, changes can occur in the measurement environment, the types of measurements, the measurement software settings and versions, etc., that can dramatically impact how the instrument will measure.
The challenge with annual calibration, says Dax, is that it can give too much confidence in a gage, particularly for a new operator. As companies face shrinking teams and smaller pools of quality personnel, production staff and engineers are often tasked with making critical production measurements. They may be briefed on how to run a measurement protocol, but if they're new to an instrument, or to metrology in general, they may not know how to recognize issues that could invalidate the data they're producing.
How to keep a system "in calibration"
Some basic guidelines can be followed to keep a gage in a calibrated state.
-
Pay attention to changes in the results
Per Cobb, the goal of measurement is not necessarily to ensure that part quality stays the same. "The job is to see what's different. If you run the gage regularly and the numbers change, you may not know what's wrong, but you should see that something is wrong."
While a change in a measurement often indicates a change in the process, it may also be due to an issue within the measurement system. If software settings change between shifts, or a measurement probe or stylus chips or breaks, the results will reflect that difference. Those results can have engineers hunting for non-existent process problems when the actual issue lies with the gage itself.
-
Verify the calibration
Calibration is a snapshot of gage performance, and that performance can change in five months, or five minutes. A new measurement probe, contamination in the system, or even a rise in humidity can affect results. "You can't calibrate and then just run the gage for the year," says Cobb. "You need to verify the numbers and maintain the gage's condition."
Calibration frequency is typically dictated by a company's quality system, but the gage results should be verified as often as necessary for the conditions. While calibration can be a lengthy process, a verification measurement is typically quite brief. According to Dax, EMI Gage recommends checking gages at the beginning of each shift by measuring a master part or an artifact standard, to spot any changes in settings.
Gage results should also be verified after any substantial change to the instrument or whenever the measured results change significantly. Verification may need to be more frequent, perhaps even several times per shift, if the environmental or system conditions change frequently.
-
Look for issues over the gage's full measurement range
According to Dax, "calibration" often simply means that correction factors have been applied so that the instrument outputs the expected values for known conditions. But those factors are only valid for the specific geometry of the measurement probe, and even the particular part of the gage's measurement range that was used for calibration. If the gage's measurement datum is contaminated, or if gage components are damaged or out of alignment, those calibration factors may be invalid for much of the measurement range. The effects may be more pronounced on dimensional measurements.
Dax says that a more thorough inspection of the gage during a calibration visit can often catch these types of issues so that they can be corrected.
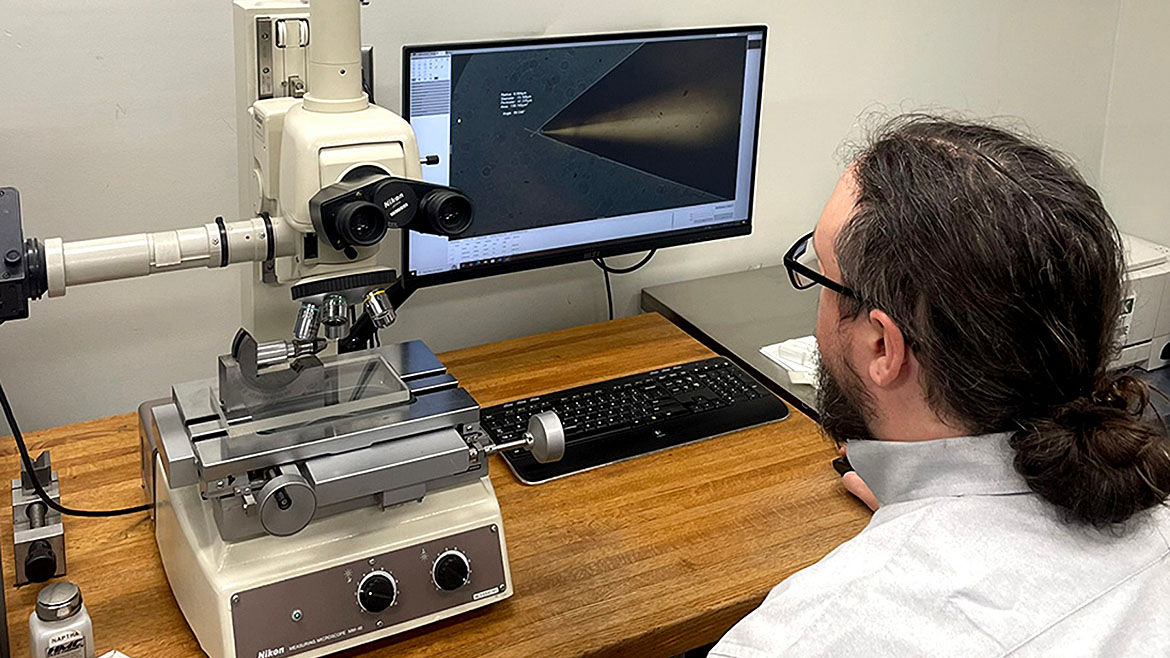
Figure 3. Checking the size and condition of a measurement stylus using a high-powered microscope. Image Source: EMI Gage -
Control the measurement configuration
Calibration is only meaningful for the configuration at the time the system was evaluated. Changes to measurement hardware (a different type of measurement probe, for example) can nullify the calibration. Software settings can also dramatically affect results. As an example, Figure 4 shows the results of a surface roughness measurement. Each trace represents the same measurement, but with different settings for the roughness filter cutoff. Just changing the cutoff can alter the measured average roughness (Ra) by 10X or more.

Figure 4. Changing the roughness cutoff (λc) changed the average roughness (Ra) measurement by a factor of 10. Source: Michigan Metrology LLC The best way to ensure that a gage is configured correctly for a measurement is to verify the gage against a master part or artifact standard. Thorough measurement protocols and procedures are also essential.
For gages that switch between multiple measurements, each configuration should be calibrated independently.
-
Control the measurement environment
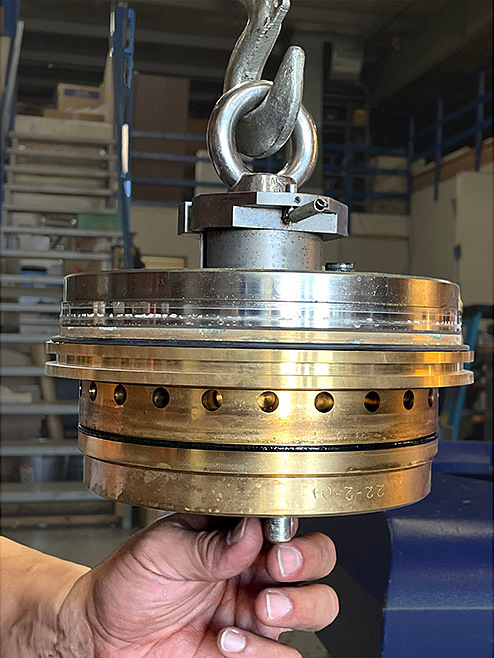
Figure 5. Dirty shop air led to damage of this roundness gage air bearing. Image Source: EMI Gage Some gages are maintained in well-controlled quality labs, but the majority of production measurements are made on the factory floor, in more challenging conditions.
"A lot can change on the floor between calibration visits," says Dax. Temperature swings and contamination from machining operations are common concerns, but other issues arise when processes change or equipment is moved. Dax cited a case in which a vibratory finishing machine was relocated next a measurement gage, which rendered the measurement results useless. "Our annual calibration visits include an evaluation of the environment," says Dax. "But we can only say, ‘You have oil in your air lines,' or ‘You have vibration here.' The gage operator and quality management team need to own the environment."
While much of the shop environment may be beyond a gage operator's control, some practices can help to keep a gage within its calibrated parameters.
Cleanliness. Cutting fluids, fine plastics, and grit may befoul metrology instruments. Maintaining clean surfaces on and around an instrument should be standard operating procedure. A small enclosure can shield a gage from shop floor contaminants.
Temperature. Daily and seasonal temperature swings will impact metrology, particularly dimensional measurements on larger components. Verifying a gage at the same time of day can help ensure that it stays in calibration.
Humidity. "A hot and sticky environment is an invitation for contamination," says Dax, noting that contaminants are drawn to the large, heavy metal datum of a gage. Regular cleaning can help prevent build-up that could impact results.
Vibration. When possible, gages should be located as far from active machinery as possible. Mechanically coupling the test part to all gage components can minimize the effects of vibration.
Shop air. Cobb says that contaminated shop air is a common cause of gage damage. Shop air that is adequately dry and filtered will avoid damage to sensitive components.
Ultimately, the responsibility for certifying that a gage makes good measurements is a collective effort. Per Dax, a third-party calibration company can take the time to thoroughly inspect a gage as well as certifying the results. In the interval until the next calibration, the onus is on the gage operator, quality team, and production management to ensure that the gage environment, configuration, and procedures can all support good measurements.
Looking for a reprint of this article?
From high-res PDFs to custom plaques, order your copy today!


