This website requires certain cookies to work and uses other cookies to help you have the best experience. By visiting this website, certain cookies have already been set, which you may delete and block. By closing this message or continuing to use our site, you agree to the use of cookies. Visit our updated privacy and cookie policy to learn more.
This Website Uses Cookies By closing this message or continuing to use our site, you agree to our cookie policy. Learn MoreThis website requires certain cookies to work and uses other cookies to help you have the best experience. By visiting this website, certain cookies have already been set, which you may delete and block. By closing this message or continuing to use our site, you agree to the use of cookies. Visit our updated privacy and cookie policy to learn more.
The need for nondestructive evaluation on large quantity production components is becoming more achievable with CT technology due to the advances in machine hardware and processing techniques over the past few years.
In recent columns I’ve commented on information requests accompanying calibration orders. Some of these are common and effective but some are not. Occasionally, they are brought about due to their inclusion in one standard or another but are misrepresented. In some cases, the standard they are from relates to in-house systems rather than calibration activities by outside parties.
I took a cursory look at this subject in a recent column but with the increasing number of companies expecting their calibration sources to make such decisions on their behalf, I thought a little more detail was in order.
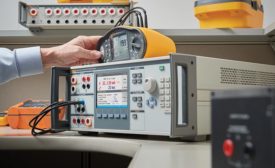
Fluke Calibration expands its line of pressure modules with the new PM500 Pressure Measurement Modules, a set of 46 modules ranging from low differential pressures up to 20 MPa (3000 psi).
A few customers are requesting that reports show the actual lab humidity during calibration of their equipment. I realize that this can be a critical consideration for some types of calibration but when it comes to fixed limit gages, I have never heard the rationale for such a request other than it’s what their customer expects.
ISO 17025 specifies quality management requirements for the competence and consistent operation of laboratories to produce precise and accurate test and calibration data.
Calibration reports are supposed to be clear and concise so the reader can understand the details. In fact, the ISO 17025 standard has a section that deals with this topic in specific terms so it would seem there should be no room for misinterpretation.
The first step to process improvement is machine performance measurement and diagnosis. However, it’s a step that many OEMs and service providers—even quality professionals—fail to approach with as much rigor as other steps, like process setting and in-process control.